# Red Hat Ceph Storage 4 Setup in External mode with OCS Integration
# Introduction
Red Hat OpenShift Container Storage can use an externally hosted Red Hat Ceph Storage cluster as the storage provider. Red Hat Ceph Storage is designed for cloud infrastructure and web-scale object storage. Red Hat Ceph Storage is a scalable, open, software-defined storage platform that combines an enterprise-hardened version of the Ceph storage system with a Ceph management platform, deployment utilities, and support services.
Setting up the Red Hat OpenShift Container Storage in external mode allows an enterprise to disintegrate container setup platform from container compute platform. The disintegration allows on-demand independent growth of storage and compute clusters. Prior to configuring the Red Hat OpenShift Container Storage in external mode the Red hat Ceph Storage pool must be setup and configured appropriately.
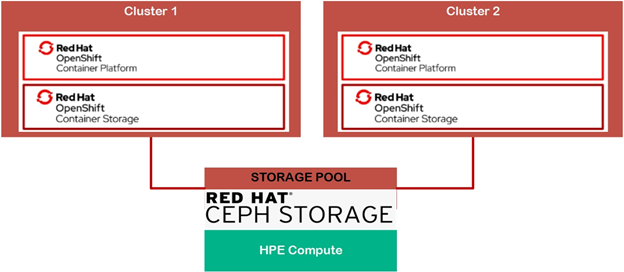
Figure 23. Red Hat Ceph Storage Setup in External Mode High Level View
# Logical Diagram

Figure 24. Red Hat Ceph Storage Setup in External Mode Solution Flow Diagram
# Hardware Requirement
| NODE ROLE | QUANTITY | PLATFORM | OS | HARD DISK | CPU | MEM |
|---|---|---|---|---|---|---|
| MON | 3 | DL | RHEL 7.7 | /dev/sdb – mon | 4 | 16 |
| OSD | 3 | DL | RHEL 7.7 | /dev/sdc – osd | 4 | 16 |
| ADMIN | 1 | VM | RHEL 7.7 | /dev/sda – os volume | 4 | 16 |
MON, OSD, MSD & MGR daemons are running on the MON/OSD node.
# Installation Process
Enable subscriptions on the following nodes.
ADMIN node:
> subscription-manager register> subscription-manager refresh> subscription-manager list --available --all --matches="*Ceph*"> subscription-manager attach --pool=<POOL_ID>> subscription-manager repos --disable=*> subscription-manager repos --enable=rhel-7-server-rpms> subscription-manager repos --enable=rhel-7-server-extras-rpms> subscription-manager repos --enable=rhel-7-server-rhceph-4-tools-rpms --enable=rhel-7-server-ansible-2.8-rpms> yum --y update> yum install yum-utils vim -y> yum-config-manager --disable epelMON/OSD nodes:
> subscription-manager register> subscription-manager refresh> subscription-manager list --available --all --matches="*Ceph*"> subscription-manager attach --pool=<POOL_ID>> subscription-manager repos --disable=*> subscription-manager repos --enable=rhel-7-server-rpms> subscription-manager repos --enable=rhel-7-server-extras-rpms> subscription-manager repos --enable=rhel-7-server-rhceph-4-osd-rpms> subscription-manager repos --enable=rhel-7-server-rhceph-4-mon-rpms> subscription-manager repos --enable=rhel-7-server-rhceph-4-tools-rpms> yum --y update> yum install yum-utils vim -y> yum-config-manager --disable epelExecute the following steps on Admin Node
Install ceph-ansible package
> yum install -y ceph-ansible> cd /usr/share/ceph-ansibleCreate ansible host inventory file for MON, OSD & GRAFANA as shown below
> touch hosts[mons] <mon-1.fqdn> <mon-2.fqdn> <mon-3.fqdn> [osds] <osd-1.fqdn> <osd-2.fqdn> <osd-3.fqdn> [grafana-server] <grafana_server.fqdn>> cd /usr/share/ceph-ansible> cp group_vars/all.yml.sample group_vars/all.yml> cp group_vars/osds.yml.sample group_vars/osds.yml> cp site.yml.sample site.ymlCreate Red Hat Ceph Docker Registry username and password using the below information.
If you do not have a Red Hat Registry Service Account, create one using the Registry Service Account webpage (opens new window). See the Red Hat Container Registry Authentication (opens new window) Knowledgebase article for details on how to create and manage tokens.
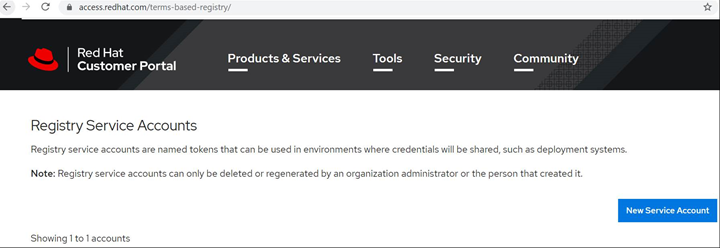
Edit group_vars/all.yml as shown below:
 fetch_directory: ~/ceph-ansible-keys

 ceph_origin: repository

 ceph_repository: rhcs

 ceph_repository_type: cdn

 ceph_rhcs_version: 4

 monitor_interface: eno3 --> Port interface where IP is configured

 public_network: 10.0.18.0/16 --> IP address range starting from 1st node

 ceph_docker_registry: registry.redhat.io

 ceph_docker_registry_auth: true

 ceph_docker_registry_username: SERVICE_ACCOUNT_USER_NAME

 ceph_docker_registry_password: TOKEN

 dashboard_admin_user: <customised username>

 dashboard_admin_password: <customised password>

 node_exporter_container_image: registry.redhat.io/openshift4/ose-prometheus-node-exporter:v4.1

 grafana_server_group_name: grafana-server

 grafana_admin_user:

 grafana_admin_password:

 mon_group_name: mons

 osd_group_name: osds

 grafana_container_image: registry.redhat.io/rhceph/rhceph-4-dashboard-rhel8:4

 prometheus_container_image: registry.redhat.io/openshift4/ose-prometheus:4.1

 alertmanager_container_image: registry.redhat.io/openshift4/ose-prometheus-alertmanager:4.1

 configure_firewall: True
Edit group_vars/osds.yml as shown below:
 osd_auto_discovery: False

 devices:

 - /dev/sdb

 - /dev/sdc
NOTE
If osd_auto_discovery is set to True, all the empty disks will be used by the system to create OSD.
Create an ansible user with sudo access on all nodes.
> adduser ansible-user> passwd ansible-user> cat << EOF >/etc/sudoers.d/ansible-user $ansible-user ALL = (root) NOPASSWD:ALL EOF> chmod 0440 /etc/sudoers.d/ansible-userGenerate SSH keys as the ansible user and copy the key to MON & OSD nodes.
> ssh-keygen> ssh-copy-id ansible-user@<mon-osd-ip>Create ~/.ssh/config file and set values for the Hostname and User options for each node in the storage cluster
> touch ~/.ssh/configHost node1 Hostname <mon-1.fqdn> User ansible-user ... ... Host node4 Hostname <osd-1.fqdn> User ansible-userRun the Ansible playbook for creating Ceph storage and Ceph cluster.
> ansible-playbook site.yml -i hostsCreated Ceph storage on any one of OSD nodes.
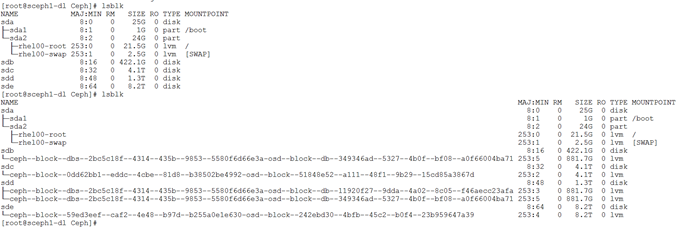
Run Ansible playbook for creating Ceph cluster dashboard.
> ansible-playbook dashboard.yml -i hosts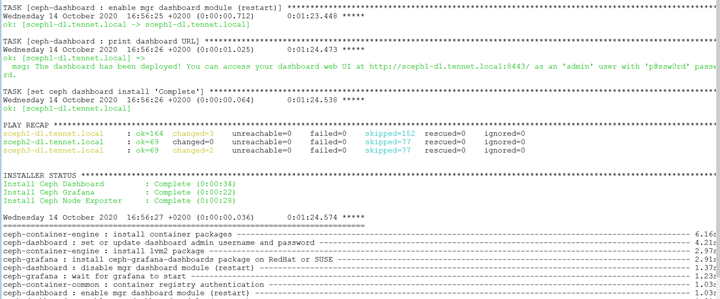
Open Ceph cluster web UI and enter credentials to login
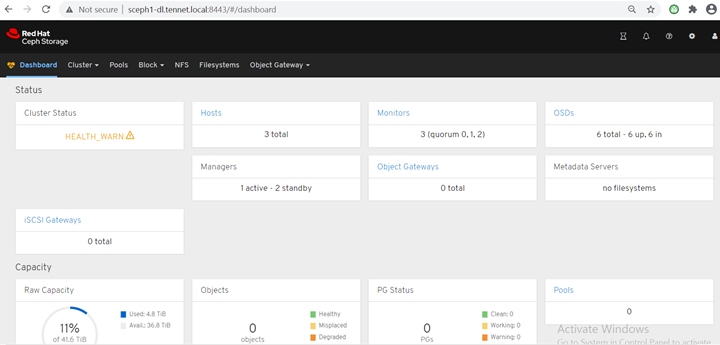
Ceph Dash board: Cretae rdb pool in Ceph cluster.
Ceph pool on Ceph cluster dash board: Dash board -> Pools -> Create Pool
Created Ceph pool on Dash board.
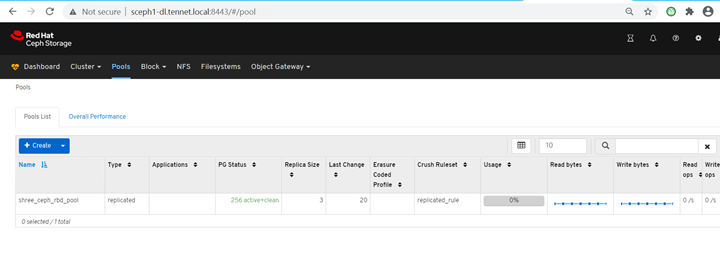
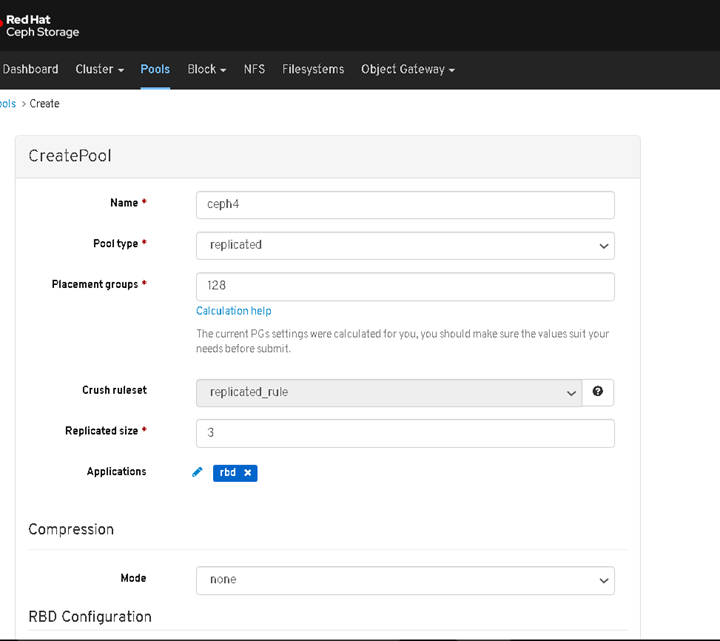
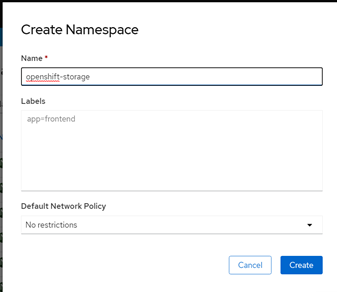
Create openshift-storage namespace. (Dashboard -> Administration -> Namespace -> Create Namespace).
Create OpenShift Container Storage 4.5 operator. (Dashboard -> Operators -> OperatorHub -> openshift-stoage (namespace) -> search for (OpenShift Container Storage) -> Install).Select the below options to create OpenShift Container Storage operator
Update Channel as stable-4.5
Installation Mode as A specific namespace on the cluster
Installed Namespace as Operator recommended namespace PR openshift-storage. If Namespace openshift-storage does not exist, it will be created during the operator installation.
Enable operator recommended cluster monitoring on this namespace checkbox is selected. This is required for cluster monitoring.
Approval Strategy as Automatic
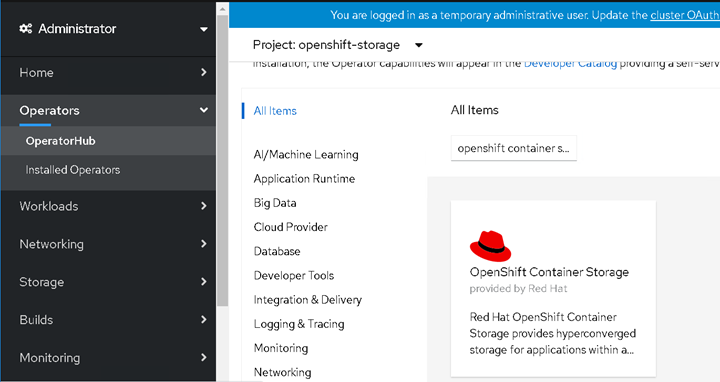
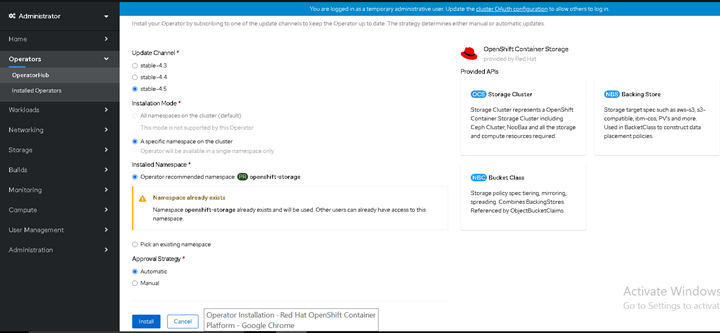
Create Overview -> openshift-storage (namespace) -> Operator Hub -> Installed Operators -> OpenShift Container Storage (operator) -> "Storage Cluster" -> "Create OCS Cluster Service"
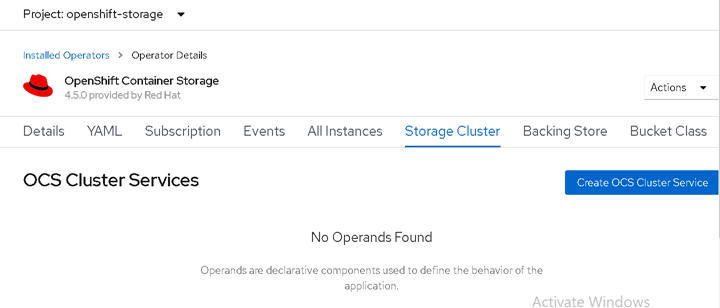
Select "External" storage mode to integrate external ceph storage for creating OCS cluster by default it shows internal
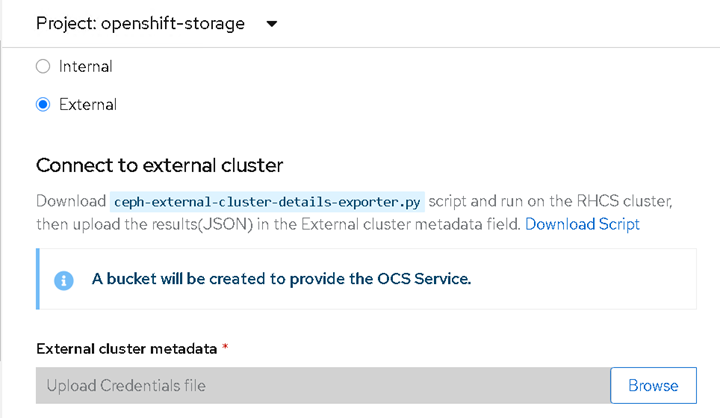
Download "ceph-external-cluster-details-exporter.py" file and place on any one of OSD nodes.
::: tip NOTE

Python version should be "python 3.x".

:::
Check the python script ceph-external-cluster-details-exporter.py arguments.
> python3 ceph-external-cluster-details-exporter.py --helpExecute the below script for integrating Ceph cluster rbd pool into OCP cluster for creating OCS cluster.
> python3 ceph-external-cluster-details-exporter.py --rbd-pool-name <rbd_pool_name_created_on_ceph_cluster>Script output as shown below in JSON format.

Save the above command output in a json file.
Click External cluster metadata -> Browse to select and upload the json file.
Click on Create for integrating external Ceph storage for creating OCS cluster.
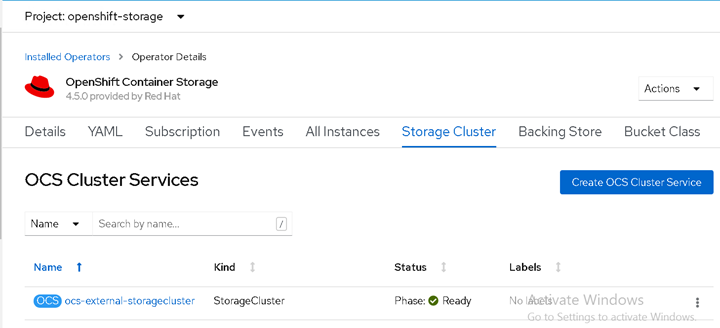
Validating OCS cluster by deploying two-tier application WordPress.
Create wordpress namespace.
Deploy WordPress application under wordpress namespace.
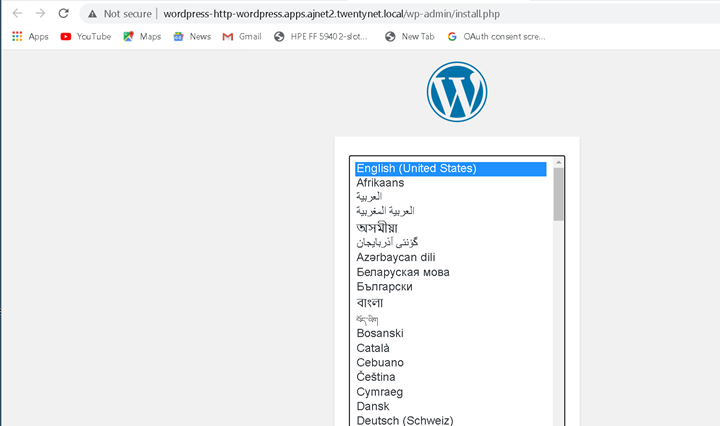
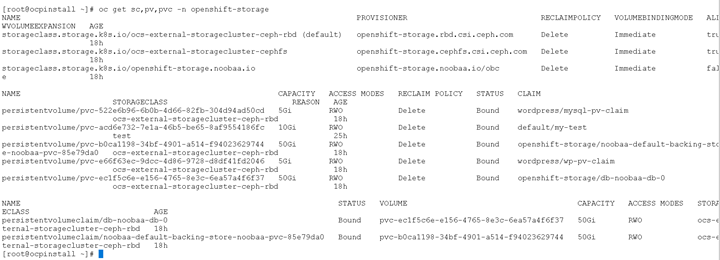
Check all OCS cluster and WordPress application's pods, pv, pvc and sc.
Check sc,pv &pvc of openshift-storage namespace.
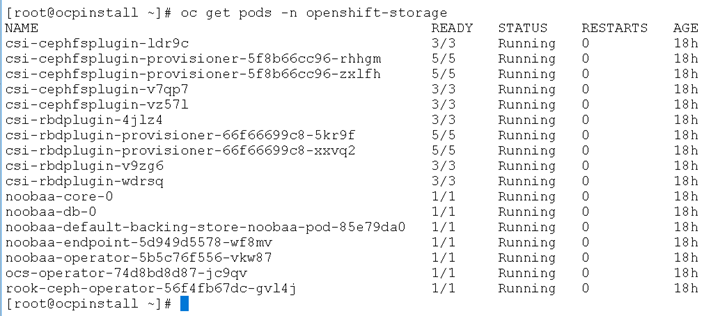
Check pods of openshift-storage namespace.
Check pvc and pods of wordpess namespace.
