OS Deployment Plans
The solution delivers two artifact bundles, one for Windows Server 2016 systems and one for Red Hat Linux 7 systems. Each artifact bundle contains one Deployment Plan, one OS Build Plan and all dependent Plan Scripts.
The artifact bundles are included in the Docker-Synergy repository:
# cd ~/Docker-Synergy
# ls ./files/ImageStreamer

HPE_RHEL7_2019_02_25.zip
HPE_WIN2016_2019-03-15.zip
In the Image Streamer UI, use the Add Artifact bundle button in the Artifact Bundles screen to upload the two files.
When the upload is finished, select the Artifact bundles corresponding to the files (without the .zip extension)
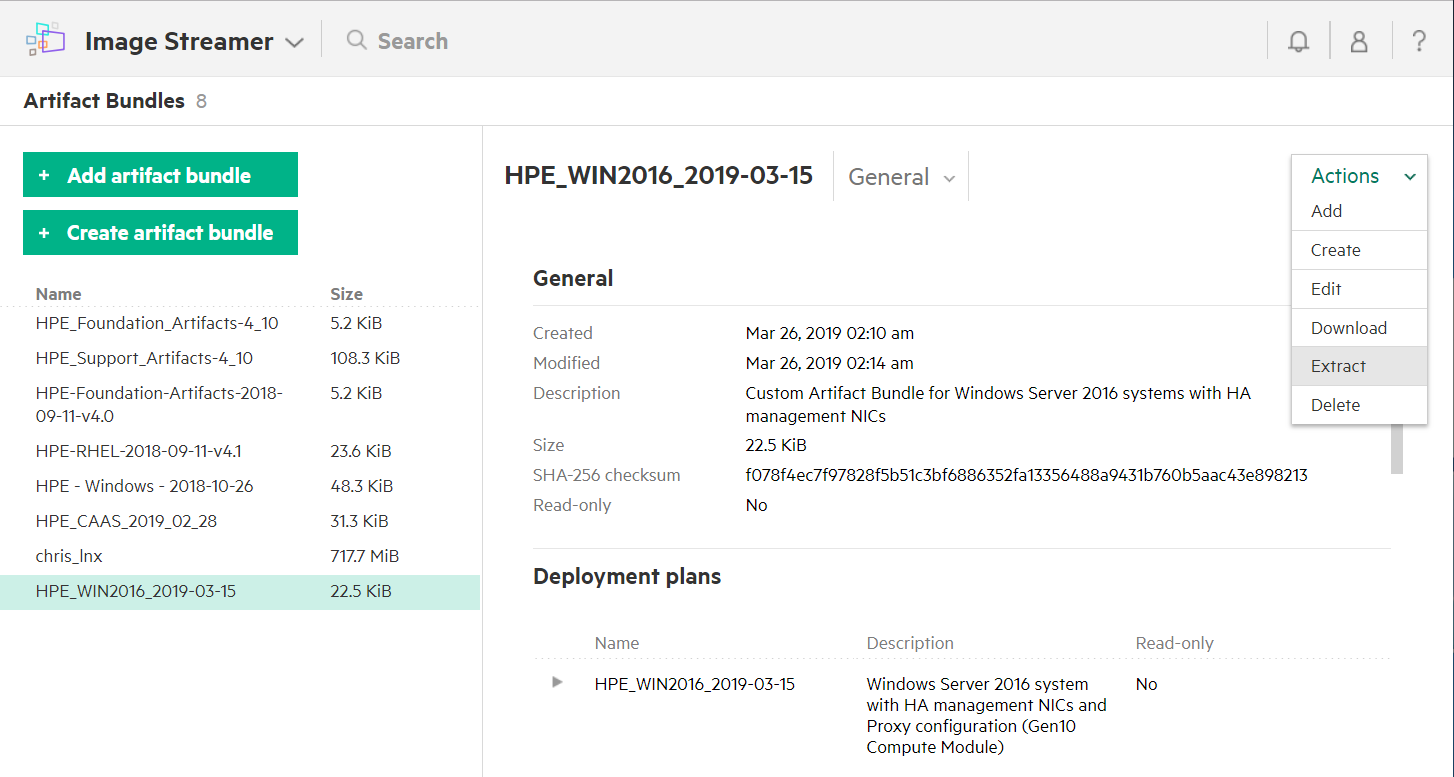
and use the Actions button to extract artifacts from the bundles, as shown in the following figure.

Figure. Extract bundle
After the extraction completes, you should find two new deployment plans in your Image Streamer appliance named
- HPE_RHEL7_2019_02_25 which is the Red Hat Enterprise Linux 7 OS Deployment Plan
- HPE_WIN2016_2019-03-15 which is the Microsoft Windows Server 2016 OS Deployment Plan
The deployment plans are shipped without a golden image. Golden images for each OS must be created as outlined in the previous sections.
Update the Red Hat OS Deployment plan
- Select the OS Deployment Plan named
HPE_RHEL7_2019_02_25on theDeployment Plansmenu in the Image Streamer UI. - Click the
Actionbutton, thenEditto edit the deployment plan. - In the
Editscreen, locate the Golden Image drop-down widget and select the golden image created with Red Hat Linux 7. - Ensure that the visibility of the custom attributes is configured as explained earlier (i.e. only NIC1 and NIC2 should be visible).
- Save your changes.
Update the Windows Server 2016 Deployment plan
- Select the OS Deployment Plan named
HPE_WIN2016_2019-03-15on theDeployment Plansmenu in the Image Streamer UI. - Click the
Actionbutton, thenEditto edit the deployment plan. - In the Edit screen, locate the Golden Image drop-down widget and select the golden image created with Microsoft Windows Server 2016.
- Make sure the visibility of the custom attributes is configured as explained earlier (ie only NIC1 and NIC2 should be visible).
- Save your changes