# Migration Toolkit for Virtualization
# Introduction
The Migration Toolkit for Virtualization (MTV) enables you to migrate virtual machines from VMware vSphere, Red Hat Virtualization, or OpenStack to OpenShift Virtualization running on Red Hat OpenShift Virtualization platform.
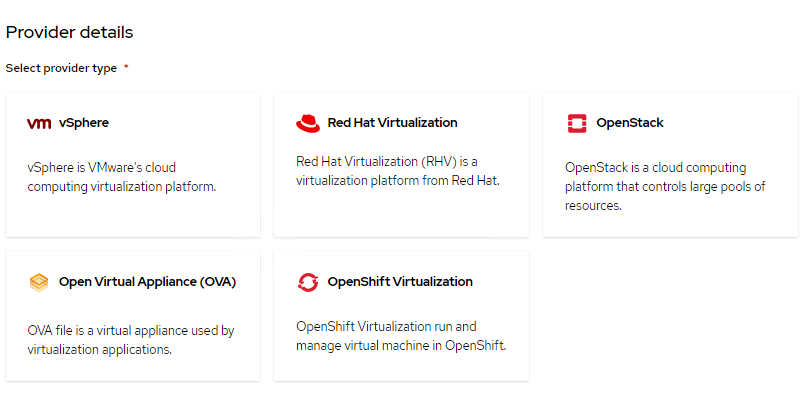 FIGURE 39 Migration Toolkit for Virtualization supported providers
MTV simplifies the migration process, allowing you to seamlessly move VM workloads to OpenShift Virtualization
MTV supports Cold migration which is the default migration type. The source virtual machines are shutdown while the data is copied. Cold migration from
VMware vSphere
Red Hat Virtualization (RHV)
OpenStack
Remote OpenShift Virtualization clusters
MTV supports warm migration from VMware vSphere and from RHV. In warm migration most of the data is copied during the pre-copy stage while the source virtual machines (VMs) are running. Then the VMs are shut down and the remaining data is copied during the cutover stage
# Installing MTV Operator
You can install MTV operator using web console and CLI
# Installing MTV Operator using web console
- In the web console, navigate to Operators → OperatorHub.
- Use the Filter by keyword field to search for mtv-operator.
- Click the Migration Toolkit for Virtualization Operator tile and then click Install.
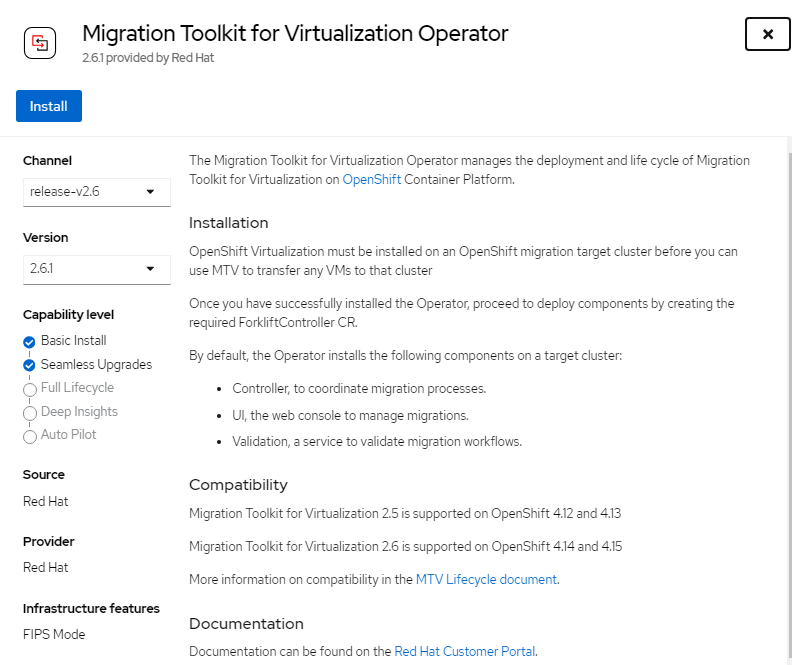 FIGURE 40 Migration Toolkit Operator deployment
- After the Migration Toolkit for Virtualization Operator is installed successfully create ForkliftController Instance.
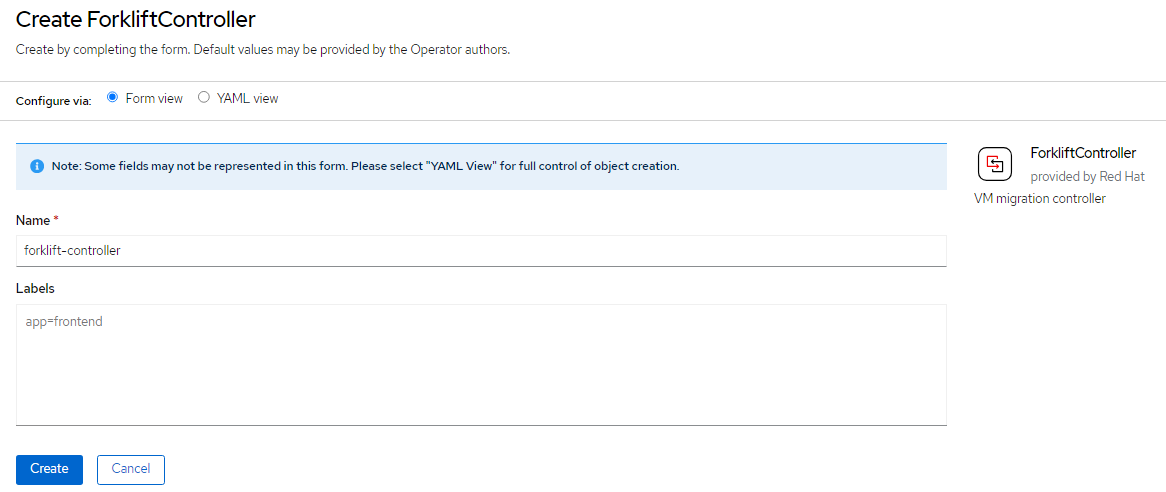 FIGURE 41 ForliftController Instance creation
# Installing MTV Operator using CLI
- Create the openshift-mtv project:
$ cat << EOF | oc apply -f -
apiVersion: project.openshift.io/v1
kind: Project
metadata:
  name: openshift-mtv
EOF
- Create an OperatorGroup CR called migration:
$ cat << EOF | oc apply -f -
apiVersion: operators.coreos.com/v1
kind: OperatorGroup
metadata:
  name: migration
  namespace: openshift-mtv
spec:
  targetNamespaces:
    - openshift-mtv
EOF
- Create a Subscription CR for the Operator:
$ cat << EOF | oc apply -f -
apiVersion: operators.coreos.com/v1alpha1
kind: Subscription
metadata:
  name: mtv-operator
  namespace: openshift-mtv
spec:
  channel: release-v2.6
  installPlanApproval: Automatic
  name: mtv-operator
  source: redhat-operators
  sourceNamespace: openshift-marketplace
  startingCSV: "mtv-operator.v2.6.1"
EOF
- Create a ForkliftController CR:
$ cat << EOF | oc apply -f -
apiVersion: forklift.konveyor.io/v1beta1
kind: ForkliftController
metadata:
  name: forklift-controller
  namespace: openshift-mtv
spec:
  olm_managed: true
EOF
# Migration of Virtual Machines
You can migrate virtual machines to OpenShift Virtualization by using the MTV web console from following providers:
- VMware vSphere
- Red Hat Virtualization
- OpenStack
- Open Virtual Appliances (OVAs) that were created by VMware vSphere
- OpenShift Virtualization
# Adding providers
In web console, navigate to Migration → Providers of Migration → Create Provider
Select the virtual machine provider (in this example we will go with VMWare)
Specify the required provider details
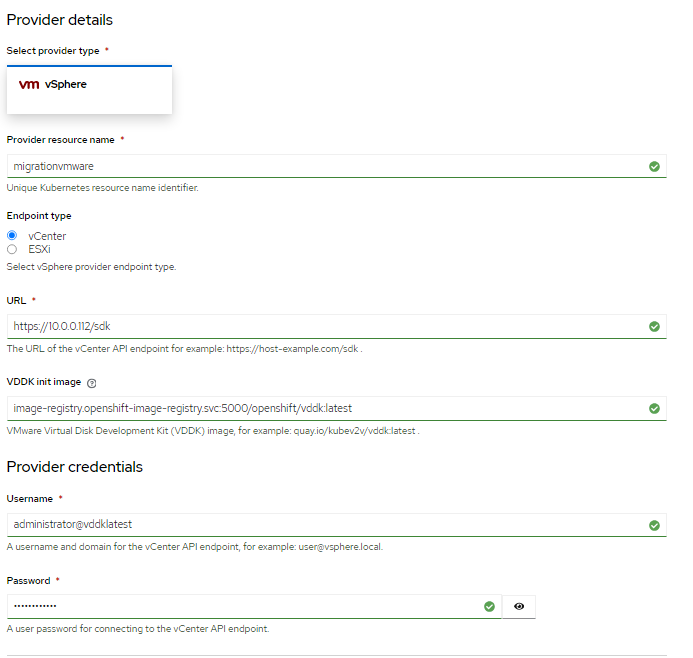 FIGURE 42 Additon of VMWare vSphere
Note: Provider the VDDK init image to accelerate migrations.
Choose one of the following options for validating CA certificates
- Custom CA certificate
- System CA certificate
- Skip certificate validation
Click Create Provider
# Selecting a migration network for a VMware source provider
In the web console, navigate to Migration → Providers for virtualization.
Click the host in the Hosts column beside a provider to view a list of hosts.
Select one or more hosts and click Select migration network.
Specify the following fields:
- Network: Network name
- ESXi host admin username: For example, root
- ESXi host admin password: Password
- Click Save.
Verify that the status of each host is Ready.
# Migration plan creation
# Creating and running a migration plan starting on Providers for virtualization
In the web console, navigate to Migration → Providers for virtualization.
In the row of the appropriate source provider. And navigate to Virtual Machines tab.
Select the VMs you want to migrate and click Create migration plan.
Create migration plan displays the source provider's name and suggestions for a target provider and namespace, a network map, and a storage map.
Provide the required details to the editable fields.
Add mapping to edit a suggested network mapping or a storage mapping, or to add one or more additional mappings.
Mapped storage and network mapping can be viewed in Migration → StorageMaps for virtualization / Migration → NetworkMaps for virtualization
- Create migration plan.
You can create the migration plan for the Source provider as well.
# Running a migration plan
In the web console, navigate to Migration → Plans for virtualization.
You can see the list of migration plans created for source and target providers, the number of virtual machines (VMs) being migrated, the status, and the description of each plan.
Click Start beside a migration plan to start the migration.
Click Start in the confirmation window that opens.
The Migration details by VM screen opens, displaying the migration's progress Warm migration only: The pre-copy stage starts. Click Cutover to complete the migration.
Click a migration's Status to view the details of the migration.
The Migration details by VM screen opens, displaying the start and end times of the migration, the amount of data copied for each VM being migrated.
# Warm Migration
Warm migration copies most of the data during the precopy stage. Then the VMs are shut down and the remaining data is copied during the cutover stage. Results of a sample ubuntu virtual machine migration with 10GB OS disk and 10GB data disk.
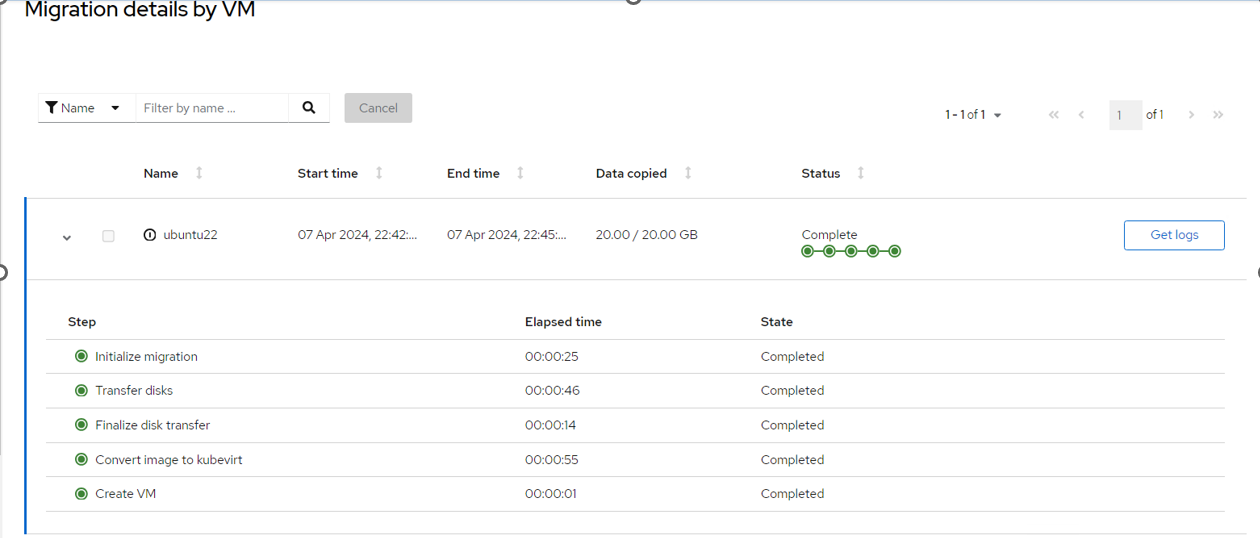 FIGURE 43 Warm Migration output
# Cold Migration
During Cold migration the Virtual Machines (VMs) are shut down while the data is copied. Results of a sample ubuntu virtual machine migration with 10GB OS disk and 10GB data disk.
 FIGURE 44 Cold Migration output