Additional Features and Functionality
OpenShift API Data Protection
Introduction
OpenShift API for Data Protection (OADP) product safeguards customer applications on OpenShift Container Platform. It offers comprehensive disaster recovery protection, covering OpenShift Container Platform applications, application-related cluster resources, persistent volumes, and internal images. OADP is also capable of backing up both containerized applications and virtual machines (VMs).
OpenShift API for Data Protection (OADP) is an OpenShift operator that enables backup and restore of applications and cluster resources. It is built on top of Velero, which provides the core functionality for taking backups, storing them in object storage, and restoring them when required.
OADP abstracts and simplifies Velero configuration using Kubernetes-native resources such as the DataProtectionApplication (DPA). OADP Operator manages deployment and lifecycle of Velero components.
Installation
In the OpenShift Container Platform web console, click Ecosystem → Software Catalog.
Use the Filter by keyword field to find the OADP Operator.
Select the OADP Operator and click Install.
Click Install to install the Operator in the openshift-adp project.
Click Ecosystem → Installed Operators to verify the installation.
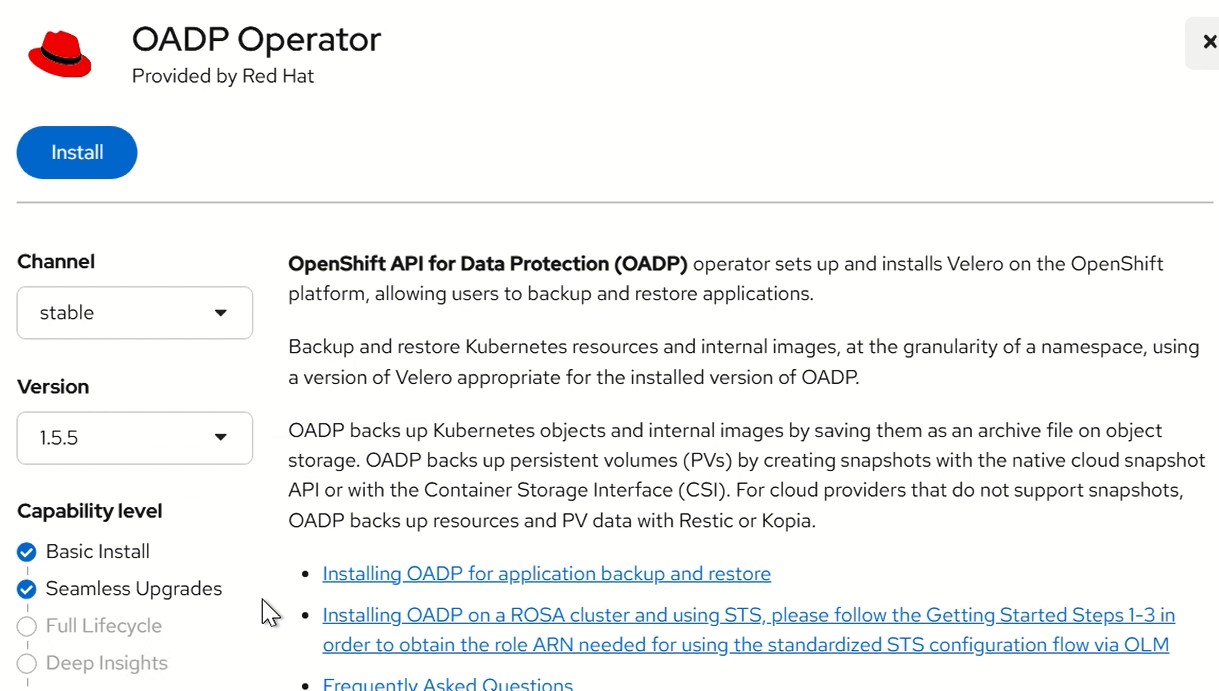
FIGURE 81. Installing OADP Operator
Creating AWS Credential secret:
Create a Secret with the default name:
1, Go to Workloads → Secrets 2, Select the namespace where OADP is installed (e.g., openshift-adp) 3, Click Create → Key/Value Secret
Name the secret (e.g., cloud-credentials) and create it Add: Key: cloud
Value:
[default]
aws_access_key_id=<ACCESS_KEY>
aws_secret_access_key=<SECRET_KEY>
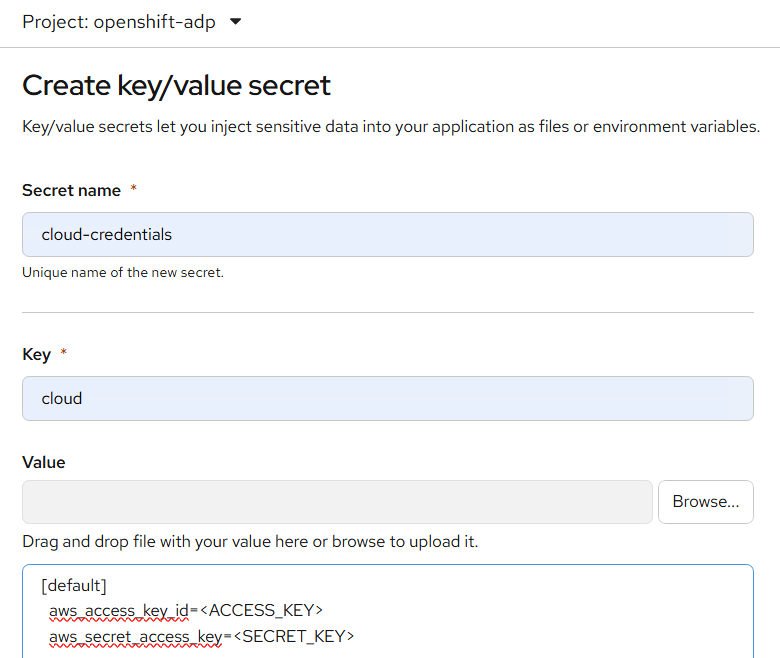
FIGURE 82. Create secret to store AWS Creds
The Secret is referenced in the spec.backupLocations.credential block of the DataProtectionApplication CR when you install the Data Protection Application. This secret allows OADP to access the S3 bucket.
Configuring the Data Protection Application
1, Go to DataProtectionApplication → Create Instance Example configuration:
apiVersion: oadp.openshift.io/v1alpha1
kind: DataProtectionApplication
metadata:
  name: velero
  namespace: openshift-adp
spec:
  configuration:
    velero:
      defaultPlugins:
        - aws
        - openshift
    nodeAgent:
      enable: true
      uploaderType: restic
  backupLocations:
    - velero:
        provider: aws
        default: true
        objectStorage:
          bucket: vel-backups
          prefix: velero
        config:
          region: ap-southeast-2
  snapshotLocations:
    - velero:
        provider: aws
        config:
          region: ap-southeast-2
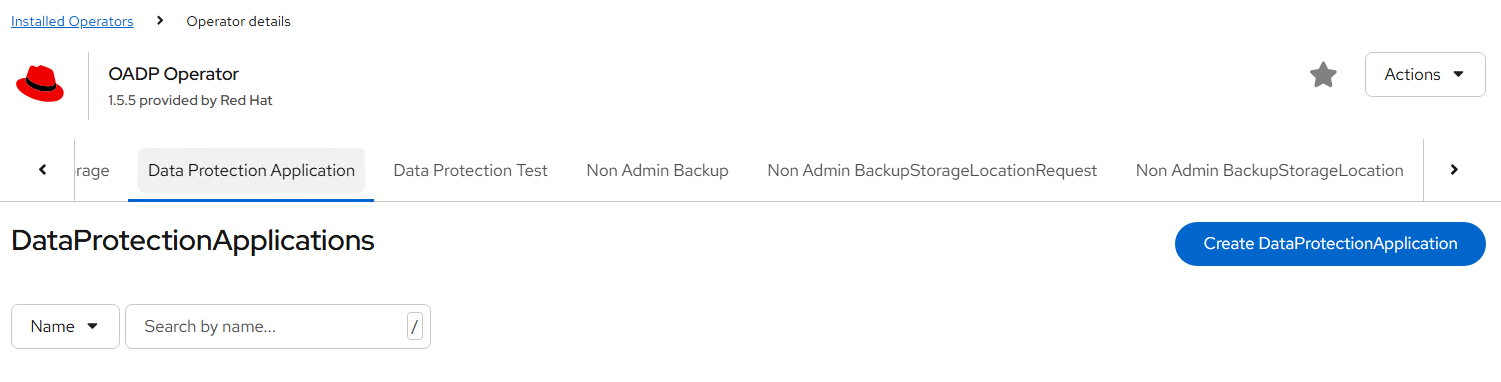

FIGURE 83. Create Data Protection Application
This will: Deploy Velero pods Configure backup storage Automatically create BackupStorageLocation
Deploy apache application for backup and restore testing
- Create a namespace for the Apache application.
    oc create namespace test-app
    Verify:
    oc get ns
    [root@sno1 ~]# oc get ns | grep test-app
    test-app                                           Active   3d2h
- Create Persistent Volume (NFS) Create a file:
    vi nfs-pv.yaml
    apiVersion: v1
    kind: PersistentVolume
    metadata:
      name: nfs-pv
    spec:
      capacity:
        storage: 5Gi
      accessModes:
        - ReadWriteMany
      nfs:
        path: /var/nfs/velero
        server: 172.28.XX.XX
      persistentVolumeReclaimPolicy: Retain
Apply:
oc apply -f nfs-pv.yaml
Verify PV:
oc get pv
[root@sno1 ~]# oc get pv
NAME     CAPACITY   ACCESS MODES   RECLAIM POLICY   STATUS      CLAIM   STORAGECLASS   VOLUMEATTRIBUTESCLASS   REASON   AGE
nfs-pv   5Gi        RWX            Retain           Available                          <unset>                          3s
NOTE
NFS is used for this application
- Create Persistent Volume Claim Create PVC file: vi nfs-pvc.yaml
apiVersion: v1
kind: PersistentVolumeClaim
metadata:
  name: nfs-pvc
  namespace: test-app
spec:
  accessModes:
    - ReadWriteMany
  resources:
    requests:
      storage: 5Gi
  volumeName: nfs-pv
Apply PVC:
oc apply -f nfs-pvc.yaml
Verify PVC:
oc get pvc -n test-app
Expected output:
[root@sno1 ~]# oc get pvc -n test-app
NAME      STATUS   VOLUME   CAPACITY   ACCESS MODES   STORAGECLASS   VOLUMEATTRIBUTESCLASS   AGE
nfs-pvc   Bound    nfs-pv   5Gi        RWX                           <unset>                 25s
- Deploy Apache Application Create deployment file: vi apache-deployment.yaml
apiVersion: apps/v1
kind: Deployment
metadata:
  name: apache
  namespace: test-app
spec:
  replicas: 1
  selector:
    matchLabels:
      app: apache
  template:
    metadata:
      labels:
        app: apache
    spec:
      securityContext:
        fsGroup: 1001
      containers:
      - name: apache
        image: httpd:2.4
        ports:
        - containerPort: 8081
        command:
        - /bin/sh
        - -c
        - |
          sed -i 's/Listen 80/Listen 8081/' /usr/local/apache2/conf/httpd.conf
          httpd-foreground
        volumeMounts:
        - name: apache-storage
          mountPath: /usr/local/apache2/htdocs
      volumes:
      - name: apache-storage
        persistentVolumeClaim:
          claimName: nfs-pvc
Deploy Apache:
oc apply -f apache-deployment.yaml
Verify deployment:
oc get all -n test-app
Expected:
NAME                          READY   STATUS    RESTARTS   AGE
pod/apache-577db98595-g9ksh   1/1     Running   0          3d

NAME                     READY   UP-TO-DATE   AVAILABLE   AGE
deployment.apps/apache   1/1     1            1           3d2h

NAME                                DESIRED   CURRENT   READY   AGE
replicaset.apps/apache-577db98595   1         1         1       3d
NOTE
If deployment not able to create pods then run below command oc adm policy add-scc-to-user anyuid -z default -n test-app
- Deploy service and route for apache deployment Create service file: vi apache-service.yaml
apiVersion: v1
kind: Service
metadata:
  name: apache
  namespace: test-app
spec:
  selector:
    app: apache
  ports:
    - port: 80
      targetPort: 8081
Apply:
oc apply -f apache-service.yaml
Verify:
oc get service -n test-app
NAME     TYPE        CLUSTER-IP       EXTERNAL-IP   PORT(S)   AGE
apache   ClusterIP   172.30.187.108   <none>        80/TCP    3d2h
- Create route file: Vi apache-route.yaml
apiVersion: route.openshift.io/v1
kind: Route
metadata:
  name: apache
  namespace: test-app
spec:
  to:
    kind: Service
    name: apache
  port:
    targetPort: 8081
Apply:
oc apply -f apache-route.yaml
Verify:
NAME     HOST/PORT                                    PATH   SERVICES   PORT   TERMINATION   WILDCARD
apache   apache-test-app.apps.snocluster.hpevme.com          apache     8081                 None
- Verify PVC Mounted in Pod Describe the pod:
oc describe pod <apache-pod-name> -n test-app
Check under Volumes section to confirm PVC is mounted.
- Access the Apache Pod Get pod name:
oc get pods -n test-app
Access pod shell:
oc exec -it <apache-pod-name> -n test-app -- sh
- Write Data to the Mounted Volume Inside the pod:
oc exec -it <pod-name> -n test-app -- sh
echo "Apache backup and restore using Velero with OADP" > /usr/local/apache2/htdocs/test.txt
Verify:
cat /usr/local/apache2/htdocs/test.txt
Expected output:
Apache backup and restore using Velero with OADP
- Verify Apache Serving the Data Run the below command:
curl http://<route-url>/test.txt
Expected output:
curl http://apache-test-app.apps.<new-cluster-domain>/test.txt
Apache backup and restore using Velero with OADP
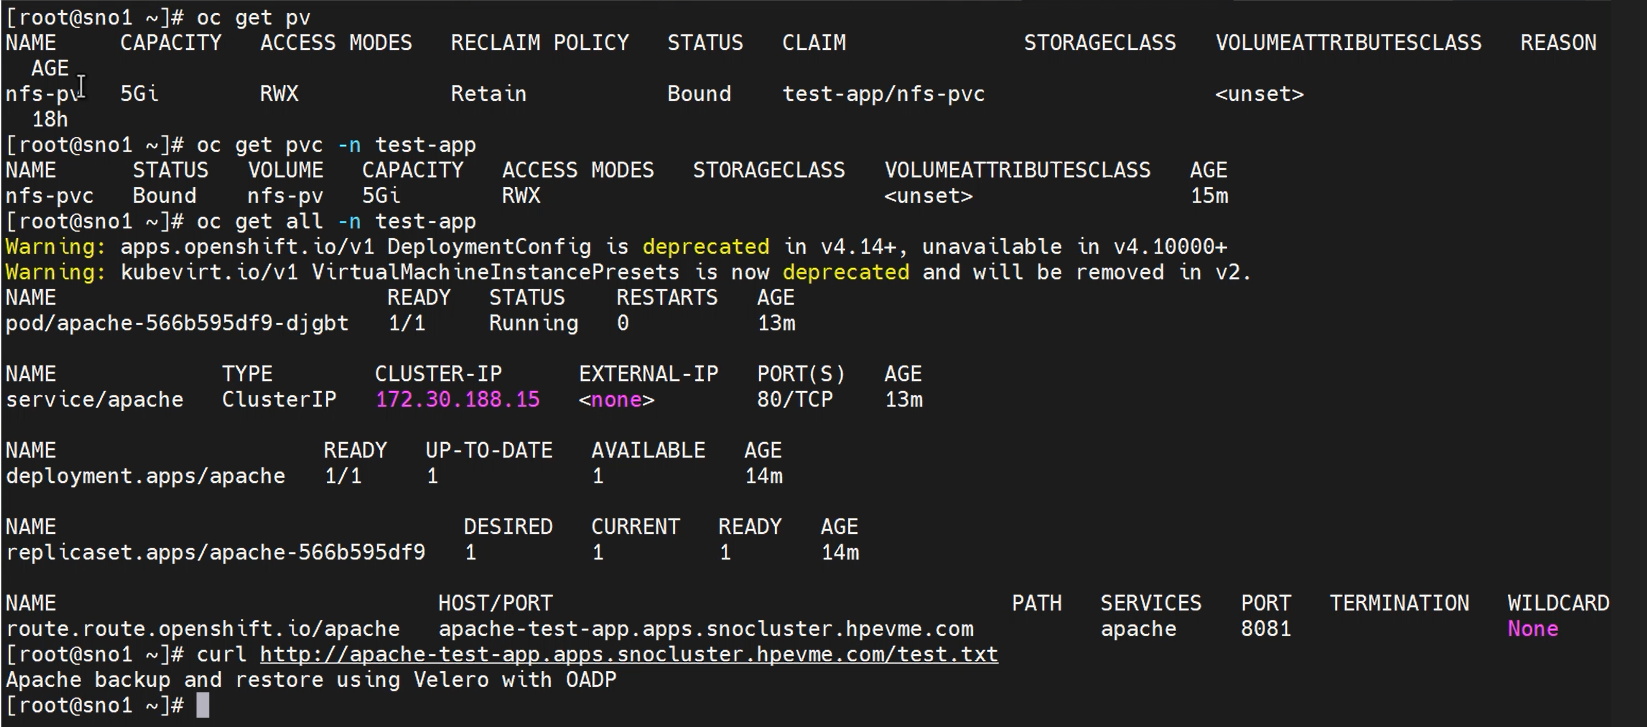
FIGURE 84. Apache Application resources
Application Backup and Restore process:
Backup Process:
- Go to Installed Operators -> OADP Operator -> backup -> click on create backup
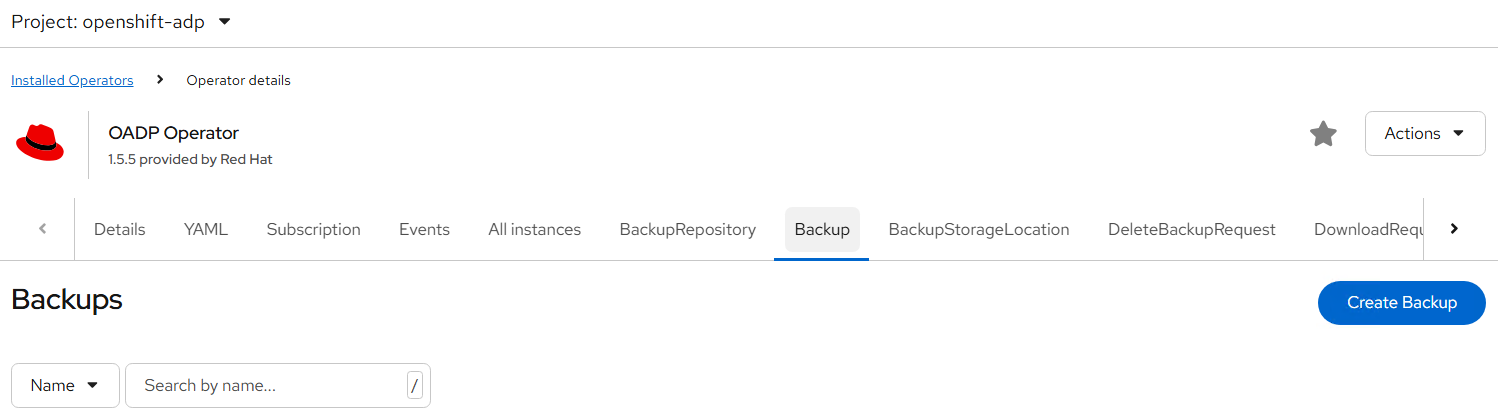
FIGURE 85. Create Backup
- Provide details in below yaml format:
apiVersion: velero.io/v1
kind: Backup
metadata:
 name: apache-backup
 namespace: openshift-adp
spec:
 includedNamespaces:
 - test-app
 snapshotVolumes: true
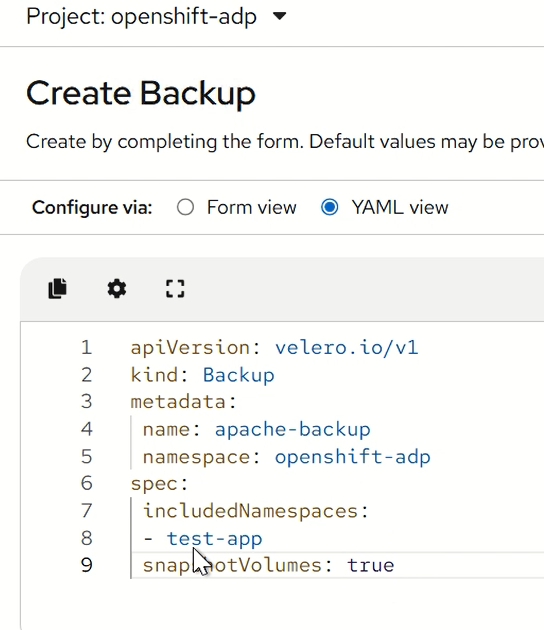
FIGURE 86. Creating a app backup using OADP
- Click create and monitor status until Completed
This backs up all resources in the test-app namespace.
NOTE
For testing restore delete the namespace and proceed with next step:
oc delete ns test-app
Restore Process:
- Go to Installed Operators -> OADP Operator -> restore -> click on create restore
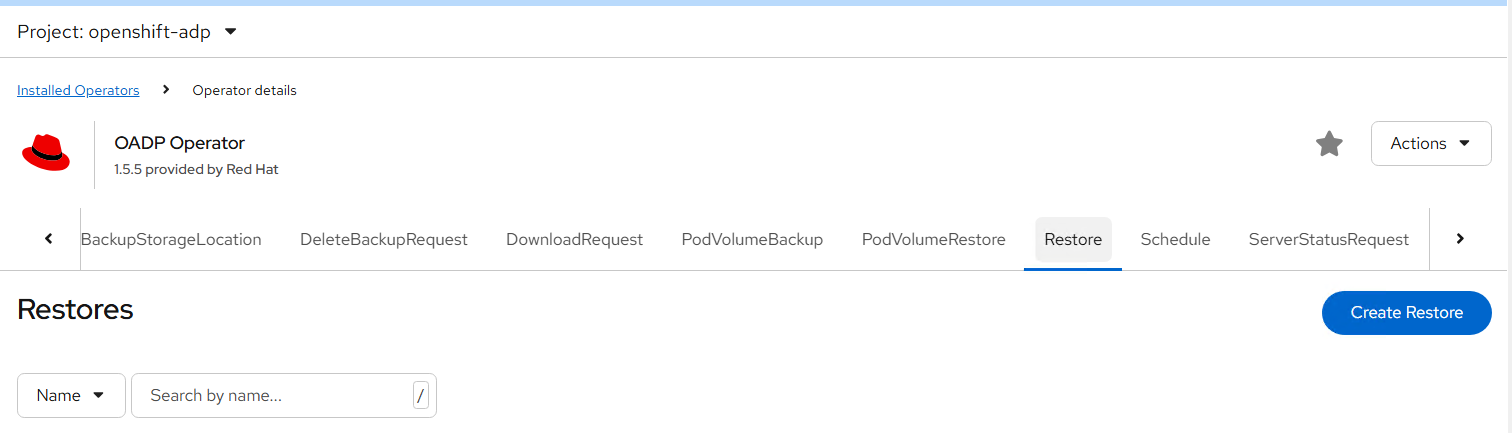
FIGURE 87. Creating a restore using OADP
- Provide details in below yaml format:
apiVersion: velero.io/v1
kind: Restore
metadata:
  name: apache-restore-test
  namespace: openshift-adp
spec:
  backupName: apache-backup
  namespaceMapping:
    test-app: test-app
- Create and wait for completion.This recreates all resources from backup.
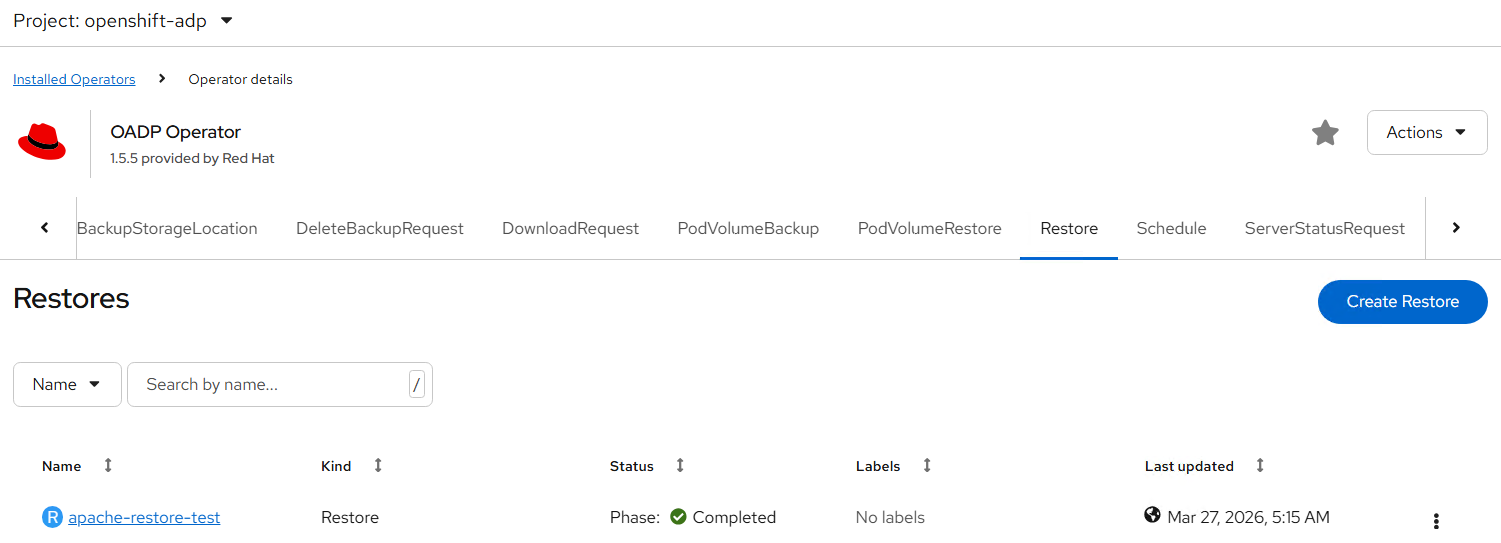
FIGURE 88. Creating a app restore with backup taken
Validate Restore
oc get all -n test-app
Verify: Pods are Running Services/routes accessible
To check the data we passed run below command and validate the output
curl http://<route-url>/test.txt
Expected output:
curl http://apache-test-app.apps.<new-cluster-domain>/test.txt
Apache backup and restore using Velero with OADP
Cluster-Level Backup & Restore
- Install Operators like NMState Operator and OpenShift Virtualization to test backup.
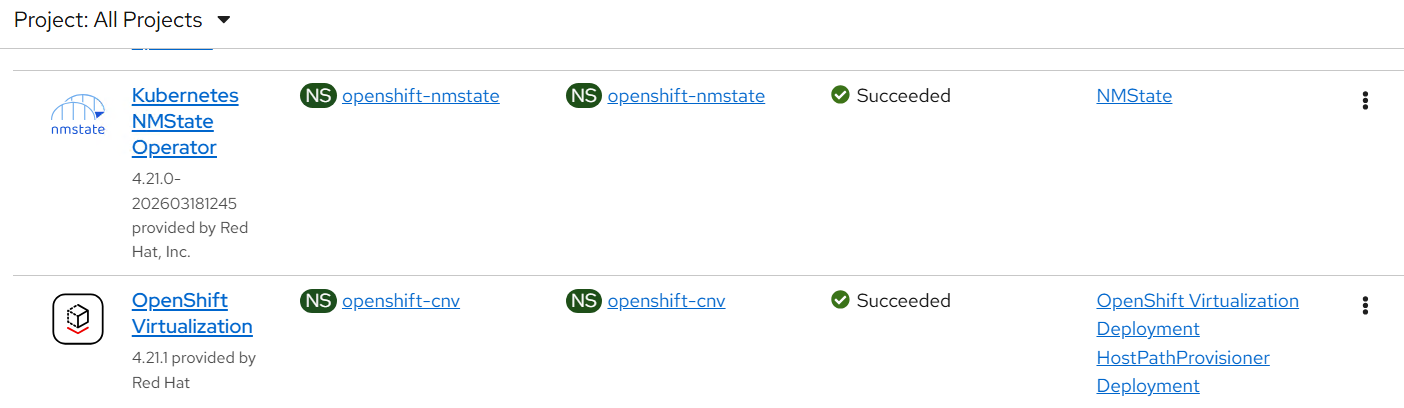
FIGURE 89. Install operators
- Create backup including cluster resources with below yaml format:
NOTE
stop/suspend VM if created using openshift virtualization before backup for consistency
apiVersion: velero.io/v1
kind: Backup
metadata:
 name: full-cluster-backup
 namespace: openshift-adp
spec:
 includedNamespaces:
 - '*'
 includeClusterResources: true
 storageLocation: velero-1
 ttl: 720h0m0s
 defaultVolumesToRestic: true
defaultVolumesToFsBackup: true
snapshotVolumes: true
snapshotMoveData: false
- Once backup is succesfully completed delete the NMState and virtualization operators and wait for them to completely get delete and proceed with restore.
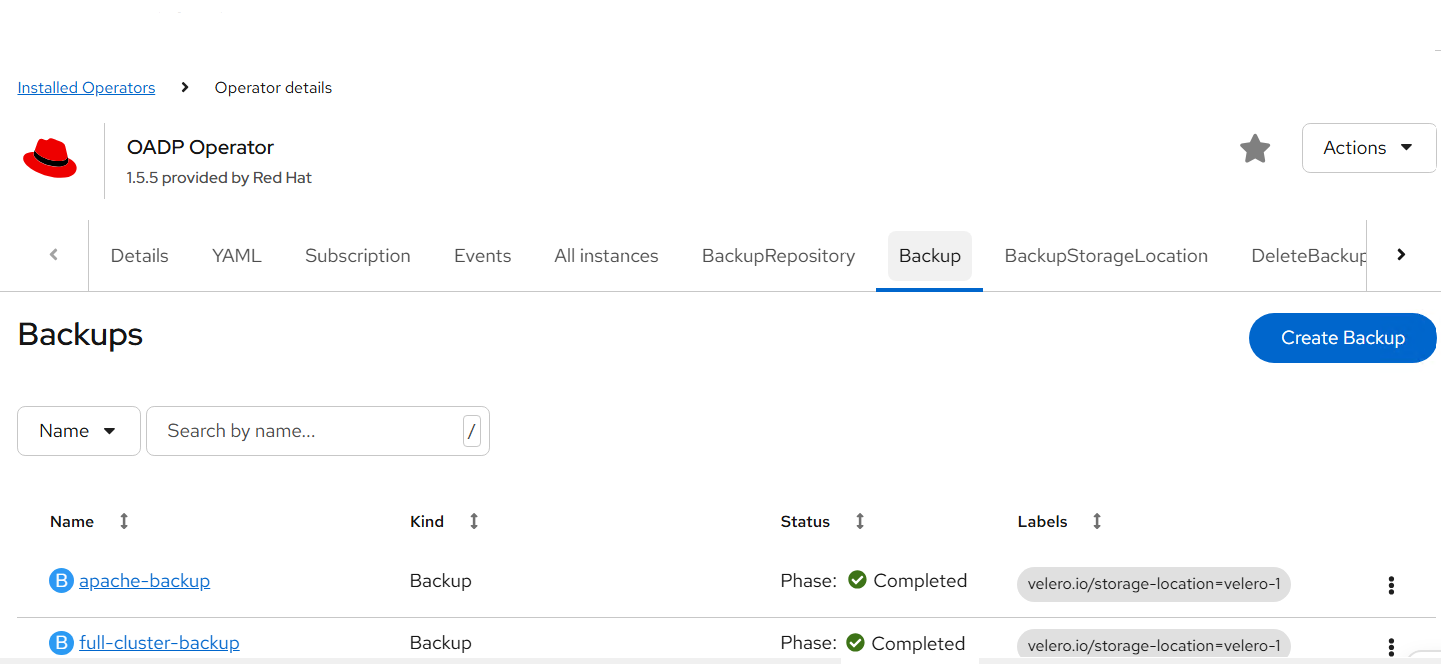
FIGURE 90. full cluster backup
- Create restore with yaml shown below:
apiVersion: velero.io/v1
kind: Restore
metadata:
 name: restore
 namespace: openshift-adp
spec:
 backupName: full-cluster-backup
 existingResourcePolicy: none
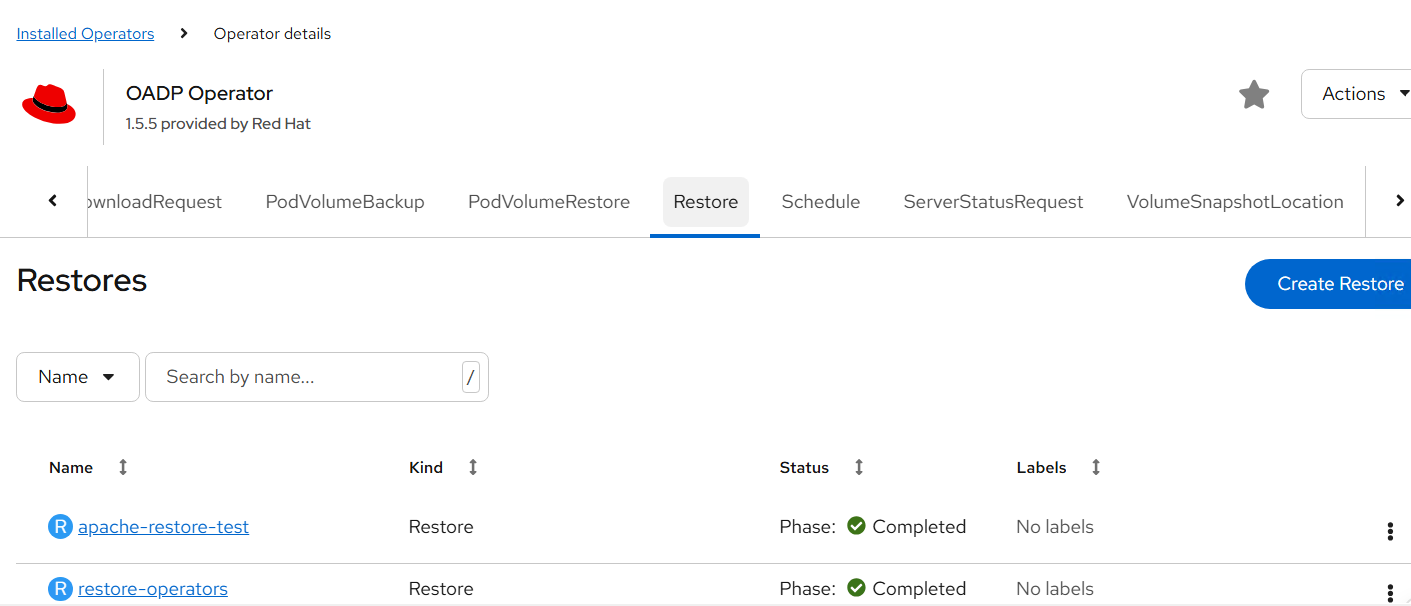
FIGURE 91. operator restore using backup
Validate: Operators are reinstalled CRDs restored Functional verification successful
AirGap Deployment
Deploy OpenShift Container Platform using Airgap Method
This sections of documents describes about deploying the OpenShift Container Platform through disconnected environment.
Create YUM repo server
Create Mirror registry
OpenShift Deployment
- Prerequisites:
we will be using one server for all the below services and which will be having internet access to download the images.
Download server
YUM server
Mirror Registry
Download/YUM/Mirror registry server requirements
a) Recommended Operating system RHEL 9.6
b) At least 500 GB disk space (especially in the "/" partition), 4 CPU cores and 16GB RAM.
c) OS disk: 2x 1.6 TB ; Data disk: ~2 TB
d) Provide the required values in input.yaml file (vi /opt/hpe-solutions-openshift/DL-LTI-Openshift/input.yaml )
e) Setup the Download server to configure the nginx, development tools and other python packages required for LTI installation.
Navigate to the directory, cd /opt/hpe-solutions-openshift/DL-LTI-Openshift/ and run the below command.
'sh setup.sh'
As part of setup.sh script it will create nginx service, so user must download and copy rhel 9.6 DVD ISO to /usr/share/nginx/html/
- Create Yum Repo server
a) Navigate to /opt/hpe-solutions-openshift/DL-LTI-Openshift/ folder and update the hosts file with the yumrepo server details.
b) Navigate to yum folder
cd /opt/hpe-solutions-openshift/DL-LTI-Openshift/airgap/yum
c) Run the below command to create yum repo server
ansible-playbook -i /opt/hpe-solutions-openshift/DL-LTI-Openshift/hosts playbooks/create_local_yum_repo.yaml
- Mirror Registry
a) Navigate to folder "/opt/hpe-solutions-openshift/DL-LTI-Openshift/".
For airgap deployment provide the below values in input.yaml file
vi /opt/hpe-solutions-openshift/DL-LTI-Openshift/input.yaml

# fill the below values for the airgap deployment
is_environment_airgap: 'yes'
mirror_registry_ip:
mirror_registry_fqdn:
LOCAL_REGISTRY:
LOCAL_REPOSITORY:
ARCHITECTURE:
b) Navigate to mirror_registry folder
cd /opt/hpe-solutions-openshift/DL-LTI-Openshift/airgap/mirror_registry
c) Download and install the mirror registry
ansible-playbook playbooks/download_mirror_registry_package.yaml
ansible-playbook playbooks/install_mirror_registry.yaml
generate ssl certificates
ansible-playbook playbooks/generate_ssl_certs.yaml
run the below commands to copy the above generated ssl certs
  cp certs/ssl.key quay-install/quay-config/
  cp certs/ssl.cert quay-install/quay-config/
  cat certs/rootCA.pem >> quay-install/quay-config/ssl.cert
  mkdir -p /etc/containers/certs.d/<mirror_registry_fqdn>        # Here provide you mirror registryg fqdn
  cp certs/rootCA.pem  /etc/containers/certs.d/<mirror_registry_fqdn>/ca.crt
  cp certs/rootCA.pem /etc/pki/ca-trust/source/anchors/
  sudo update-ca-trust extract
  systemctl restart quay-app
d) execute the playbook site.yaml
site.yaml file contains the following playbooks
    - import_playbook: playbooks/download_openshift_components.yaml  # it will download ocp related images, client and installer
    - import_playbook: playbooks/create_json_pull_secret.yaml
    - import_playbook: playbooks/update_json_pull_secret.yaml
    - import_playbook: playbooks/mirroring_ocp_image_repository.yaml
- For OpenShift Solution Deployment follow the existing process listed for OpenShift Deployment
Red Hat Advanced Cluster Management for Kubernetes
Introduction
Red Hat Advanced Cluster Management for Kubernetes provides end-to-end management visibility and control to manage your Kubernetes environment. Take control of your application modernization program with management capabilities for cluster creation, application lifecycle, and provide security and compliance for all of them across data centers and hybrid cloud environments. Clusters and applications are all visible and managed from a single console, with built-in security policies. Run your operations from anywhere that Red Hat OpenShift Container Platform runs, and manage your Kubernetes clusters.
With Red Hat Advanced Cluster Management for Kubernetes:
Work across a range of environments, including multiple data centers, private clouds and public clouds that run Kubernetes clusters.
Easily create OpenShift Container Platform Kubernetes clusters and manage cluster lifecycle in a single console.
Enforce policies at the target clusters using Kubernetes-supported custom resource definitions.
Deploy and maintain day two operations of business applications distributed across your cluster landscape.
Figure 19 shows Architecture of Advanced Cluster Management for Kubernetes
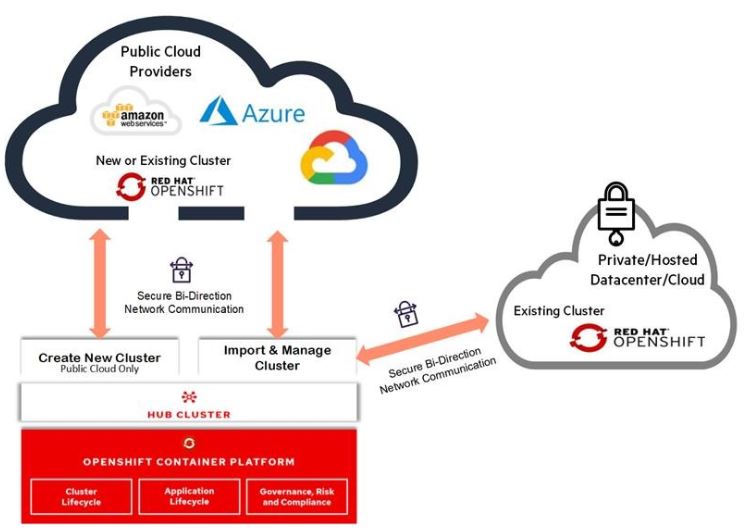
FIGURE 92. Multi-Cluster Management with Red Hat Advanced Cluster Management
Installing Red Hat Advanced Cluster Management from the console
Prerequisites
Hub Cluster
OpenShift Container Platform 4.x successfully deployed.
Operator Hub availability.
Managed Clusters
OpenShift 4.x on from public cloud providers (Amazon Web Services, Google Cloud, IBM and Microsoft Azure) or Private clouds (Openstack, OpenShift).
Flow Diagram
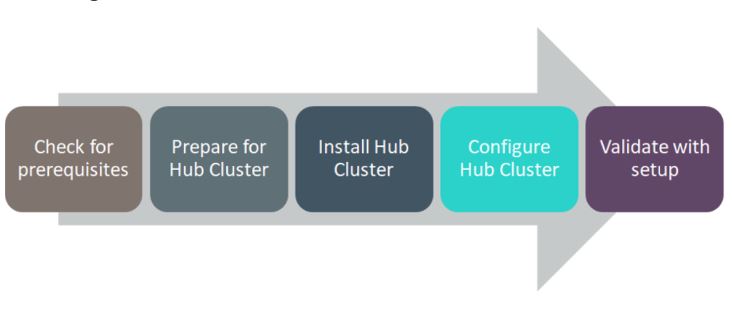
FIGURE 93. RedHat Advanced Cluster Management Solution Flow Diagram
Installation
Following steps needs to perform prior to installing Advanced Cluster Management from the OpenShift Console.
Create Namespace
Create Pull Secrets
Follow below steps to creating namespace.
Create a hub cluster namespace for the operator requirements:
In the OpenShift Container Platform console navigation, select Administration -> Namespaces.
Select create Namespace.
Provide a name for your namespace. This is the namespace that you use throughout the installation process.
NOTE
The value for namespace might be referred to as Project in the OpenShift Container Platform environment.
Follow below steps to create secrets.
Switch your project namespace to the one that you created in step 1. This ensures that the steps are completed in the correct namespace. Some resources are namespace specific.
I. In the OpenShift Container Platform console navigation, select Administration -> Namespaces.
II. Select the namespace that you created in step 1 from the list.
Create a pull secret that provides the entitlement to the downloads.
I. Copy your OpenShift Container Platform pull secret from cloud.redhat.com
II. In the OpenShift Container Platform console navigation, select Workloads -> Secrets.
III. Select Create -> Image Pull Secret.
IV. Enter a name for your secret.
V. Select Upload Configuration File as the authentication type.
VI. In the Configuration file field, paste the pull secret that you copied from cloud.redhat.com.
VII. Select Create to create the pull secret.
Installing Advanced Cluster Management Operator
In the OpenShift Container Platform console navigation, select Ecosystem -> Software Catalog.
Select an existing project name or create new project.
Select Red Hat Advanced Cluster Management.
Select Install.
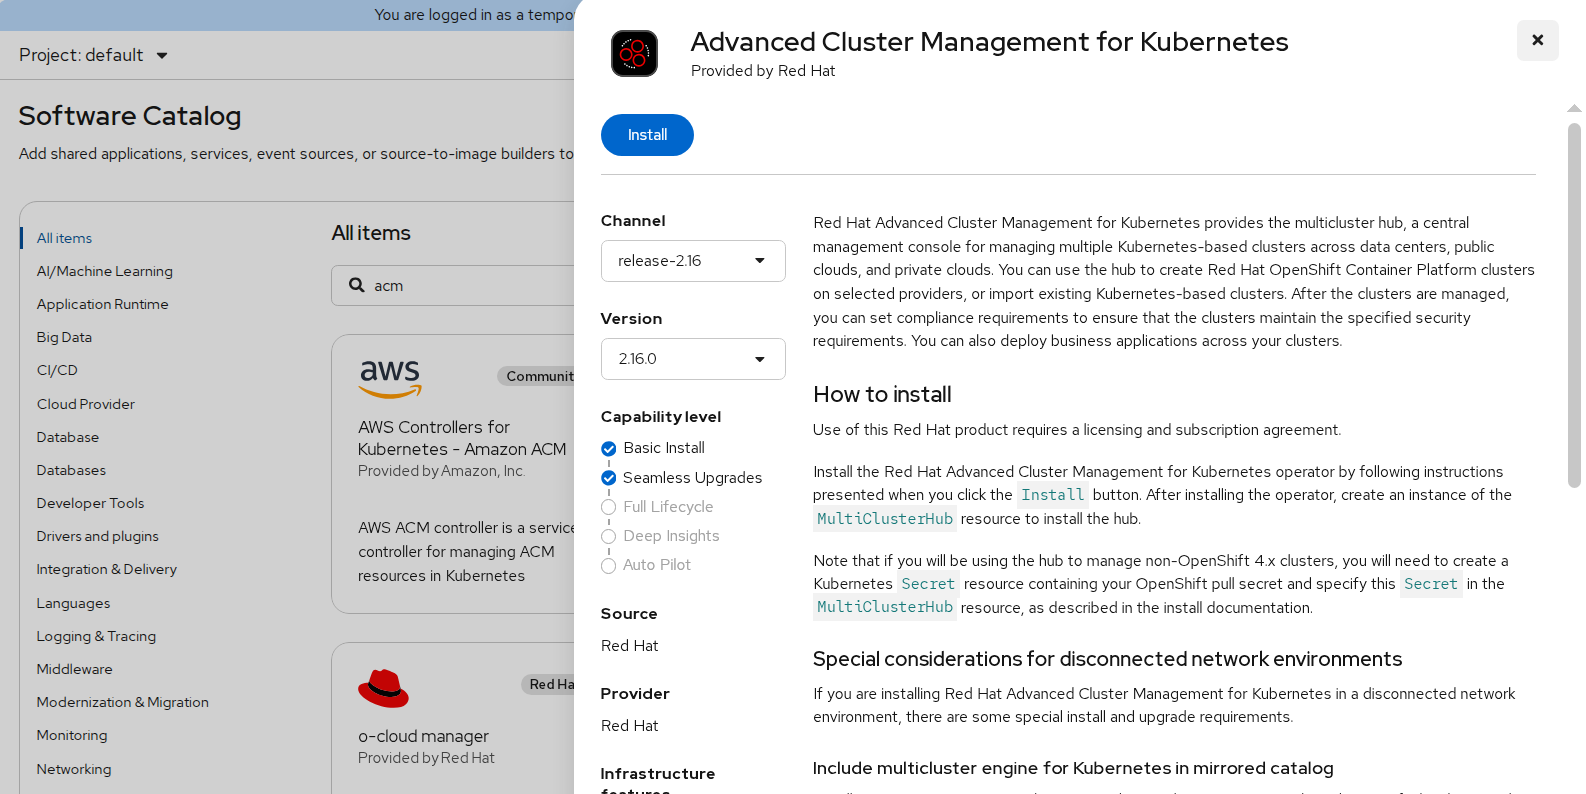
FIGURE 94. RedHat Advanced Cluster Management Operator deployment
Update the values, if necessary.
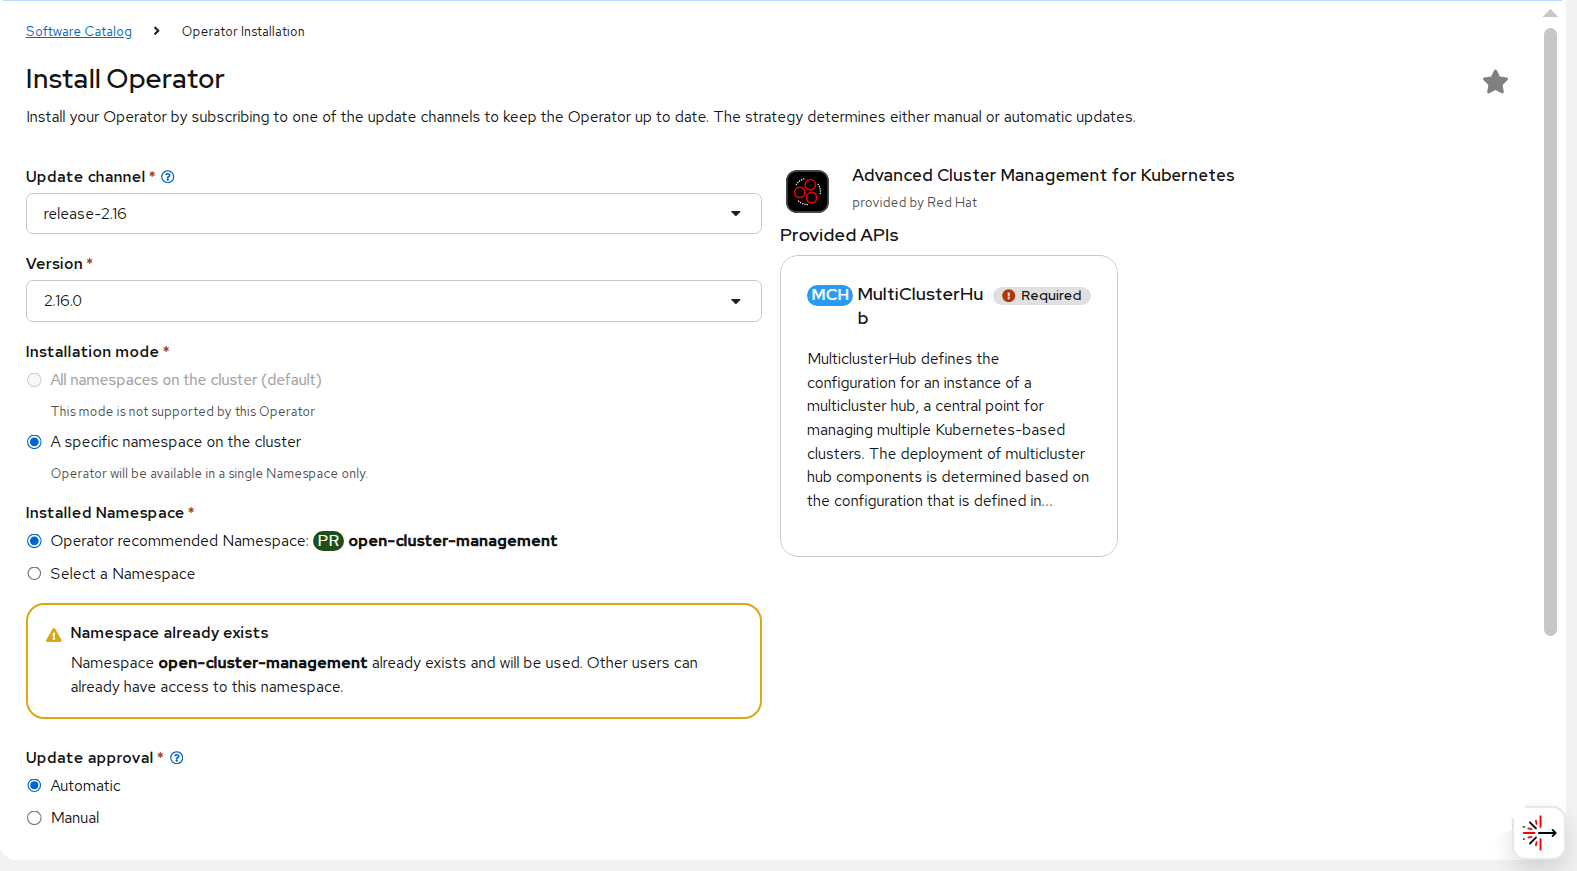
FIGURE 95. RedHat Advanced Cluster Management Operator
Select specific namespace on the cluster for the Installation Mode option.
I. Select open-cluster-management namespace from the drop down menu.
selected by default for the Update Channel option.
Select an Approval Strategy:
I. Automatic specifies that you want OpenShift Container Platform to upgrade Advanced Cluster Management for kubernetes Operator.
II. Manual specifies that you want to have control to upgrade Advanced Cluster Management for kubernetes Operator manually
Select Install.
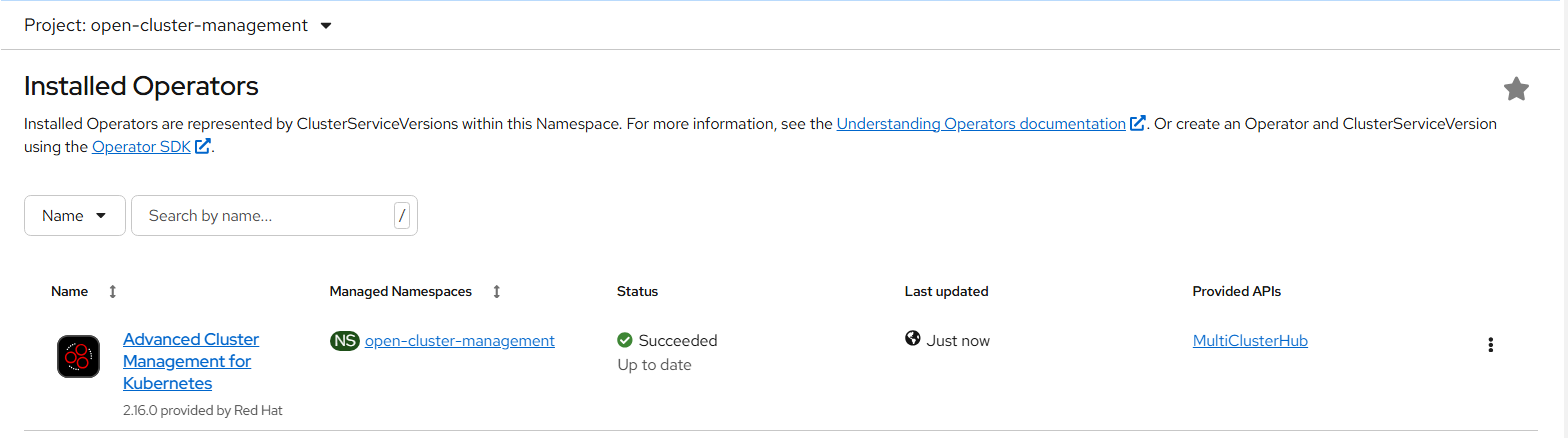
FIGURE 96. Deployed RedHat ACM Operator
The Installed Operators page is displayed with the status of the operator.
Create the MultiClusterHub custom resource
In the OpenShift Container Platform console navigation, select Installed Operators -> Advanced Cluster Management for Kubernetes.
Select the MultiClusterHub tab.
Select Create MultiClusterHub.
Update the values, according to your needs.
Tip: You can edit the values in the YAML file by selecting YAML View. Some of the values are only available in the YAML view. The following example shows some sample data in the YAML view:
apiVersion: operator.open-cluster-management.io/v1

kind: MultiClusterHub

metadata:

namespace: << newly created namespace>>

name: multiclusterhub

spec:

imagePullSecret: <secret>
Add the pull secret that you created to the imagePullSecret field on the console. In t he YAML View, confirm that the namespace is your project namespace.
Select Create to initialize the custom resource. It can take up to 10 minutes for the hub to build and start.
After the hub is created, the status for the operator is Running on the Installed Operators page.
Access the Advanced Cluster Management console for the hub
Red Hat Advanced Cluster Management for Kubernetes web console is integrated with the Red Hat OpenShift Container Platform web console as a console plug-in. You can access Red Hat Advanced Cluster Management within the OpenShift Container Platform console from the top navigation drop-down menu, which now provides two options: Administrator and Fleet Management. The menu initially displays Administrator.
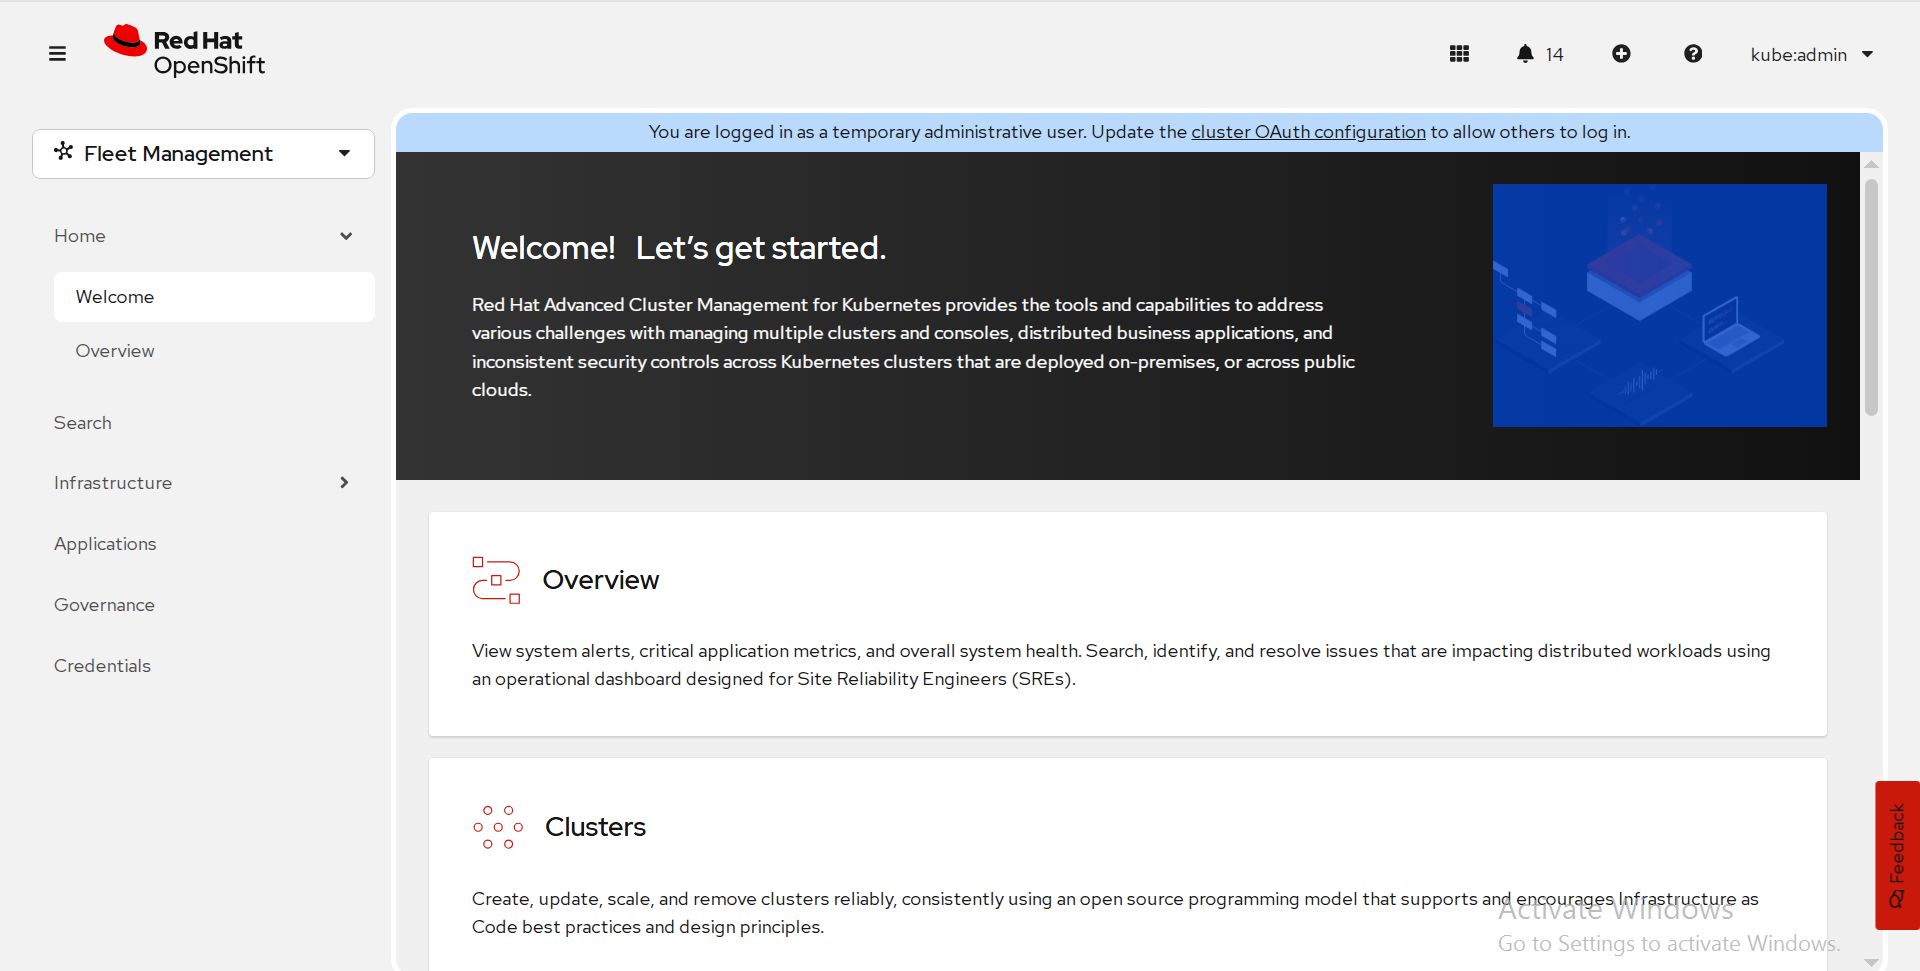
FIGURE 97. ACM console
To create/ import an existing cluster from Advanced Cluster Management console, click on Clusters.
Import an existing Cluster using Advanced Cluster Management console
In the Cluster list tab, Click Import cluster.
It displays a window as below, there you can provide Cluster name, Cloud (public or on-premise), Environment and labels are optional.

FIGURE 98. Importing existing cluster to ACM
- Once you provide all the details, Click on Generate Command.
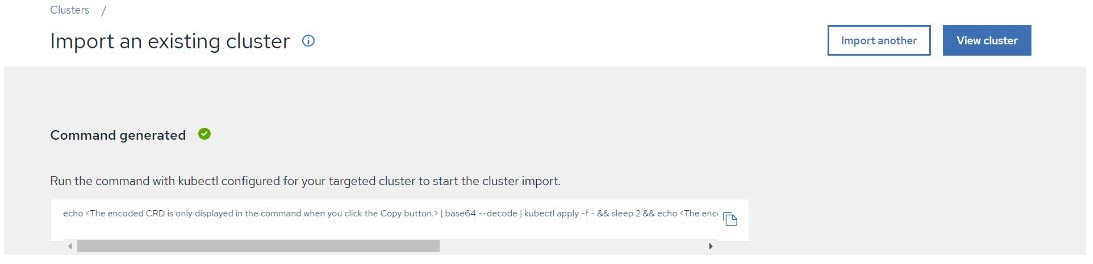
FIGURE 99. Generated command from ACM
Copy the command generated, Run it on imported cluster.
After running the command, we should navigate to Advanced Cluster Management console there we can find the status of imported cluster details in cluster option as per below snap.
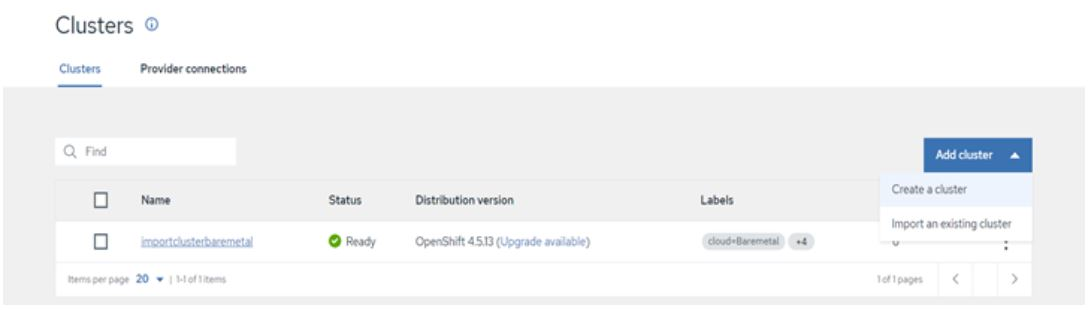
FIGURE 100. Imported cluster details to ACM Console
Red Hat Advanced Cluster security for Kubernetes
Red Hat Advanced Cluster Security (RHACS) for Kubernetes is the pioneering Kubernetes-native security platform, equipping organizations to build, deploy, and run cloud-native applications more securely. The solution helps protect containerized Kubernetes workloads in all major clouds and hybrid platforms. Central services include the user interface (UI), data storage, RHACS application programming interface (API), and image scanning capabilities. RHACS Cloud Service allows you to secure self-managed clusters that communicate with a Central instance. The clusters you secure, called Secured Clusters.
Prerequisites
- Access to a Red Hat OpenShift Container Platform cluster using an account with Operator installation permissions.
- Red Hat OpenShift Container Platform 4.21 or later. For more information, see Red Hat Advanced Cluster Security for Kubernetes Support Policy
Install the Red Hat Advanced Cluster Security Operator
Navigate in the web console to the Ecosystem -> Software Catalog page.
Select an existing project name or create new project.
If Red Hat Advanced Cluster Security for Kubernetes is not displayed, enter Advanced Cluster Security into the Filter by keyword box to find the Red Hat Advanced Cluster Security for Kubernetes Operator.
Select the Red Hat Advanced Cluster Security for Kubernetes Operator to view the details page.
Read the information about the Operator, and then click Install.
On the Install Operator page:
a. Keep the default value for Installation mode as All namespaces on the cluster.
b. Choose a specific namespace in which to install the Operator for the Installed namespace field. Install the Red Hat Advanced Cluster Security for Kubernetes Operator in the rhacs-operator namespace.
c. Select automatic or manual updates for Update approval.
Click Install.
Verification: After the installation completes, navigate to Ecosystem > Installed Operators to verify that the Red Hat Advanced Cluster Security for Kubernetes Operator is listed with the status of Succeeded.
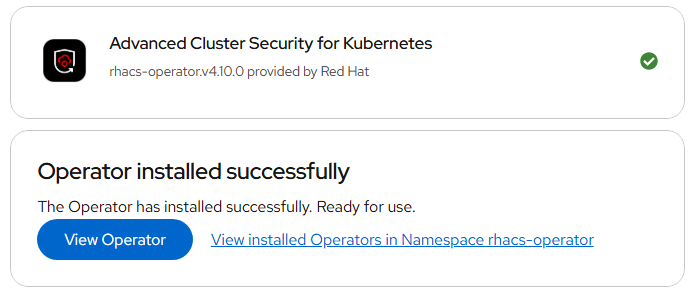
FIGURE 101. Red Hat ACS Operator Installation Install the Central Red Hat Advanced Cluster Security
- On the Red Hat OpenShift Container Platform web console, navigate to the Ecosystem > Installed Operators page.
- Select the Red Hat Advanced Cluster Security for Kubernetes Operator from the list of installed Operators.
- If you have installed the Operator in the recommended namespace, OpenShift Container Platform lists the project as rhacs-operator, Select Project: rhacs-operator → Click Create project.Operator
- Enter the new project name (stackrox) and click Create. Red Hat recommends that you use stackrox as the project name.
- Under the Provided APIs section, select Central. Click Create Central.
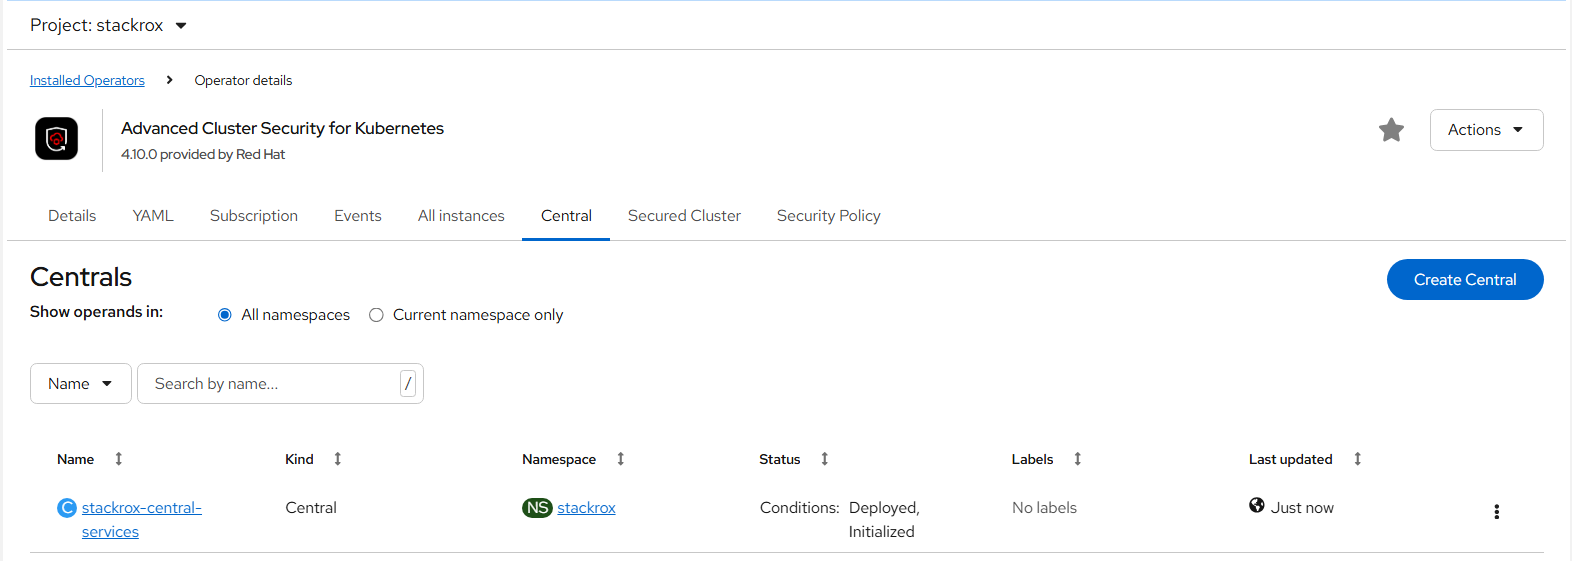
FIGURE 102. Central Red Hat Advanced Cluster Security (ACS) Installation
- Configure via yaml view, keep default values, and click create.
- In stackrox-central-services details we will find Admin credentials information.
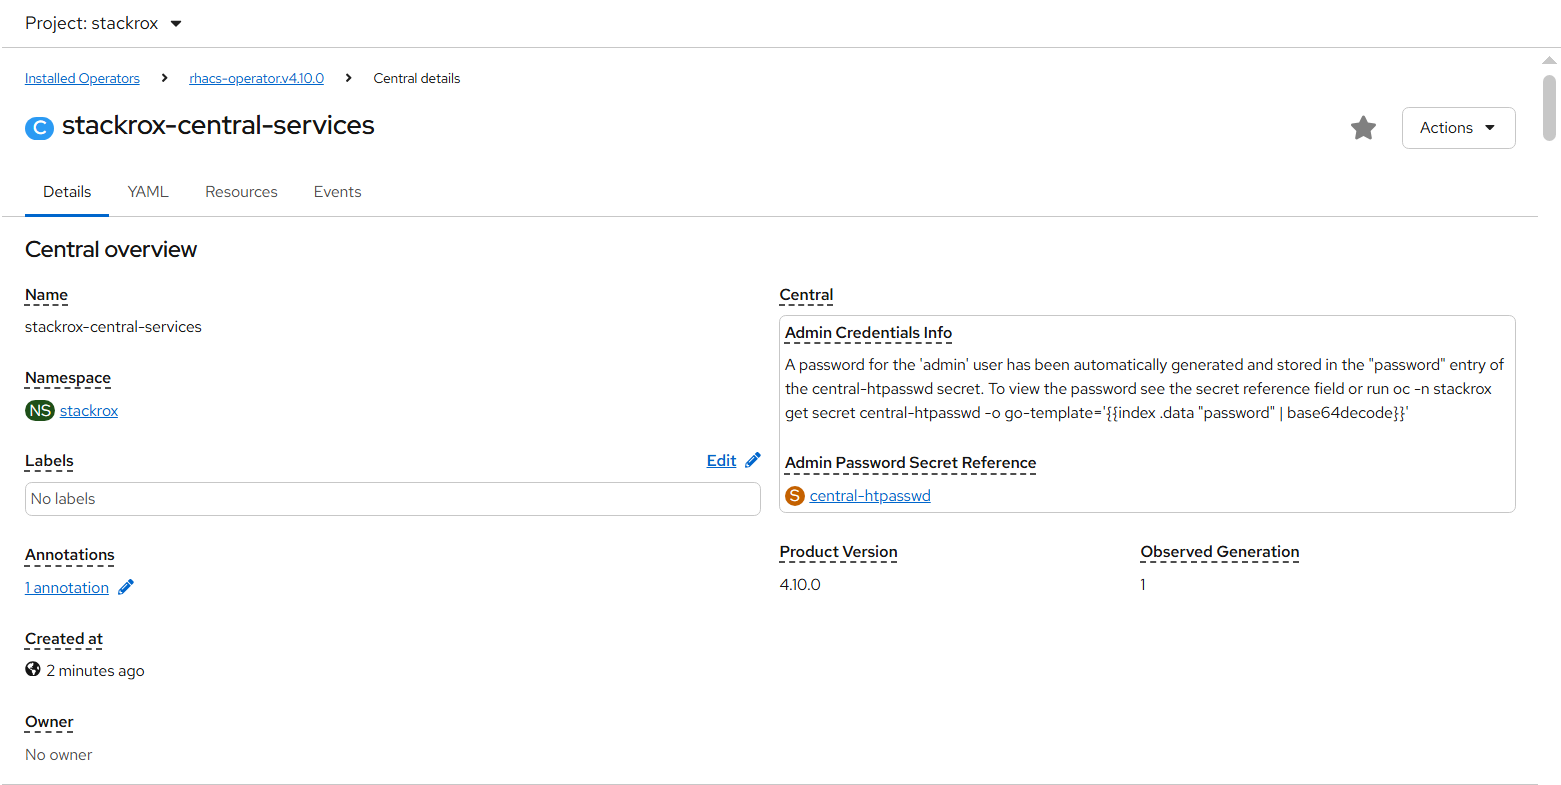
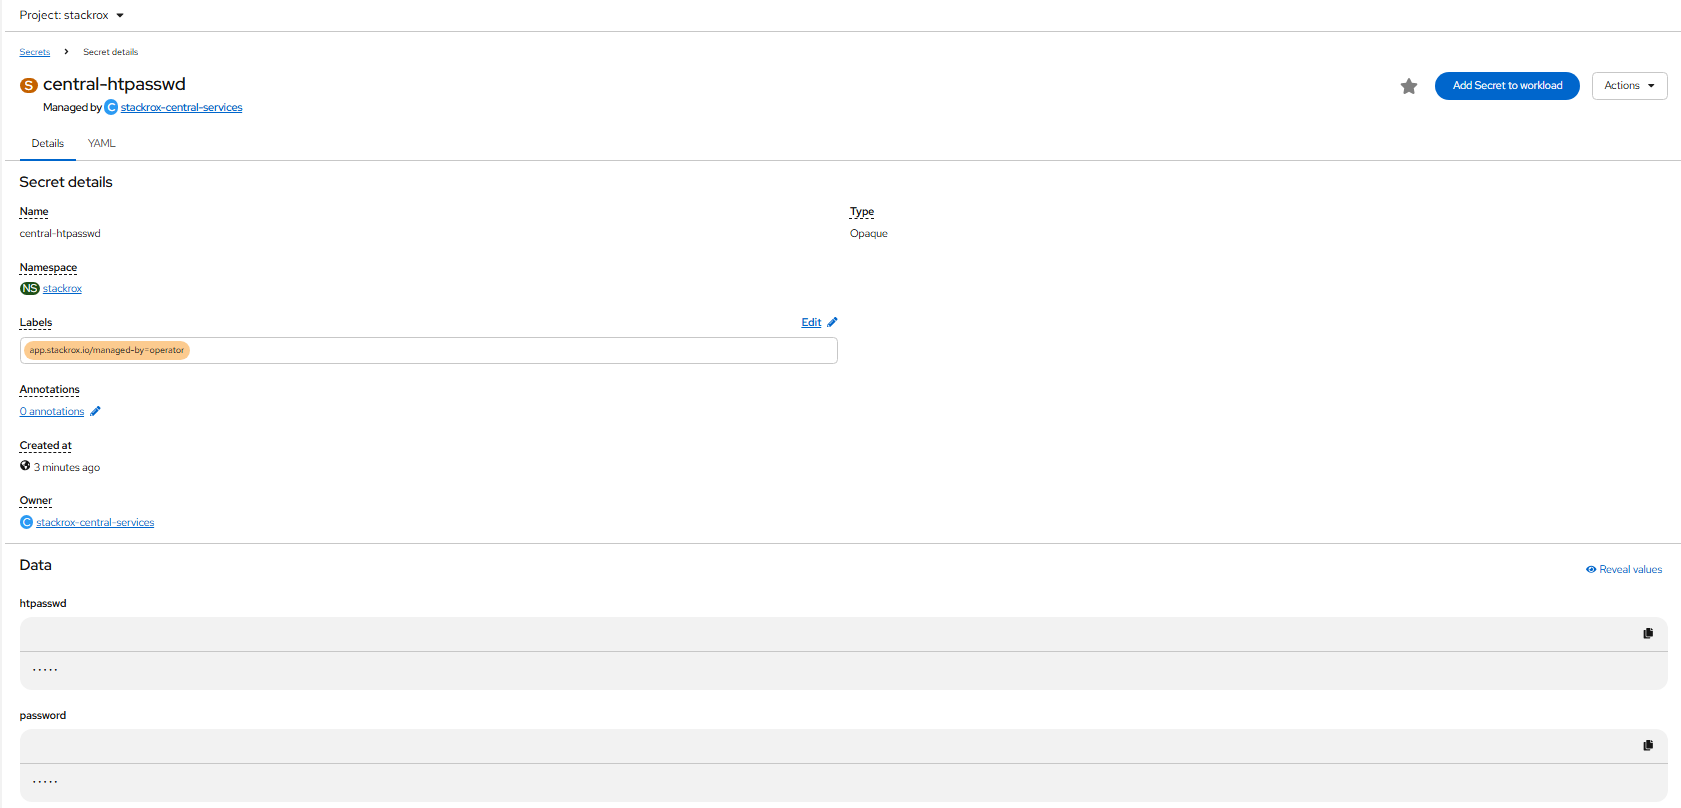
FIGURE 103. Stackrox-central-services details
- Click central-htpasswd below Admin Password Secret Reference to find the central login credentials and note the htpasswd username(admin) and password.
- Navigate to Networking > Routes to find the central url.
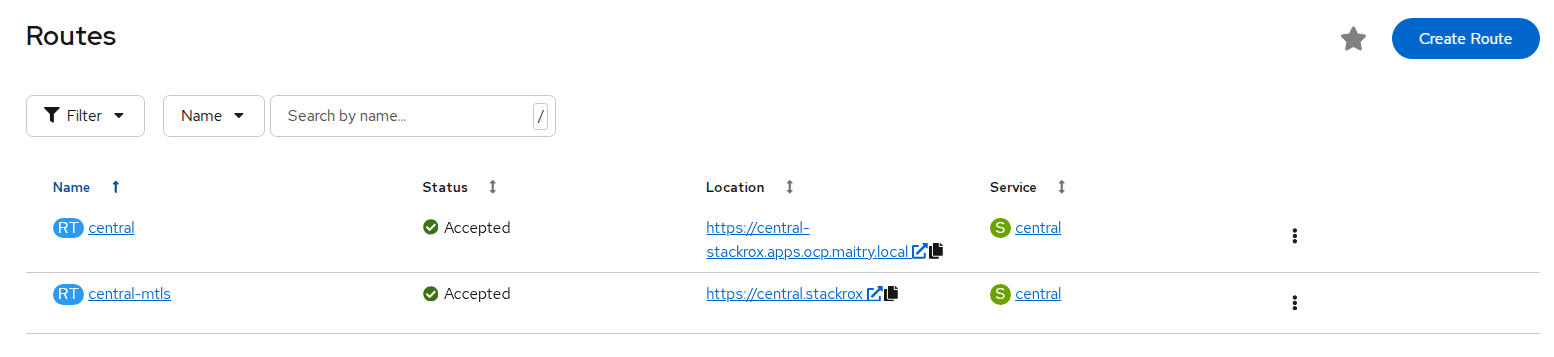
FIGURE 104. Stackrox central url
- Log in to the central console using htpasswd credentials.
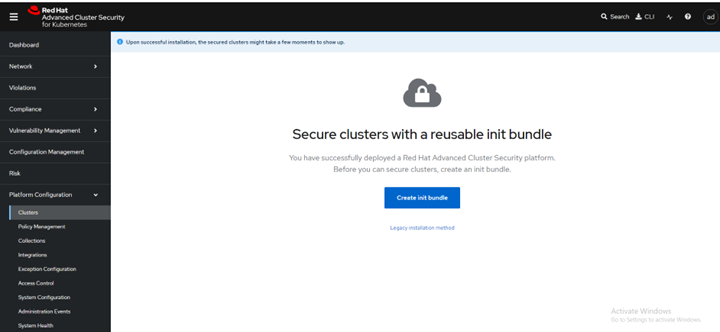
FIGURE 105. Central console dashboard
Create init bundle using RHACS portal
- On the RHACS portal, navigate to Platform Configuration > Integrations.
- Navigate to the Authentication Tokens section and click Cluster Init Bundle.
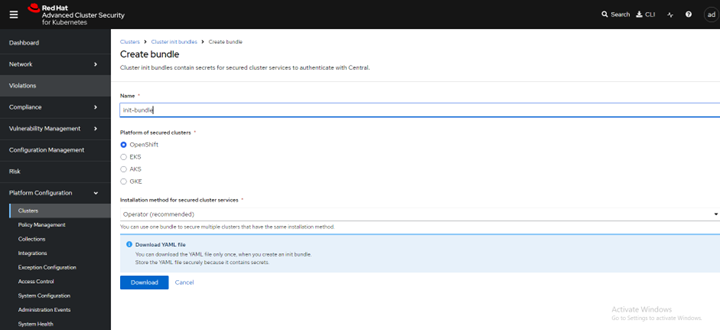
FIGURE 106. Create init bundle
- Click Create bundle.
- Enter a name for the cluster init bundle and click Download.
Apply the init bundle by creating a resource on the secured cluster
Before installing secured clusters, we must use the init bundle to create the required resources on the cluster that will allow the services on the secured clusters to communicate with Central. Use any one of the following methods.
Method 1: Using the CLI
a. Run the following commands to create the resources:
oc create namespace stackroxb. (Specify the file name of the init bundle containing the secrets)
oc create -f <init_bundle.yaml> -n <stackrox>c. Specify the name of the project where secured cluster services will be installed
Method 2 : using the web console
a. In the OpenShift Container Platform web console on the cluster that you are securing, in the top menu, click + to open the Import YAML page. You can drag the init bundle file or copy and paste its contents into the editor, and then click Create.
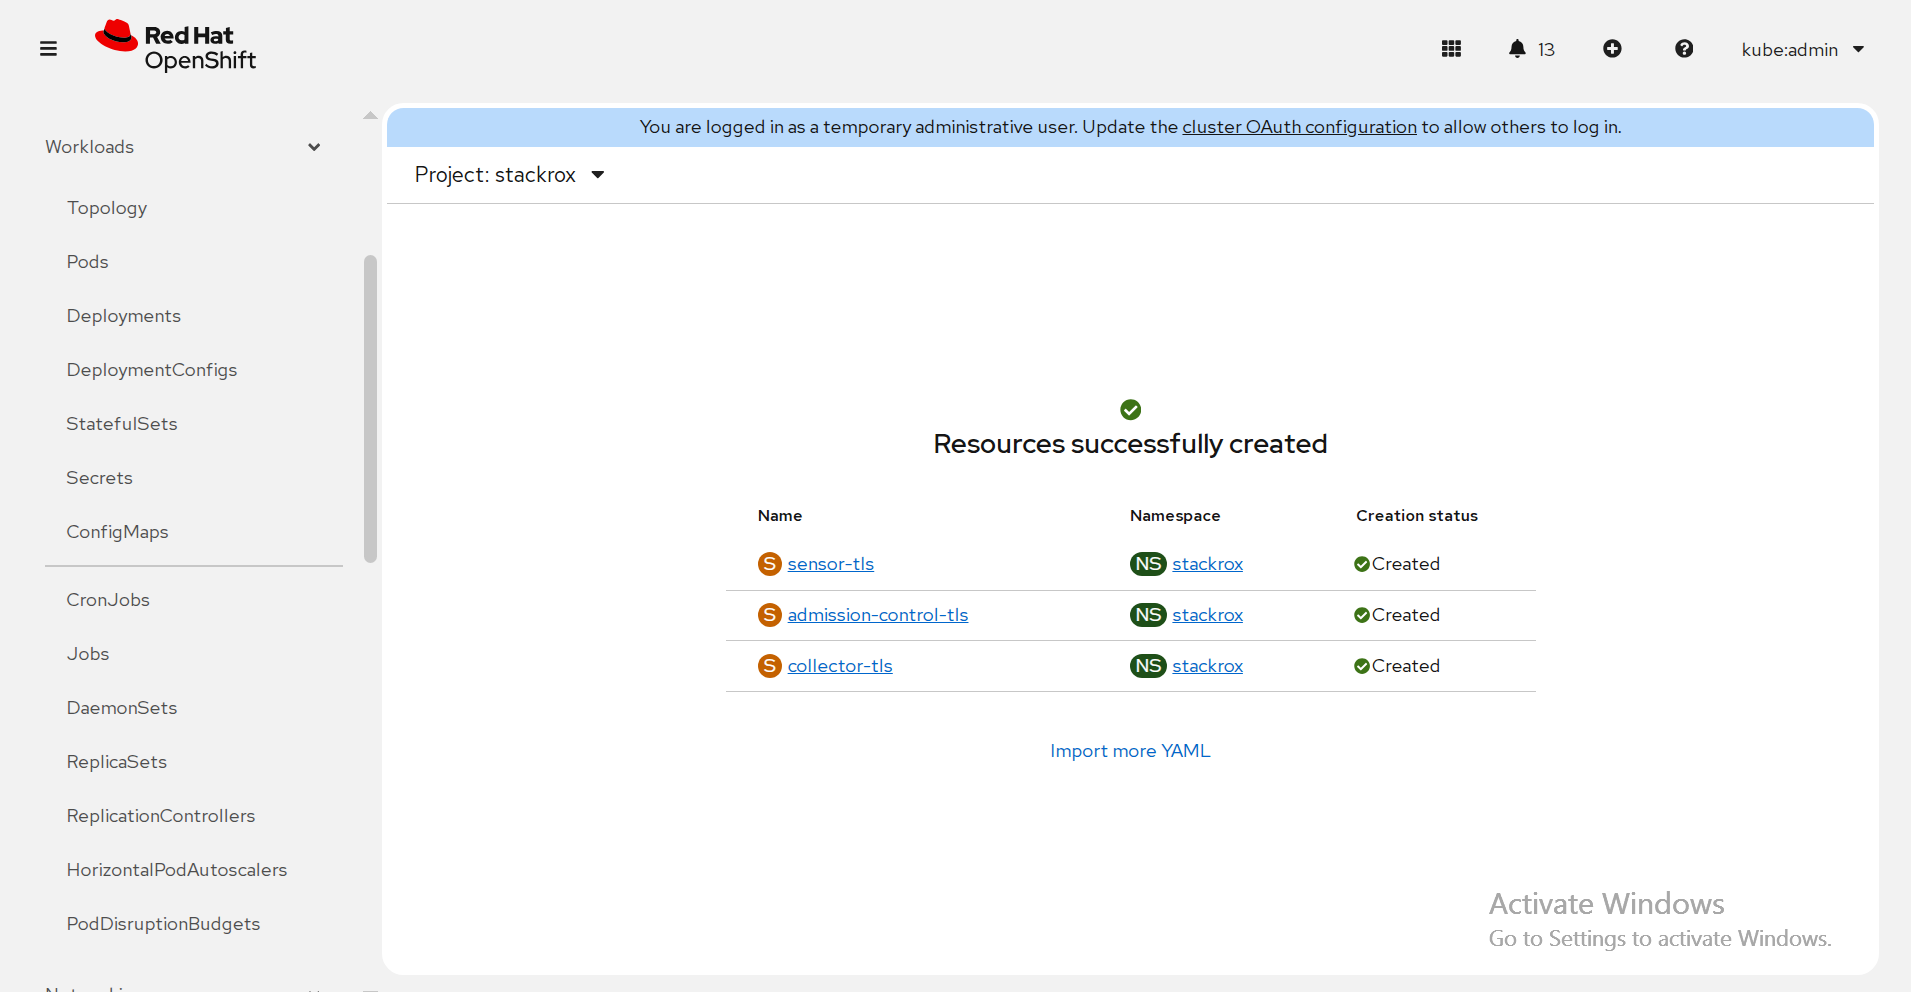
FIGURE 107. Resource creation on secured cluster
Install secured cluster services within same cluster
Prerequisites
- If using OpenShift Container Platform, ensure the installation of version 4.21 or later.
- Installation of the RHACS Operator and generation of an init bundle that is applied to the cluster.
Procedure
- On the OpenShift Container Platform web console, navigate to the Ecosystem > Installed Operators page and select the RHACS Operator.
- Click Secured Cluster from the central navigation menu in the Operator details page.
- Click Create Secured Cluster.
- Select one of the following options in the Configure via field: either Form view or Yaml view.
- Enter the new project name by accepting or editing the default name. The default value is stackrox-secured-cluster-services.
- Keep all values default for stackrox-secured-cluster-services for same cluster.
- Now the stackrox-secured-cluster-services are ready to perform activity.
Red Hat Quay
Red Hat Quay is an enterprise-quality container registry. Use Red Hat Quay to build and store container images, then make them available to deploy across your enterprise. The Red Hat Quay Operator provides a simple method to deploy and manage Red Hat Quay on an OpenShift cluster.
Note
This section is required to executed only if user has selected Red Hat OpenShift Data Foundation (ODF) as storage option. Skip this section if HPE Alletra is the storage option.
This section explains configuring Red Hat Quay v3.16 container registry on existing OpenShift Container Platform 4.21 using the Red Hat Quay Operator.
Installation of Red Hat Quay Operator
Log in to Red Hat OpenShift Container Platform console, select Ecosystem → Software Catalog.
Select an existing project name or create new project.
In the search box, type Red Hat Quay and select the official Red Hat Quay Operator provided by Red Hat. This directs you to the Installation page, which outlines the features, prerequisites, and deployment information.
Select Install. This directs you to the Operator Installation page.
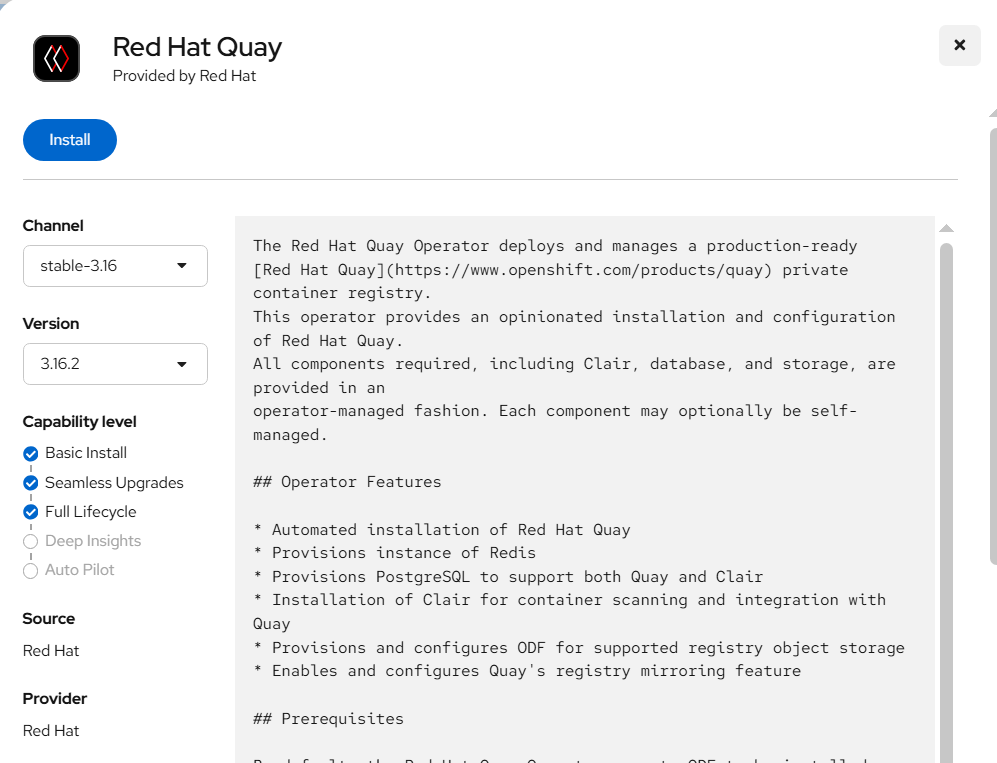
FIGURE 108. Red Hat Quay operator installation
- Update the details for Update channel, Installation mode, Installed Namespace, and update approval as shown in the following figure.
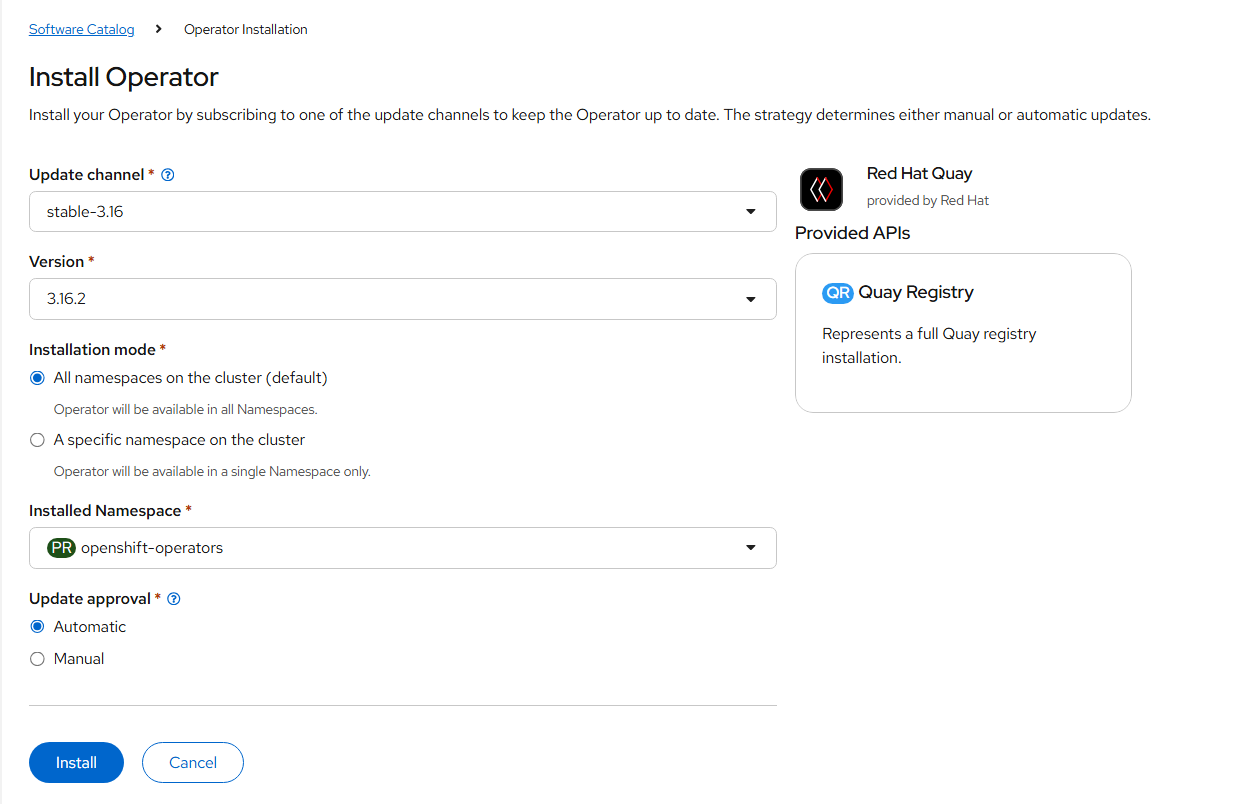
FIGURE 109. Red Hat Quay operator installation details
Select Install.
After installation you can view the operator in the Installed Operators tab.

FIGURE 110. Red Hat Quay operator installed successfully
Create the Red Hat Quay Registry
- Click the Quay Registry tab → Create QuayRegistry.
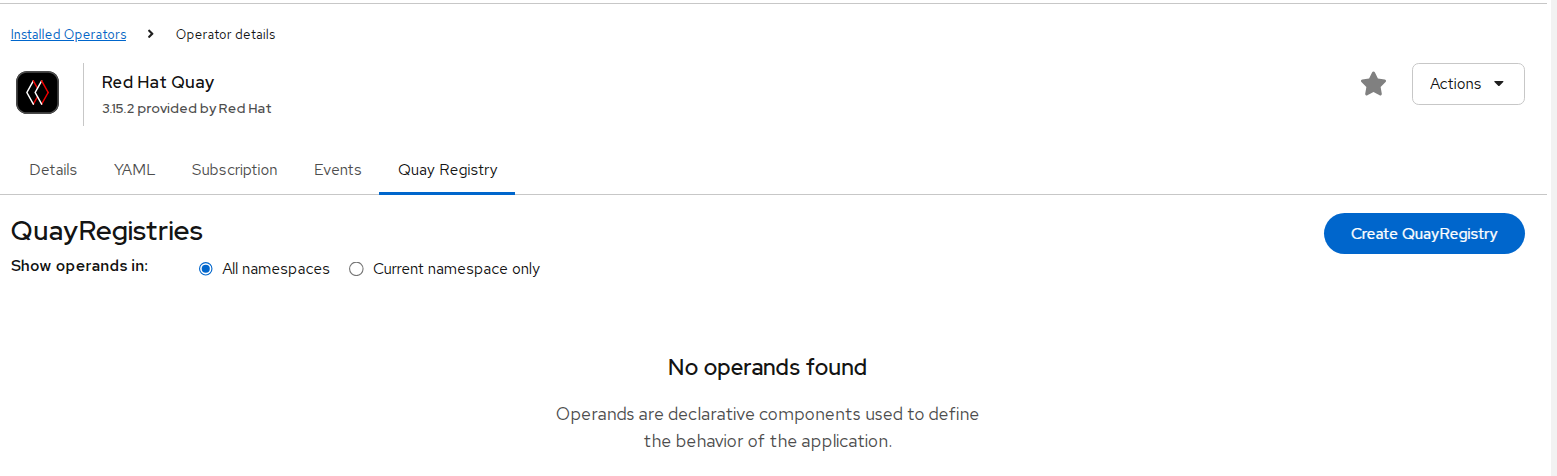
FIGURE 111. Red Hat Quay registry creation
- Provide details like name and click create.

FIGURE 112. Red Hat Quay registry creation yaml details
- Quay registry is created and appears as shown in the following figure.
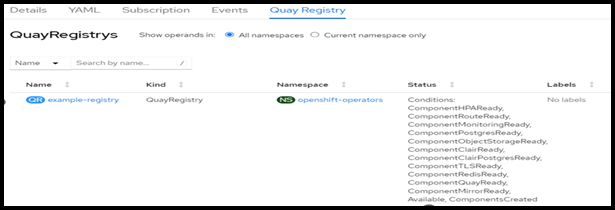
FIGURE 113. Red Hat Quay registry created successfully
- Click Create Quay Registry to see registry information.
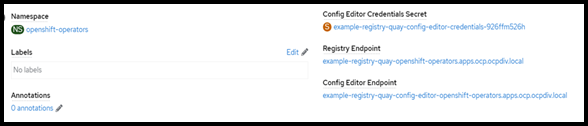
FIGURE 114. Red Hat Quay registry created details
- Click Registry Endpoint to open registry dashboard.
If dashboard is not accessible add the entry of registry url to /etc/hosts as follows.
haproxy-ip  <Registry Endpoint URL>
haproxy-ip example-registry-quay-openshift-operators.apps.ocp.ocpdiv.local
- Quay registry dashboard login page appears as shown in the following figure.
FIGURE 115. Red Hat Quay account login page
Enter details as shown and click Create Account.
Click sign in and enter details provided while creating the account.
Veeam Kasten
Kasten K10 by Veeam is a cloud-native data management platform purpose-built for Kubernetes applications. It provides reliable backup, restore, disaster recovery, and application mobility for workloads running on Kubernetes distributions, including Red Hat OpenShift.
Kasten K10 takes an application-centric approach to backup. Instead of only protecting storage volumes, it captures all the resources that define an application, including Kubernetes objects, configurations, secrets, and persistent volumes. This ensures consistent application recovery whether restoring within the same cluster or migrating to another OpenShift cluster.
Prerequisites
- A running Red Hat OpenShift cluster with sufficient CPU, memory, and storage.
- Cluster admin privileges for installation.
- A configured CSI (Container Storage Interface) driver (Internal ODF, External Ceph, or HPE Alletra Storage MP).
- A default StorageClass with snapshot support.
- An object storage bucket (e.g., MinIO) configured as the backup target.
- Ingress or Route access for the Kasten K10 dashboard.
NOTE
The VolumeSnapshotClass associated with the storage class used for Kasten backups must include the annotation: k10.kasten.io/is-snapshot-class: "true"
Deploying MinIO for Kasten Backup Storage
Prepare an Ubuntu machine with internet access.
Download and install the MinIO server binary:
wget https://dl.min.io/server/minio/release/linux-amd64/minio
chmod +x minio
sudo mkdir -p /minioap
sudo chown $(whoami):$(whoami) /minioap
./minio server /minioap
The MinIO service runs at
http://<Ubuntu-IP>:9000with default credentialsminioadmin:minioadmin.Configure MinIO for Kasten:
mc alias set myminio http://<Ubuntu-IP>:9000 minioadmin minioadmin
mc admin user add myminio <username> <password>
mc admin policy attach myminio readwrite --user <username>
Create a bucket for Kasten backups:
- Log in to the MinIO console using the new credentials.
- Click Create Bucket in the MinIO console.
- Name the bucket, e.g., kasten-backup.
- The bucket should now appear in the console.
The MinIO server is now ready as an object store backend for Kasten K10 backups.
Installing Kasten K10 Operator on OpenShift
- Log in to the OpenShift web console as a cluster admin.
- Navigate to Ecosystem -> Software Catalog.
- Select an existing project name or create new project.
- Search for Veeam Kasten and click Install.
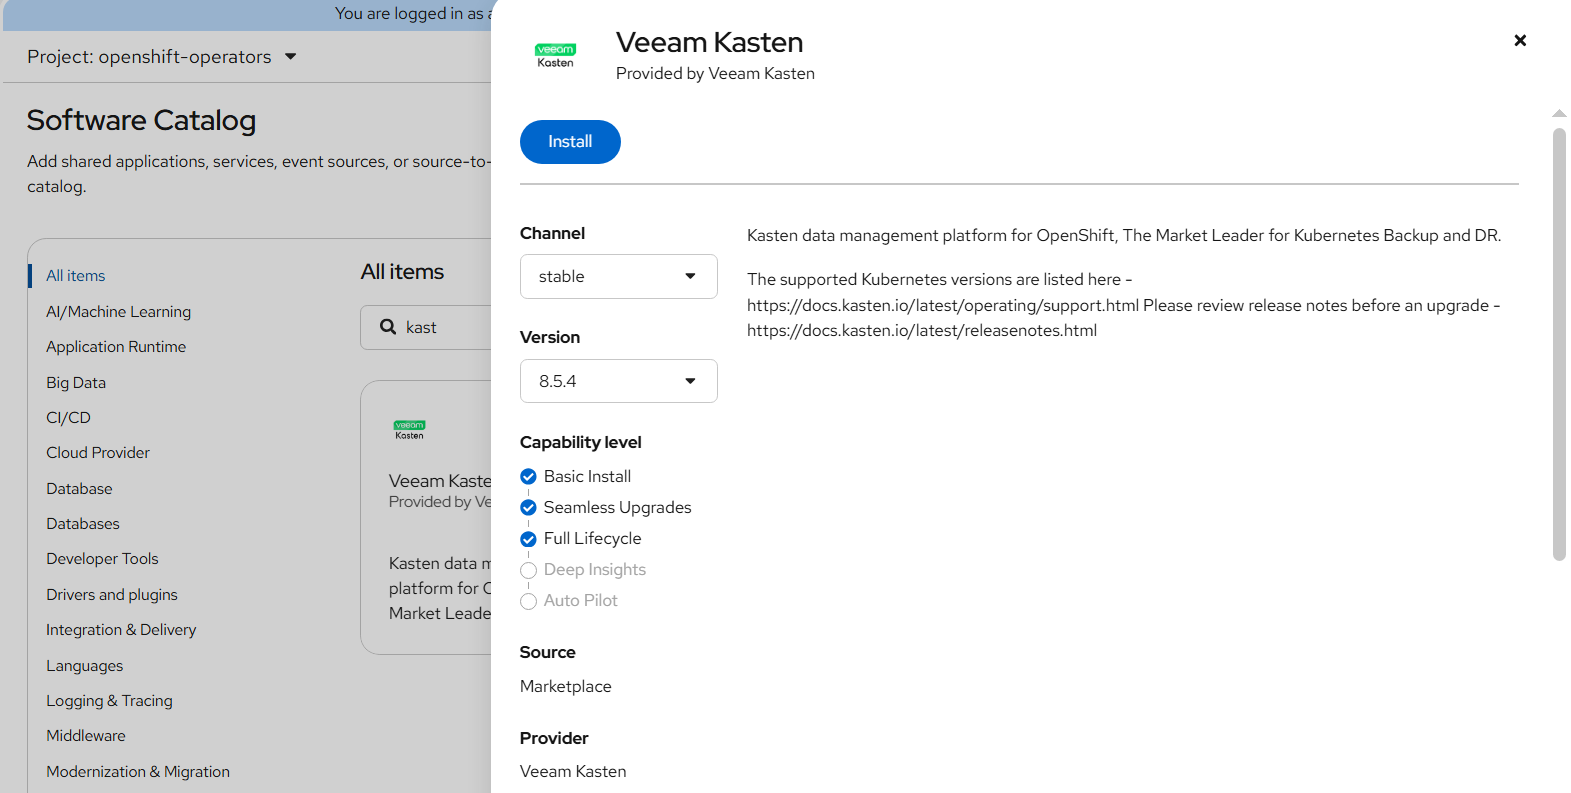
FIGURE 116. Veeam Kasten Operator Installation
- Choose installation settings:
- Installation Mode: All namespaces on the cluster
- Installed Namespace: kasten-io (auto-created)
- Wait until the operator status shows Succeeded.
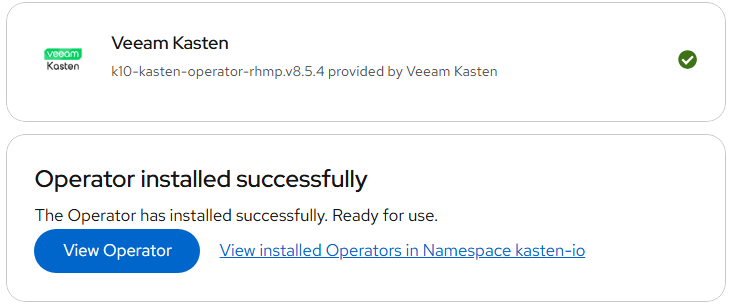
FIGURE 117. Veeam Kasten Operator successfully installed
Creating the Kasten K10 Instance
- Go to Ecosystem ->Installed Operators -> select Veeam Kasten.
- Under the K10 tab, click Create K10.
- Keep default values and click Create.
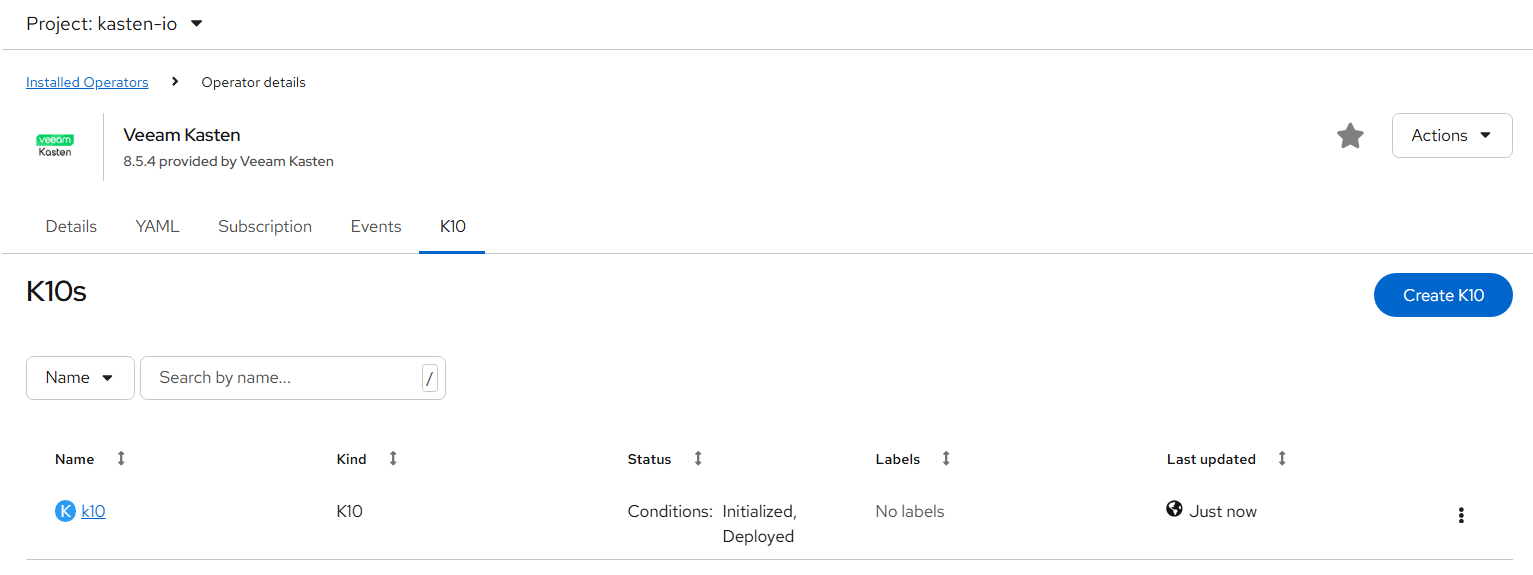
FIGURE 118. Kasten instance created
- Verify pod status:
oc get pods -n kasten-io
Exposing the K10 Dashboard
- Get K10 services:
oc get svc -n kasten-io - Expose the gateway service using an OpenShift route:
oc expose svc gateway -n kasten-io - Retrieve the route URL:
oc get route -n kasten-io - Access the dashboard at
http://gateway-kasten-io.apps.<cluster-domain>/k10/.
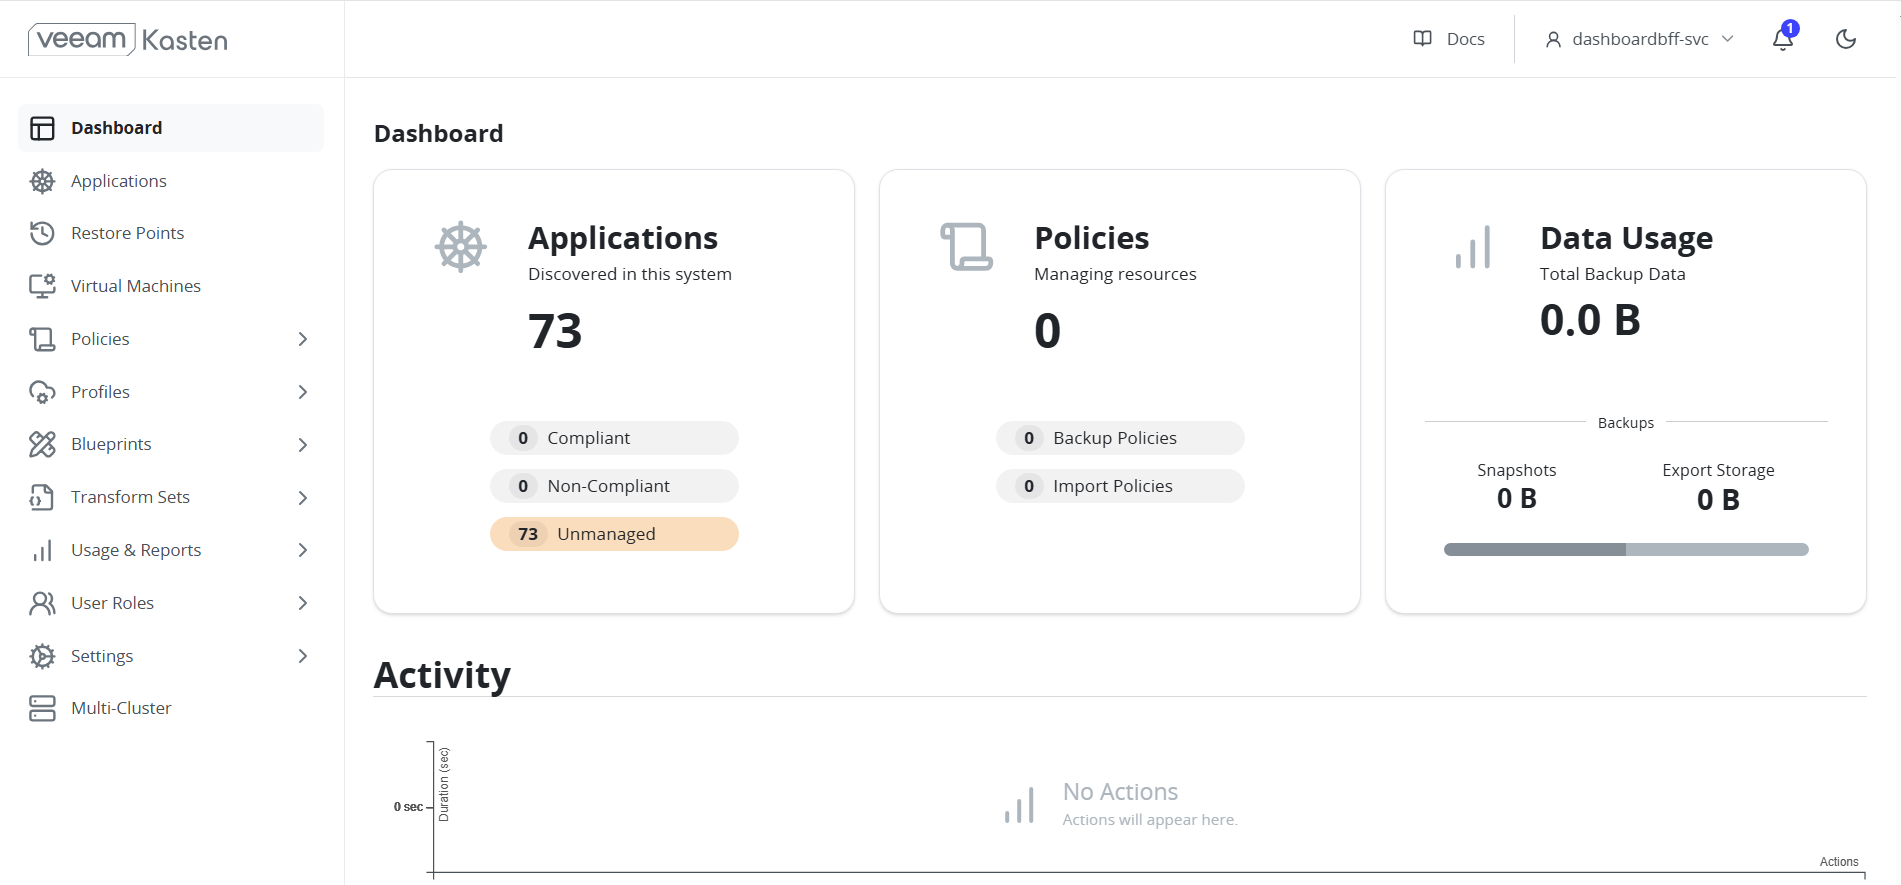
FIGURE 119. Kasten Dashboard
Backup and Restore Using Kasten K10
Creating a Location Profile (MinIO)
- Log in to the Kasten K10 dashboard.
- Navigate to Profiles -> Location -> New Profile.
- Fill details as below:
- Access Key / Secret Key: MinIO credentials
- Endpoint URL:
http://<MinIO-IP>:9000 - Bucket Name:
kasten-backup - Region:
us-east-1 - Enable Skip TLS Verification if using HTTP.
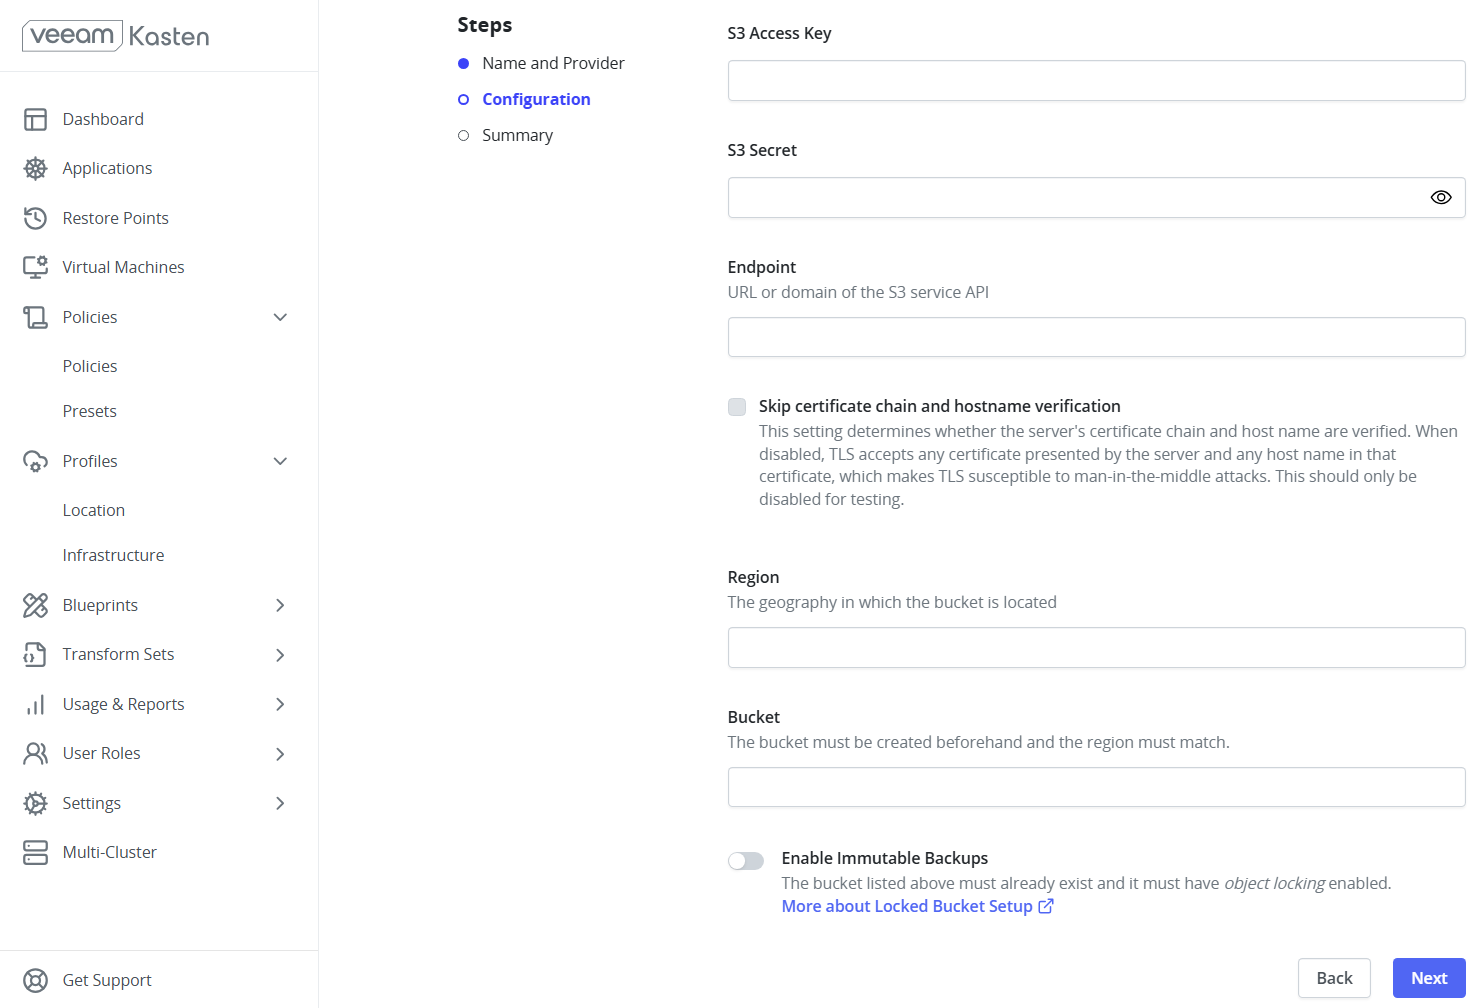
FIGURE 120. Creating Location Profile
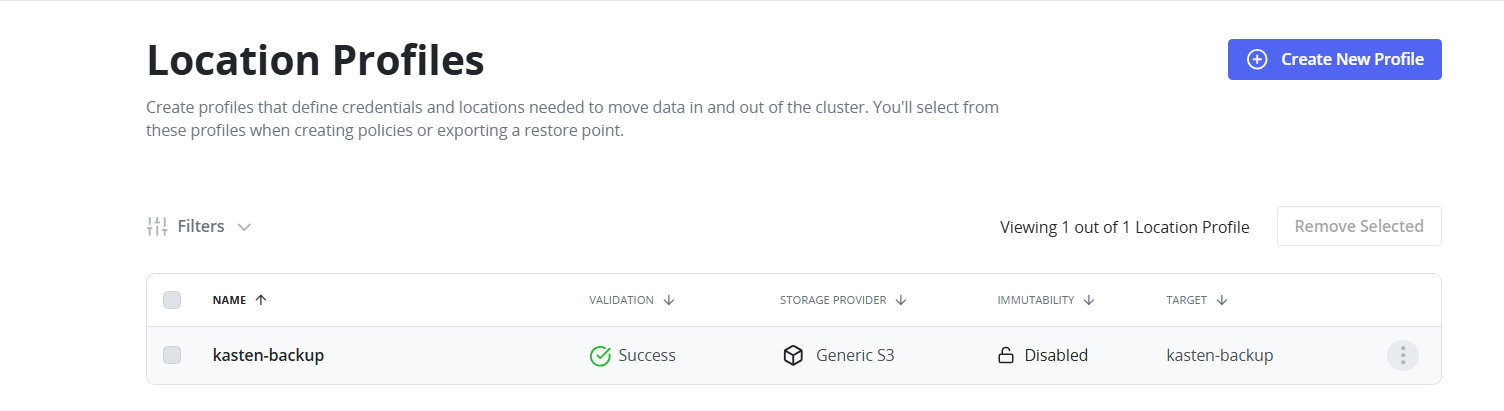
FIGURE 121. Location Profile created
Creating a Backup Policy
- Go to Policies -> Create New Policy.
- Set policy name.
- Select Snapshot under Actions.
- Set Backup Frequency as per your requirement.
- Enable Backup via Snapshot Export and choose the MinIO Location Profile.
- Select target namespace.
- Save and manually trigger the policy for initial backup.
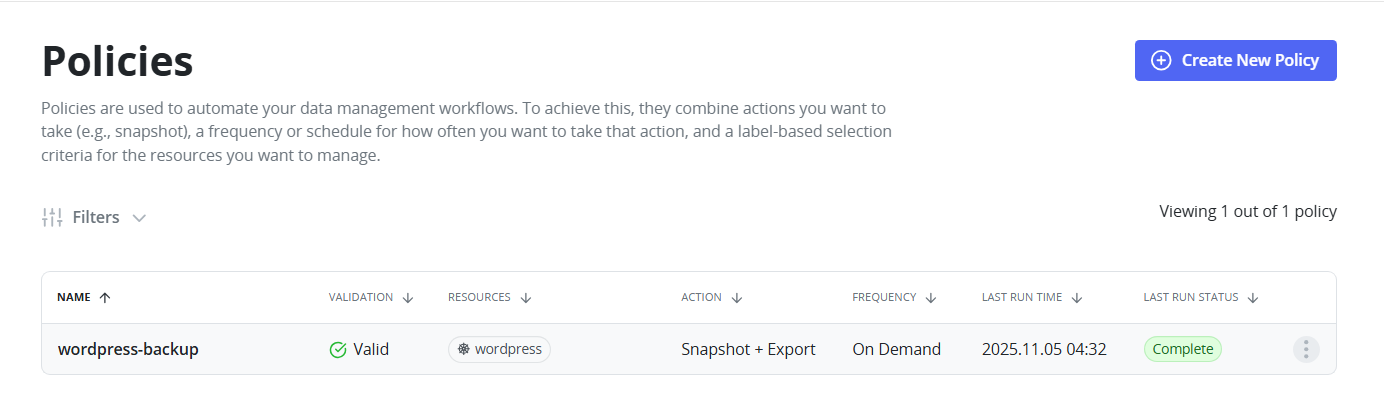
FIGURE 122. Backup Policy
- Monitor the progress of the backup policy directly from the Kasten dashboard.
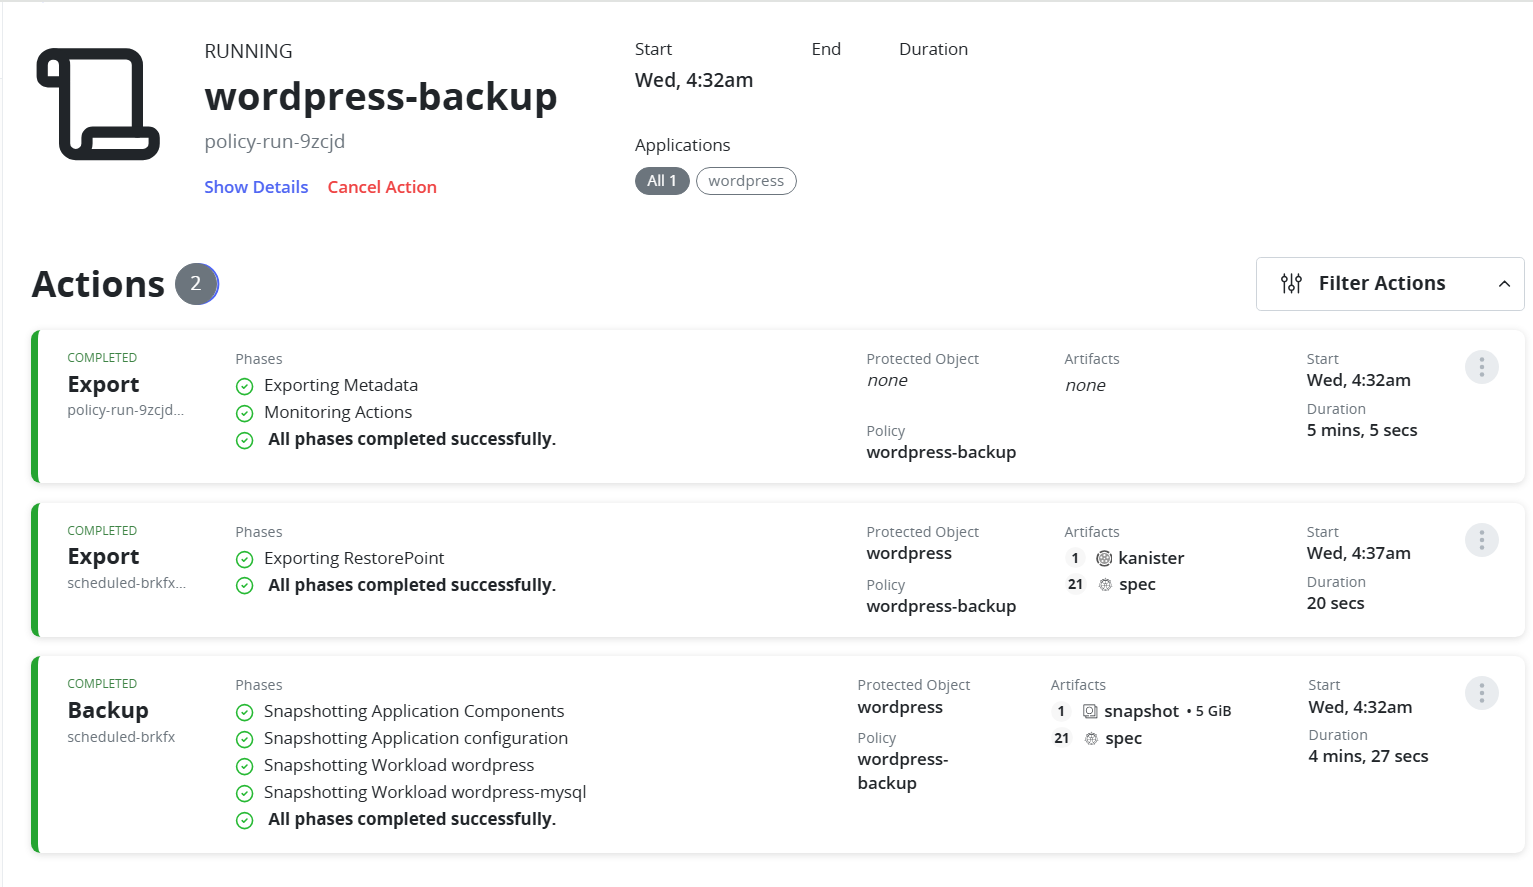
FIGURE 123. Running backup policy
Grant Required Permissions Before Restore
Before restoring an application or namespace, ensure that the target namespace has the appropriate Security Context Constraints (SCC) assigned to allow restored pods to run successfully.
Run the following command to grant the anyuid SCC to the default service account in the target namespace. Replace <namespace> with the namespace where the application will be restored:
oc adm policy add-scc-to-user anyuid -z default -n <namespace>
Restoring a Namespace
- Navigate to Restore Points.
- Select a restore point.
- Choose the target namespace (existing or new).
- Confirm Restore and wait until the pods are recreated.
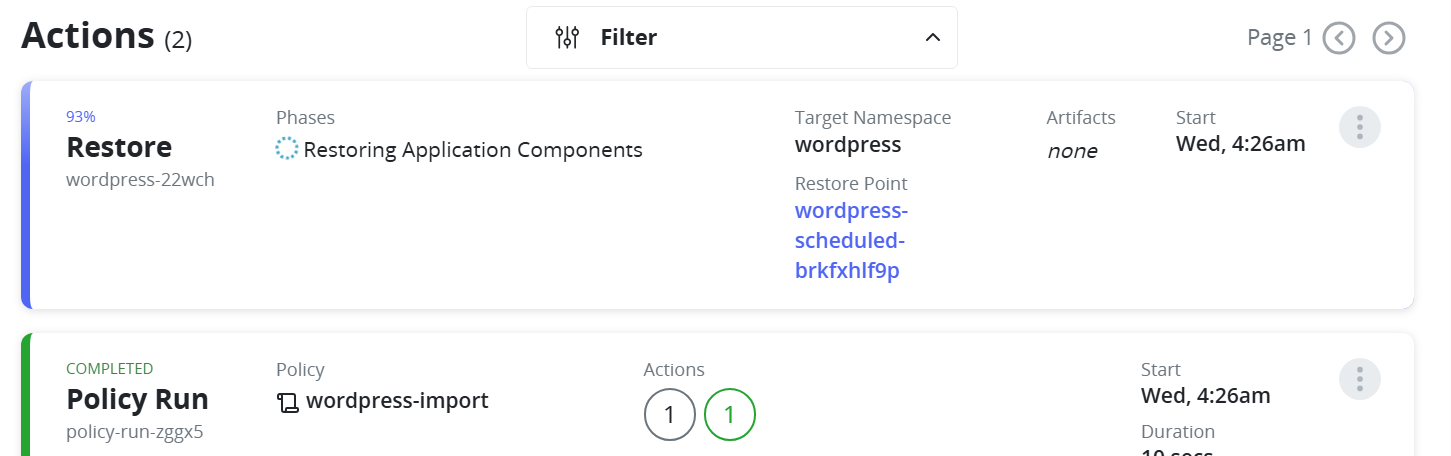
FIGURE 124. Restoring the namespace

FIGURE 125. Restore successfully completed
Cross-Cluster Restore
- Ensure Kasten K10 is deployed in the target cluster and has access to the same MinIO bucket.
- In the target cluster, create the same Location Profile pointing to the MinIO bucket.
- Go to Policies -> Create New Policy.
- Enter a policy name.
- Under Actions, select Import.
- Set the Import Frequency.
- Under Config Data for Import, paste the configuration text from the backup policy on the source cluster.
- Select the Profile for Import.
- Save the policy and run it manually for the first import.
- Navigate to Restore Points.
- Choose the desired Restore Point.
- Select a Namespace in the target cluster where the application will be restored.
- Confirm Restore. The application will be recreated with its persistent data and cluster resources.
FIGURE 126. Cross cluster restore
Observability and Monitoring for VM Fleet
Introduction
Observability for virtual machine fleets is critical in multi-cluster environments to monitor performance, resource utilization, and overall health. Red Hat Advanced Cluster Management (ACM) provides centralized observability across clusters, enabling administrators to visualize metrics for virtual machines, nodes, and workloads from a single interface.
This section covers enabling observability using ACM, configuring object storage using MinIO, and visualizing VM fleet metrics using Grafana dashboards.
Prerequisites
Before enabling observability, ensure the following:
- Red Hat Advanced Cluster Management (ACM) is installed
- Hub cluster is configured and ready
- Managed clusters are imported into the hub
- Object storage (S3-compatible such as MinIO) is available for storing metrics data
Enable Observability
Step 1 — Deploy MinIO on Hub Cluster
- Create namespace:
oc create namespace minio
- Deploy MinIO:
apiVersion: apps/v1
kind: Deployment
metadata:
  name: minio
  namespace: minio
spec:
  replicas: 1
  selector:
    matchLabels:
      app: minio
  template:
    metadata:
      labels:
        app: minio
    spec:
      containers:
      - name: minio
        image: quay.io/minio/minio:latest
        args:
        - server
        - /data
        - --console-address
        - ":9001"
        env:
        - name: MINIO_ROOT_USER
          value: admin
        - name: MINIO_ROOT_PASSWORD
          value: password123
        ports:
        - containerPort: 9000
          name: api
        - containerPort: 9001
          name: console
        volumeMounts:
        - name: data
          mountPath: /data
      volumes:
      - name: data
        emptyDir: {}
---
apiVersion: v1
kind: Service
metadata:
  name: minio
  namespace: minio
spec:
  selector:
    app: minio
  ports:
  - name: api
    port: 9000
    targetPort: 9000
  - name: console
    port: 9001
    targetPort: 9001
  type: ClusterIP
Apply:
oc apply -f minio.yaml
Verify:
oc rollout status deployment minio -n minio
oc get pods -n minio
Step 2 — Expose MinIO Console (Optional)
oc create route edge minio-console \
--service=minio \
--port=console \
-n minio
Access the console using the route:
oc get route -n minio
Login credentials:
- Username: admin
- Password: password123
Step 3 — Create Bucket for ACM
Create a bucket named:
acm-observability
Configure access:
mc alias set local http://<minio-ip>:9000 admin password123
mc ls local
mc admin user add local user1 Password1234
mc admin policy attach local readwrite --user user1
Step 4 — Create Observability Namespace
oc create namespace open-cluster-management-observability --dry-run=client -o yaml | oc apply -f -
Step 5 — Register Observability Addon
cat <<EOF | oc apply -f -
apiVersion: addon.open-cluster-management.io/v1alpha1
kind: ClusterManagementAddOn
metadata:
  name: observability-controller
spec:
  addOnMeta:
    displayName: Observability Controller
    description: "Manages Observability components"
  installStrategy:
    type: Manual
  addOnConfiguration:
    crdName: observabilityaddons.observability.open-cluster-management.io
EOF
Step 6 — Create Object Storage Secret
cat <<EOF | oc apply -f -
apiVersion: v1
kind: Secret
metadata:
  name: thanos-object-storage
  namespace: open-cluster-management-observability
type: Opaque
stringData:
  thanos.yaml: |
    type: s3
    config:
      bucket: acm-observability
      endpoint: minio.minio.svc.cluster.local:9000
      access_key: user1
      secret_key: Password1234
      insecure: true
EOF
Step 7 — Create MultiClusterObservability Resource
cat <<EOF | oc apply -f -
apiVersion: observability.open-cluster-management.io/v1beta2
kind: MultiClusterObservability
metadata:
  name: observability
  namespace: open-cluster-management-observability
spec:
  enableDownsampling: true
  observabilityAddonSpec:
    enableMetrics: true
    interval: 300
    scrapeSizeLimitBytes: 1073741824
    workers: 1
  storageConfig:
    metricObjectStorage:
      name: thanos-object-storage
      key: thanos.yaml
    storageClass: lvms-vg1
    alertmanagerStorageSize: 1Gi
    compactStorageSize: 100Gi
    receiveStorageSize: 100Gi
    ruleStorageSize: 1Gi
    storeStorageSize: 10Gi
EOF
Step 8 — Verify Deployment
watch oc get pods -n open-cluster-management-observability
On managed cluster:
oc get pods -n open-cluster-management-addon-observability
Expected components:
- Thanos (query, store, compact, receive)
- Metrics collector pods
Accessing Grafana Dashboards
Navigate to Networking → Routes
Open Grafana route and log in using hub cluster credentials
Go to Dashboards → ACM / OpenShift Virtualization
After navigating to the dashboards, you will find multiple pre-built dashboards available for monitoring the VM fleet.
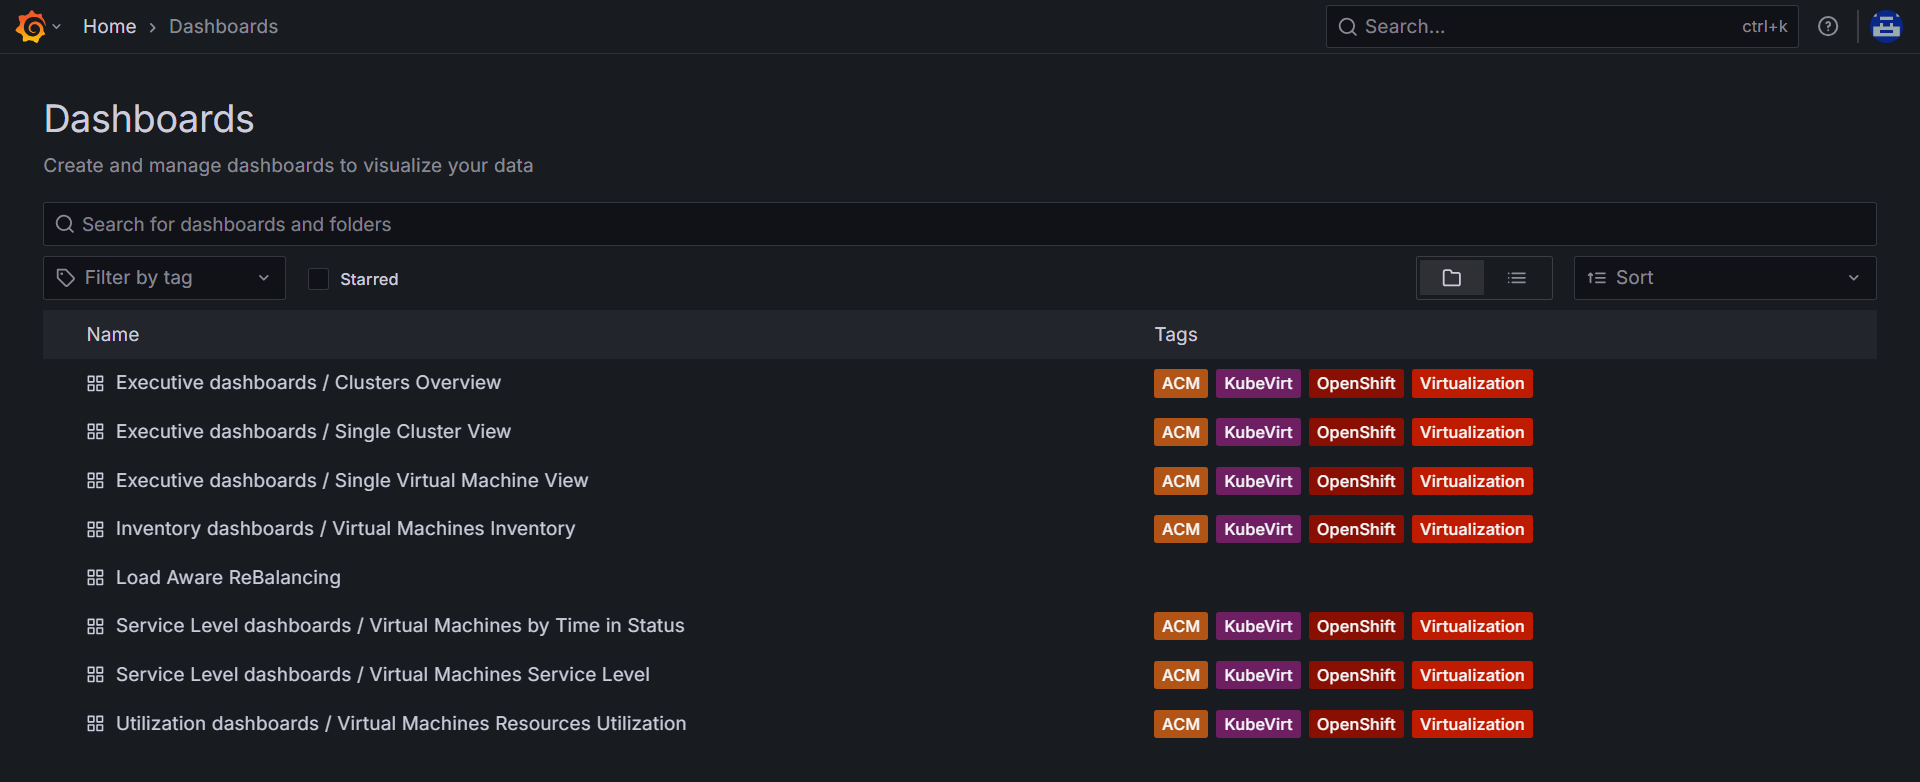 FIGURE 127. ACM / OpenShift Virtualization pre-built dashboards in Grafana
Some of the key dashboards include:
- Cluster Overview- Provides a consolidated view across all clusters including total nodes, total virtual machines, running vs stopped VMs, and overall CPU, memory, network, and storage utilization.
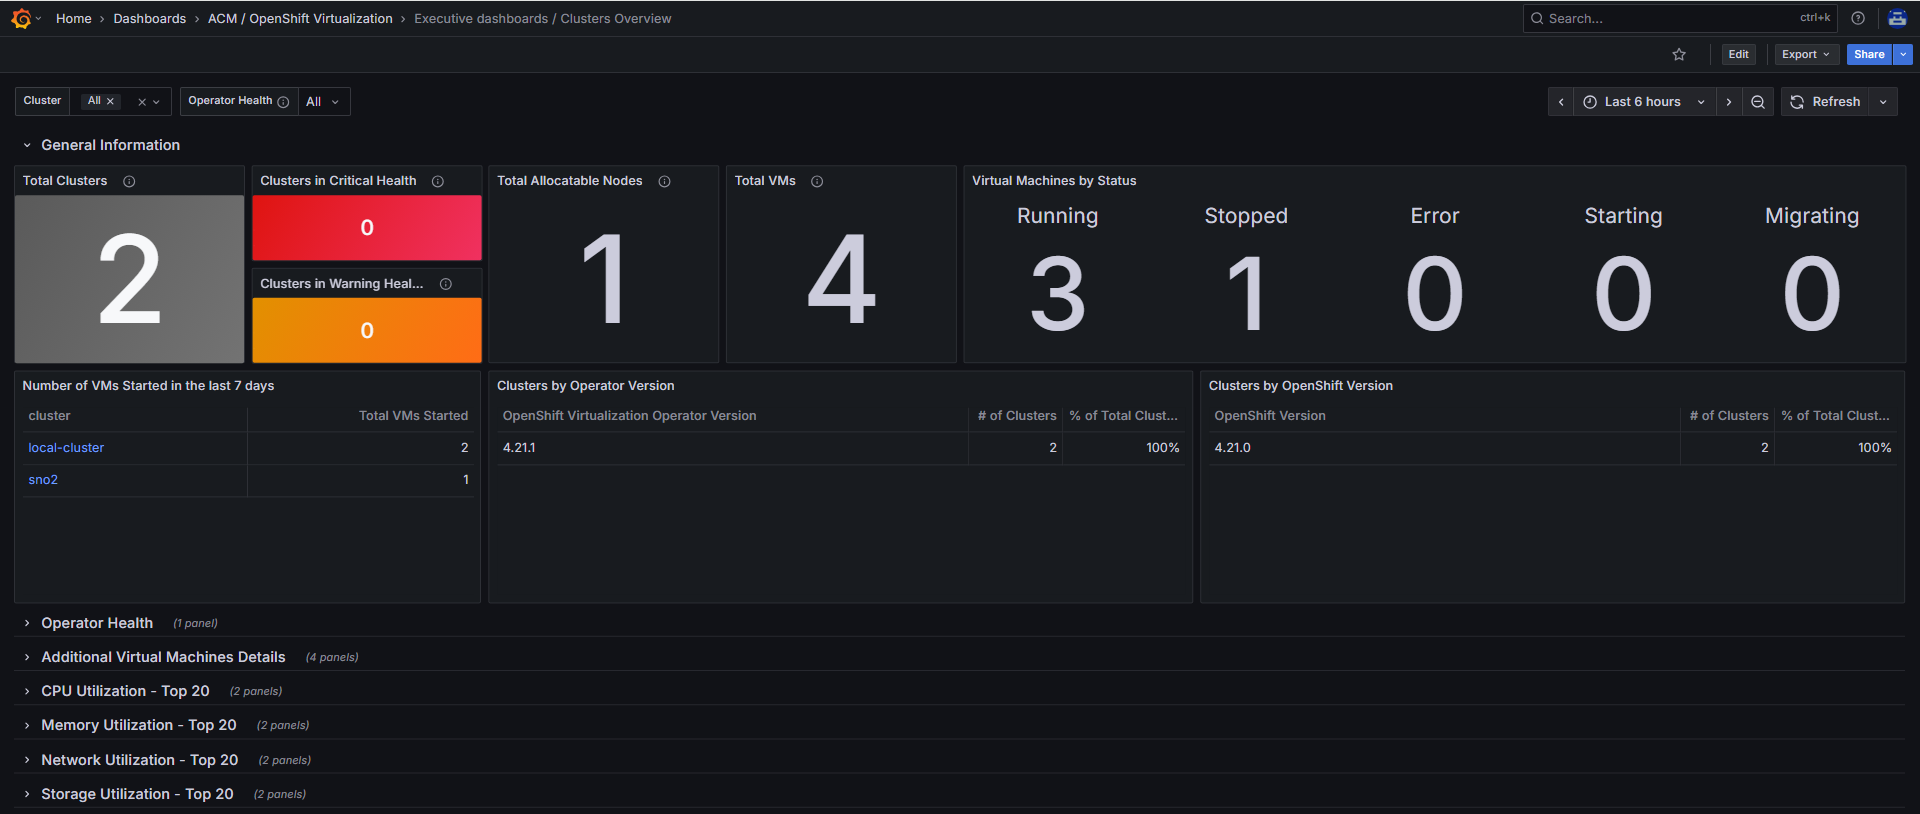 FIGURE 128. Cluster Overview Dashboard
- Single Cluster View- Provides detailed insights for an individual cluster including node count, VM count and status, resource utilization, and alerts related to virtual machines.
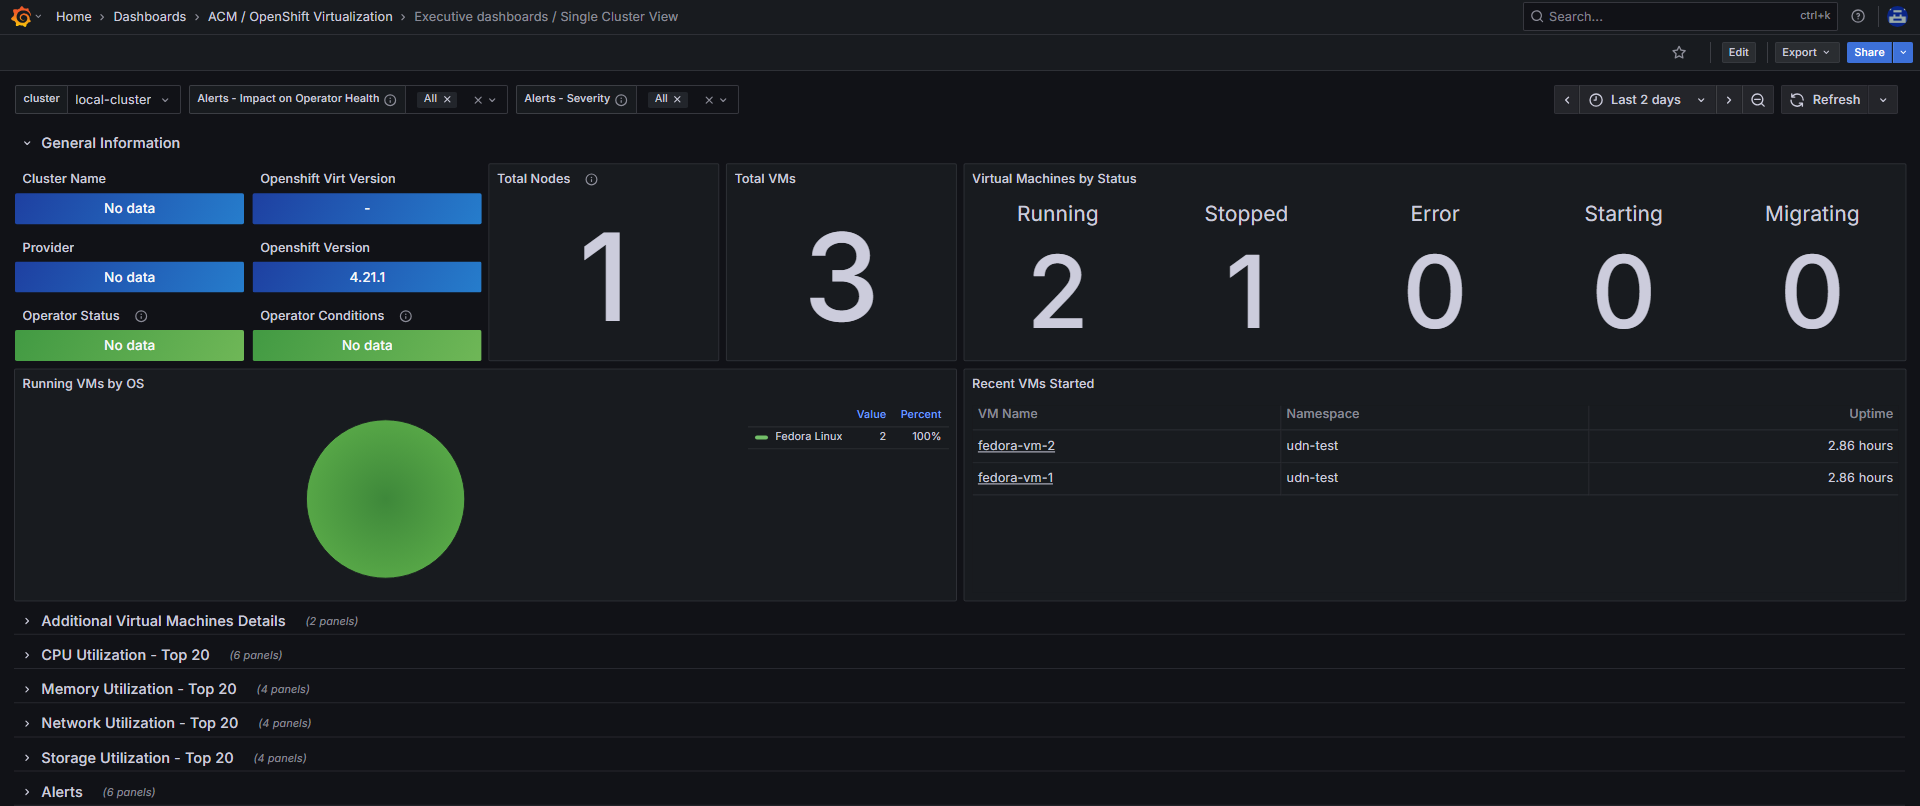 FIGURE 129. Single Cluster View Dashboard
- Single Virtual Machine View- Provides detailed metrics for a specific virtual machine including CPU and memory usage, network metrics, storage consumption, and overall VM health status.
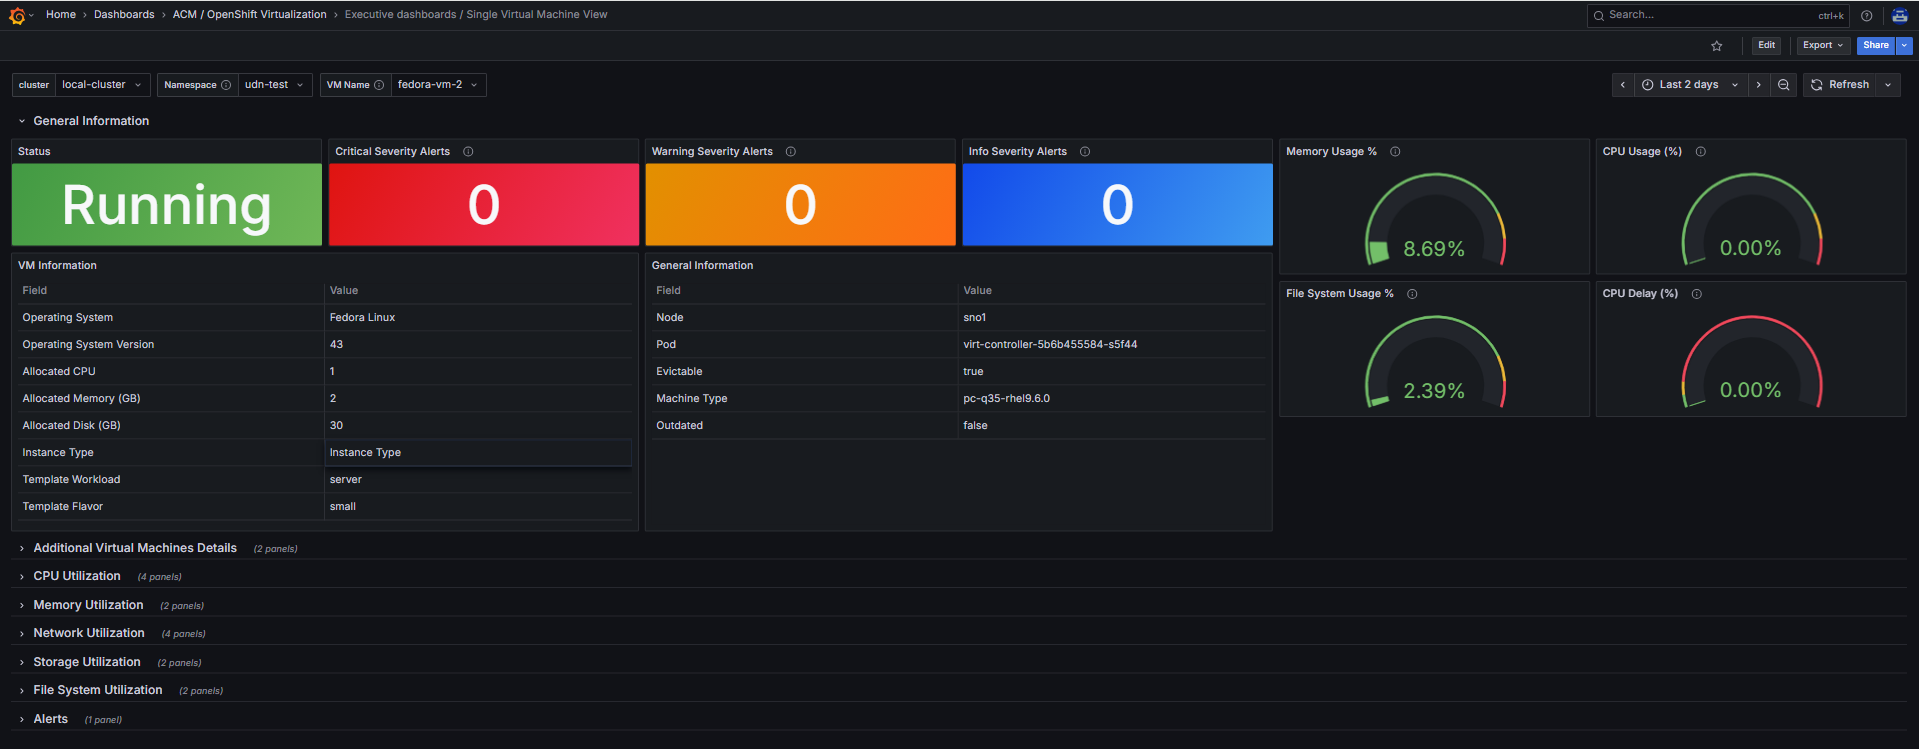 FIGURE 130. Single Virtual Machine View Dashboard
Creating Custom Dashboard
If additional metrics are required, custom dashboards can be created.
Step 1 — Create JSON Dashboard
vi vm-fleet-dashboard.json
{
  "uid": "vm-fleet-monitoring",
  "title": "OpenShift Virtualization VM Fleet Monitoring",
  "schemaVersion": 38,
  "version": 1,
  "refresh": "30s",
  "timezone": "browser",
  "editable": true,
  "time": {
    "from": "now-6h",
    "to": "now"
  },
  "tags": [
    "kubevirt",
    "openshift-virtualization",
    "acm",
    "vm-fleet"
  ],
  "panels": [
    {
      "id": 1,
      "type": "stat",
      "title": "Total VMs",
      "datasource": "Observatorium",
      "targets": [
        {
          "expr": "count(kubevirt_vm_info)"
        }
      ],
      "gridPos": {
        "h": 4,
        "w": 12,
        "x": 0,
        "y": 0
      }
    },
    {
      "id": 2,
      "type": "stat",
      "title": "Running VMs",
      "datasource": "Observatorium",
      "targets": [
        {
          "expr": "sum by (cluster)(kubevirt_vmi_phase_count{phase=\"running\"})"
        }
      ],
      "gridPos": {
        "h": 4,
        "w": 12,
        "x": 12,
        "y": 0
      }
    },
    {
      "id": 4,
      "type": "timeseries",
      "title": "VM CPU Usage",
      "datasource": "Observatorium",
      "targets": [
        {
          "expr": "rate(kubevirt_vmi_cpu_usage_seconds_total[15m])"
        }
      ],
      "gridPos": {
        "h": 8,
        "w": 12,
        "x": 0,
        "y": 6
      }
    },
    {
      "id": 5,
      "type": "timeseries",
      "title": "VM Memory Usage",
      "datasource": "Observatorium",
      "targets": [
        {
          "expr": "sum by (cluster)(kubevirt_vmi_memory_used_bytes)"
        }
      ],
      "gridPos": {
        "h": 8,
        "w": 12,
        "x": 12,
        "y": 6
      }
    },
    {
      "id": 6,
      "type": "stat",
      "title": "VMs per Cluster",
      "datasource": "Observatorium",
      "targets": [
        {
          "expr": "count by (cluster) (kubevirt_vmi_info)"
        }
      ],
      "gridPos": {
        "h": 6,
        "w": 12,
        "x": 0,
        "y": 16
      }
    },
    {
      "id": 8,
      "type": "stat",
      "title": "Successful Cross-Cluster VM Migrations",
      "datasource": "Observatorium",
      "targets": [
        {
          "expr": "count(count by (name) (max_over_time(label_replace(kubevirt_vmi_info, \"vm\", \"$1\", \"name\", \"(.*)\")[1h:])) > 1)"
        }
      ],
      "gridPos": {
        "h": 6,
        "w": 12,
        "x": 12,
        "y": 16
      }
    }
  ],
  "templating": {
    "list": []
  },
  "annotations": {
    "list": []
  }
}
Step 2 — Create Deployment Script
vi deploy-json.sh
#!/bin/bash

set -e

DASHBOARD_JSON="vm-fleet-dashboard.json"
CONFIGMAP_NAME="grafana-dashboard-vm-fleet"
NAMESPACE="open-cluster-management-observability"

oc create configmap "$CONFIGMAP_NAME" \
  --from-file="$DASHBOARD_JSON" \
  --namespace="$NAMESPACE" \
  --dry-run=client -o yaml | \
  oc label -f - grafana-custom-dashboard=true --local --dry-run=client -o yaml | \
  oc apply -f -

oc get configmap "$CONFIGMAP_NAME" -n "$NAMESPACE"
Step 3 — Deploy Dashboard
sh deploy-json.sh
You will see the following output:
 FIGURE 131. Custom Dashboard creation
Step 4 — Verify in Grafana
Navigate to Grafana → Dashboards → Custom
You will see:
OpenShift Virtualization VM Fleet Monitoring
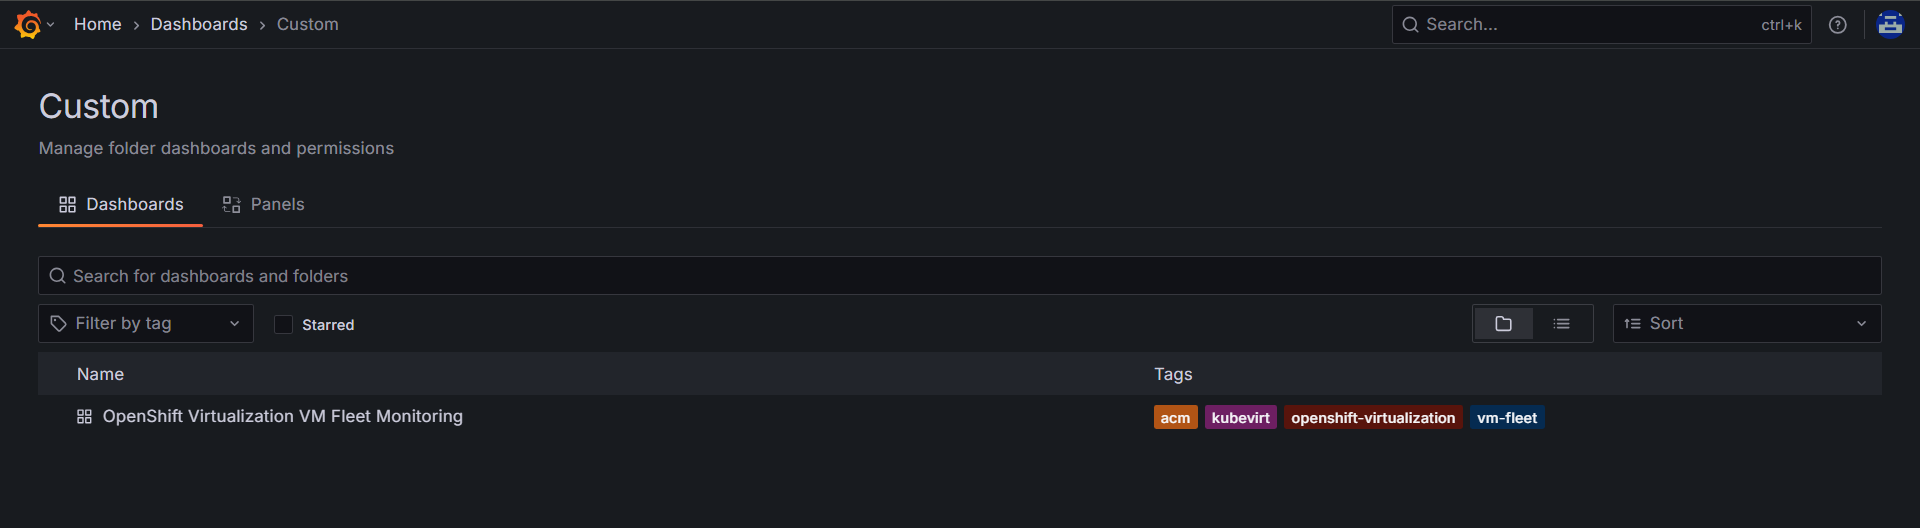
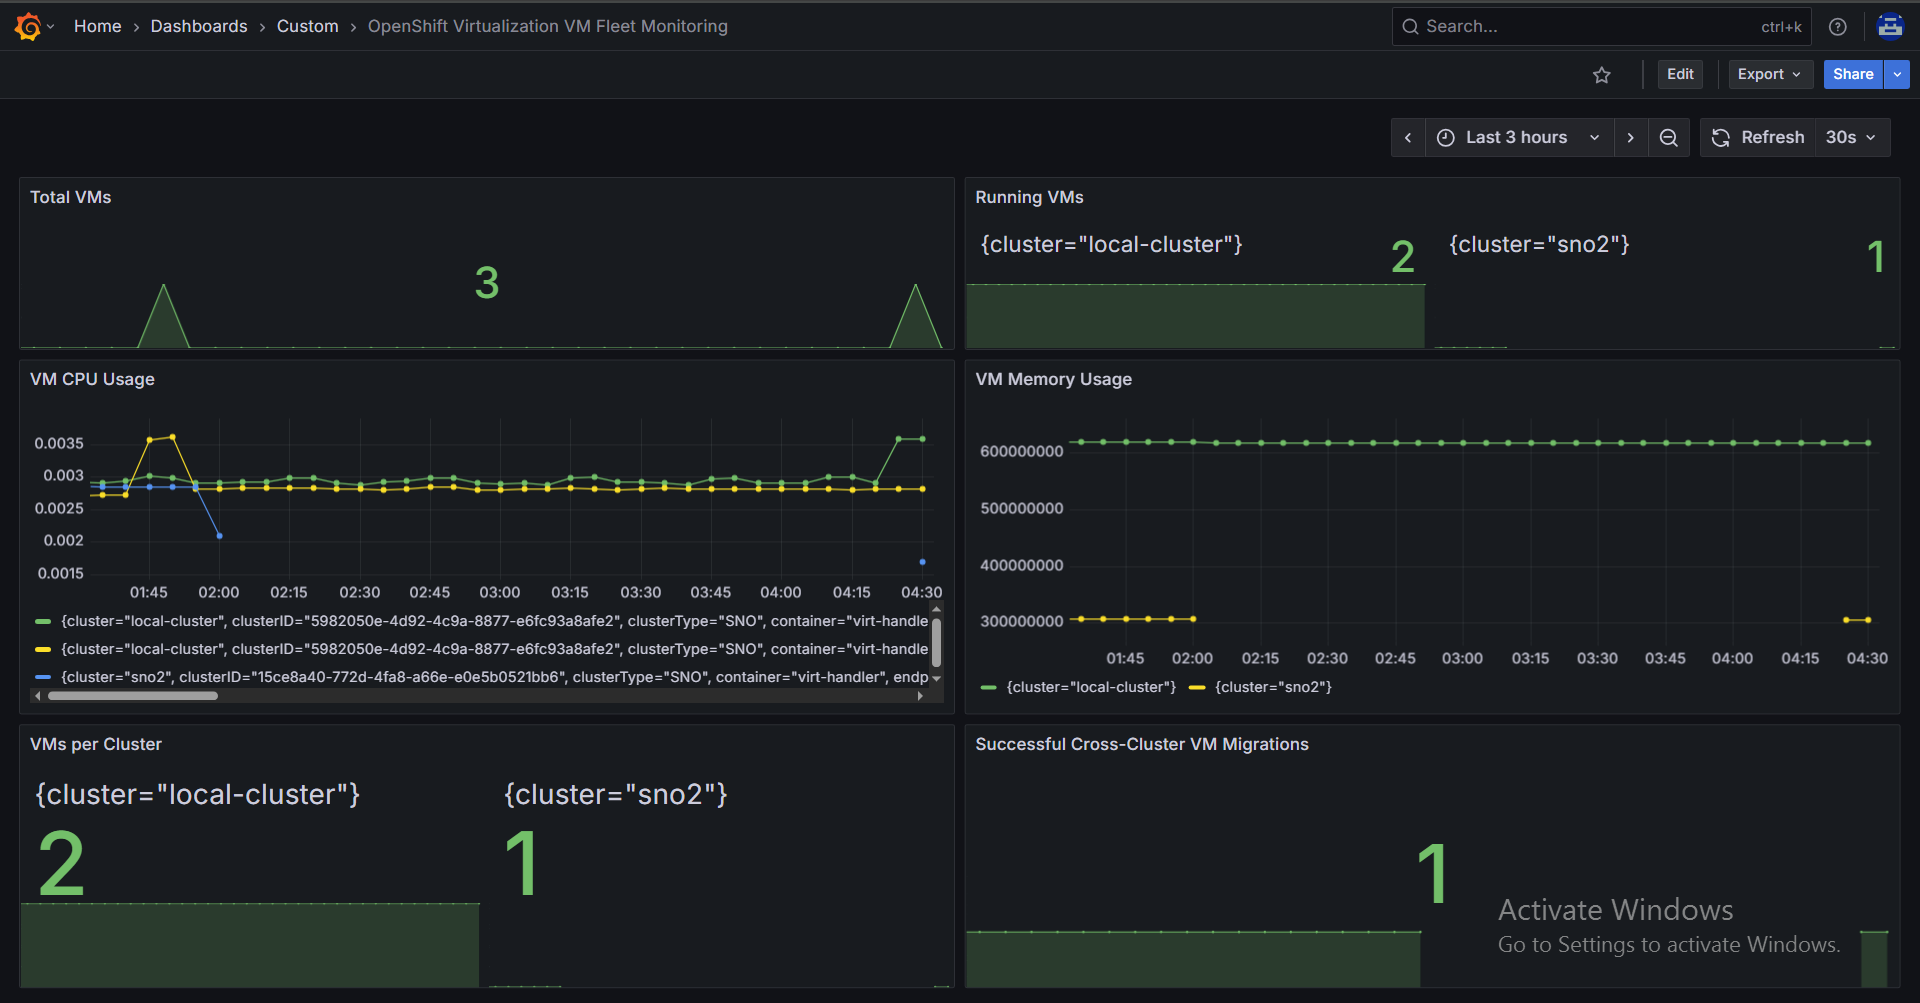 FIGURE 132. Custom OpenShift Virtualization VM Fleet Monitoring dashboard in Grafana
Notes
- Dashboard updates reflect within 30–60 seconds
- Restart Grafana if required:
oc rollout restart deployment/observability-grafana -n open-cluster-management-observability
- Modify JSON as per requirement and re-run script to update dashboard