# Host Configuration
# RHEL 8.4 Host Configuration
- Run below commands to create a user and add to wheel group
> useradd <<username>>

> passwd <<password>>

> usermod --append -G wheel <<username>>
- Open the visudo file and provide passwordless authentication to the user.
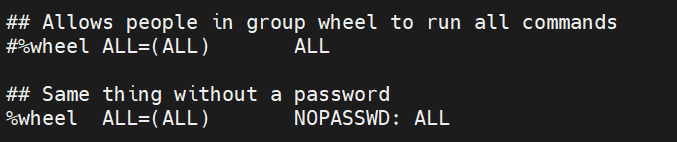
- Make sure redhat server registered with right subscription. If not, follow the below steps to attach the subscription.
> sudo subscription-manager register --username <Redhat_username> --password <Redhat_Password> --auto-attach
- Run below command in case of attaching subscription forcefully.
> sudo subscription-manager register --username <Redhat_username> --password <Redhat_Password> --auto-attach --force
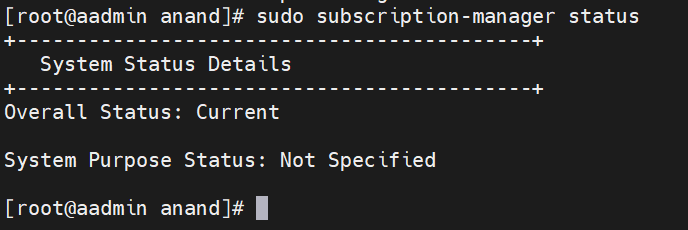
- Run the below command to check the status of the subscription.
sudo subscription-manager status
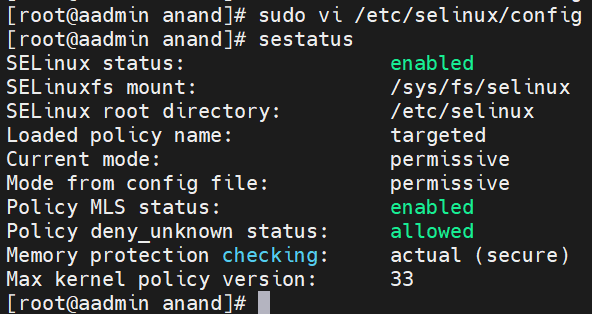
- Make sure SELinux status set to "permissive". Follow below steps to change the SELinux status.
Run the below command to check SELius status.
selinux -v
Edit the configuration file and set state to "permissive" and then reboot the system.
sudo vi /etc/selinux/config
- Disable firewall service on hosts.
> sudo systemctl stop firewalld

> sudo systemctl disable firewalld
# Docker Installation
Login as a non-root user and follow the below steps to install docker.
sudo dnf check-update
- Remove any previous Docker version:
>  sudo dnf remove docker \
>   docker-client \
>   docker-client-latest \
>   docker-common \
>   docker-latest \
>   docker-latest-logrotate \
>   docker-logrotate \
>   docker-engine
- Remove podman-manpages
> sudo dnf remove podman-manpages
- Install Docker 19.03+
> sudo dnf install -y yum-utils

> sudo yum-config-manager --add-repo <https://download.docker.com/linux/centos/docker-ce.repo>

> sudo dnf install -y docker-ce docker-ce-cli containerd.io

> sudo systemctl start docker
- Verify you are now running version 19.03+
> sudo docker version
- Compare your output with the following example to ensure the Client and Server versions are 19.03+
>  Client: Docker Engine - Community\
>  Version:           19.03.13\
>  \...\
>  Server: Docker Engine - Community\
>   Engine:\
>   Version:          19.03.13
- Verify Docker runs
> docker run hello-world
User should see something similar to this:
> Hello from Docker!
sudo systemctl start docker

sudo systemctl enable docker
Add user to Docker Group
su

usermod --append -G docker username
# Install Kubectl
cat <<EOF > /etc/yum.repos.d/kubernetes.repo

[kubernetes]

name=Kubernetes

baseurl=https://packages.cloud.google.com/yum/repos/kubernetes-el7-x86_64

enabled=1

gpgcheck=1

repo_gpgcheck=1

gpgkey=https://packages.cloud.google.com/yum/doc/yum-key.gpg
https://packages.cloud.google.com/yum/doc/rpm-package-key.gpg

EOF
yum install -y kubectl
# Installing the latest Cloud SDK version
1. Update DNF with Cloud SDK repo information:
sudo tee -a /etc/yum.repos.d/google-cloud-sdk.repo << EOM\
[google-cloud-sdk]\
name=Google Cloud SDK\
baseurl=https://packages.cloud.google.com/yum/repos/cloud-sdk-el7-x86_64\
enabled=1\
gpgcheck=1\
repo_gpgcheck=0\
gpgkey=https://packages.cloud.google.com/yum/doc/yum-key.gpg\
       https://packages.cloud.google.com/yum/doc/rpm-package-key.gpg\
EOM
2. Install the Cloud SDK
sudo dnf install google-cloud-sdk -y
- Optionally, install the below additional components
sudo dnf install google-cloud-sdk-app-engine-python -y

sudo dnf install google-cloud-sdk-app-engine-python-extras -y

sudo dnf install google-cloud-sdk-app-engine-java -y

sudo dnf install google-cloud-sdk-app-engine-go -y

sudo dnf install google-cloud-sdk-bigtable-emulator -y

sudo dnf install google-cloud-sdk-cbt -y

sudo dnf install google-cloud-sdk-cloud-build-local -y

sudo dnf install google-cloud-sdk-datalab -y

sudo dnf install google-cloud-sdk-datastore-emulator -y

sudo dnf install google-cloud-sdk-firestore-emulator -y

sudo dnf install google-cloud-sdk-pubsub-emulator -y
# Configure NTP Server
Login to your ntp server through putty and open chrony.conf file and update the below entries.
vi /etc/chrony.conf
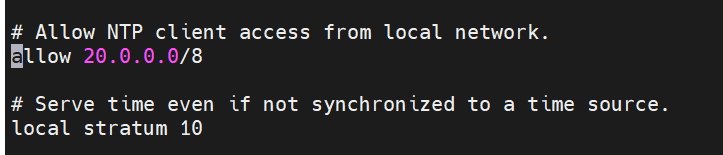
In this case my network id is 20.0.0.0/8 likewise replace with your network id.
Run the below commands.
sudo timedatectl set-timezone 'America/New_York'

sudo timedatectl set-ntp true

sudo systemctl start chronyd

sudo systemctl enable chronyd

sudo systemctl restart chronyd
# Configure NTP client:
1.Install chrony by using the below command
sudo yum install chrony -y
2.update the ntp server in the below file
sudo vi /etc/chrony.conf

3.Restart the ntp service
sudo systemctl restart chronyd
# Ubuntu 18.04 or 20.04 Host Configuration
- Create a non-root user and enable passwordless sudo for the user.
> sudo --i

> usermod -aG sudo user
- Open visudo file, Find a line which contains includedir /etc/sudoers.d. Add the below line.
> visudo

> username ALL=(ALL) NOPASSWD: ALL
for ex: user1 ALL=(ALL) NOPASSWD: ALL

# Install NTP Client
- Run the below command cto install NTP client
sudo apt-get install chrony
- open the chrony configuration file and add the ntp server as show below.
sudo vi /etc/chrony/chrony.conf

- Validate package manager and disable AppAromor.
> sudo apt-get check

> sudo systemctl stop apparomor

> sudo systemctl disable apparomor

> sudo systemctl status apparmor  grep "Active"
- Disable ufw and verify by following below steps
> sudo ufw disable

> sudo ufw status
# Docker Installation
- Remove any previous Docker version:
sudo apt-get remove docker docker-engine docker.io containerd runc
- Update your package manager:
sudo apt-get update
- Install Docker 19.03+
sudo apt-get install \
  apt-transport-https \
  ca-certificates \
  curl \
  gnupg-agent \
  software-properties-common \
  docker.io
- Verify you are now running version 19.03+:
sudo docker version
- Compare your output with the following example to ensure the Client and Server versions are 19.03+
 Client: Docker Engine - Community\
 Version:           19.03.13\
 \...\
 Server: Docker Engine - Community\
  Engine:\
  Version:          19.03.13
# Installing Kubectl
sudo apt-get update && sudo apt-get install -y apt-transport-https gnupg2
curl -s https://packages.cloud.google.com/apt/doc/apt-key.gpg  sudo
apt-key add -
echo "deb https://apt.kubernetes.io/ kubernetes-xenial main"  sudo
tee -a /etc/apt/sources.list.d/kubernetes.list
sudo apt-get update

sudo apt-get install -y kubectl
# Installing the latest Cloud SDK version
- Add the Cloud SDK distribution URI as a package source
> echo "deb [signed-by=/usr/share/keyrings/cloud.google.gpg]
> https://packages.cloud.google.com/apt cloud-sdk main"  sudo tee -a
> /etc/apt/sources.list.d/google-cloud-sdk.list
- Make sure you have [apt-transport-https]{.ul} (opens new window) installed
sudo apt-get install apt-transport-https ca-certificates gnupg
- Import the Google Cloud public key
> curl https://packages.cloud.google.com/apt/doc/apt-key.gpg  sudo
> apt-key --keyring /usr/share/keyrings/cloud.google.gpg add --
- Update and install the Cloud SDK:
sudo apt-get update && sudo apt-get install google-cloud-sdk
- Optionally, install any of these additional components (opens new window).
sudo apt-get install google-cloud-sdk -y

sudo apt-get install google-cloud-sdk-app-engine-python -y

sudo apt-get install google-cloud-sdk-app-engine-python-extras -y

sudo apt-get install google-cloud-sdk-app-engine-java -y

sudo apt-get install google-cloud-sdk-app-engine-go -y

sudo apt-get install google-cloud-sdk-bigtable-emulator -y

sudo apt-get install google-cloud-sdk-cbt -y

sudo apt-get install google-cloud-sdk-cloud-build-local -y

sudo apt-get install google-cloud-sdk-datalab -y

sudo apt-get install google-cloud-sdk-datastore-emulator -y

sudo apt-get install google-cloud-sdk-firestore-emulator -y

sudo apt-get install google-cloud-sdk-pubsub-emulator -y
# Configuring Anthos Admin WorkStation
This section contains the steps to configure Anthos Admin workstation.
- Login with the account granted access to Anthos
gcloud auth login
- Run the below command to update the Cloud SDK.
gcloud components update
- Log in with your Google account so to manage your services and service accounts:
gcloud auth login --update-adc
# Install bmctl tool
bmctl is a command line tool to created and interact with the Anthos clusters on bare metal.
- Create new directory
> cd \~

> mkdir baremetal

> cd baremetal
- Download bmctl tool from Cloud Storage Bucket and provide executable permissions.
> gsutil cp gs://anthos-baremetal-release/bmctl/1.8.0/linux-amd64/bmctl
> bmctl

> chmod a+x bmctl
- Enable following API's either by logging into Google Gloud Console or by executing the below commands from admin work station.
> gcloud services enable --project=*PROJECT_ID* \

> servicemanagement.googleapis.com \

> servicecontrol.googleapis.com \
NOTE
PROJECT_ID replace with your project id.
- To set the default project, issue the following command, and replace PROJECT_ID with your Google Cloud project ID:
gcloud config set project ***PROJECT_ID***
# Configuring service accounts for use with Connect
Make sure you are in the baremetal directory.
Enable the necessary Google services in your Cloud project:
gcloud services enable --project=***PROJECT_ID*** \

container.googleapis.com \

gkeconnect.googleapis.com \

gkehub.googleapis.com \

cloudresourcemanager.googleapis.com \

anthos.googleapis.com
3.Create the connect-agent service account with the necessary role and download the key file. These steps create the connect-agent.json key file in the baremetal directory:
a.Create service account:
gcloud iam service-accounts create connect-agent-svc-account
--project=*PROJECT_ID*
b. Grant the gkehub.connect role:
> gcloud projects add-iam-policy-binding *PROJECT_ID* --member="serviceAccount:connect-agent-svc-account@*PROJECT_ID*.iam.gserviceaccount.com" --role="roles/gkehub.connect"
C.Download the service account JSON key file:
> gcloud iam service-accounts keys create connect-agent.json  --iam-account=connect-agent-svc-account@***PROJECT_ID***.iam.gserviceaccount.com
--project=***PROJECT_ID***
4.Create the connect-register service account with the necessary role and download the key file. These steps create the connect-register.json key file in the baremetal directory:
a. Create service account:
> gcloud iam service-accounts create connect-register-svc-account --project=***PROJECT_ID***
b. Grant the gkehub.admin role:
> gcloud projects add-iam-policy-binding ***PROJECT_ID*** --member="serviceAccount:connect-register-svc-account@***PROJECT_ID***.iam.gserviceaccount.com" --role=roles/gkehub.admin
c. Download the service account JSON key file:
> gcloud iam service-accounts keys create connect-register.json --iam-account=connect-register-svc-account@***PROJECT_ID***.iam.gserviceaccount.com --project=***PROJECT_ID***
# Configuring a service account for use with Logging and Monitoring
To create the service account and key file for Logging and Monitoring:
Make sure you are in the baremetal directory.
Enable the necessary Google services in your Cloud project:
gcloud services enable --project ***PROJECT_ID*** \

anthos.googleapis.com \

anthosaudit.googleapis.com \

anthosgke.googleapis.com \

cloudresourcemanager.googleapis.com \

container.googleapis.com \

gkeconnect.googleapis.com \

gkehub.googleapis.com \

serviceusage.googleapis.com \

stackdriver.googleapis.com \

monitoring.googleapis.com \

logging.googleapis.com
- Create the logging-monitoring service account with the necessary roles and download the key file. These steps create the cloud-ops.json key file in the baremetal directory:
a. Create service account
gcloud iam service-accounts create logging-monitoring-svc-account --project=***PROJECT_ID***
b. Grant the logging.logWriter role
gcloud projects add-iam-policy-binding ***PROJECT_ID*** --member="serviceAccount:logging-monitoring-svc-account@***PROJECT_ID***.iam.gserviceaccount.com"
--role="roles/logging.logWriter"
c. Grant the monitoring.metricWriter role
gcloud projects add-iam-policy-binding ***PROJECT_ID*** --member="serviceAccount:logging-monitoring-svc-account@***PROJECT_ID***.iam.gserviceaccount.com"
--role="roles/monitoring.metricWriter"
d. Grant the roles/stackdriver.resourceMetadata.writer role
gcloud projects add-iam-policy-binding ***PROJECT_ID*** --member="serviceAccount:logging-monitoring-svc-account@***PROJECT_ID***.iam.gserviceaccount.com"
--role="roles/stackdriver.resourceMetadata.writer"
e. Grant the roles/monitoring.dashboardEditor role
gcloud projects add-iam-policy-binding ***PROJECT_ID*** --member="serviceAccount:logging-monitoring-svc-account@***PROJECT_ID***.iam.gserviceaccount.com"
--role="roles/monitoring.dashboardEditor"
f. Download the service account JSON key file:
gcloud iam service-accounts keys create cloud-ops.json --iam-account=logging-monitoring-svc-account@***PROJECT_ID***.iam.gserviceaccount.com
--project=***PROJECT_ID***