# Istio with Kiali dashboard deployment on HPECP
# Introduction
Istio is a service mesh technology that helps in service-to-service communications. It provides an easy way to create a network of deployed services with load balancing, service-to-service authentication, monitoring and many more without requiring any changes in service code. Istio deploys a special sidecar proxy that intercepts all network communication between microservices, using Istio's control plane functionality. Kiali works with Istio to visualize the service mesh topology. Kiali is a management console for Istio, and as such, Istio is a requirement. It provides and controls the service mesh
Pre-requisites
- Access to HPECP WEBGUI
# Flow Diagram
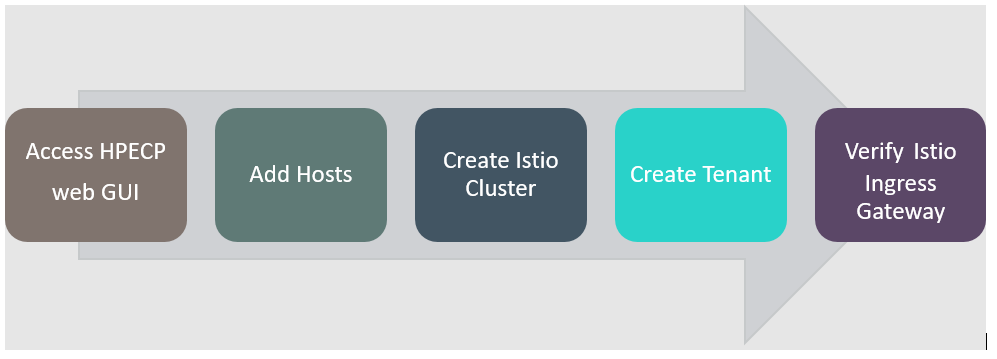
Figure 83: Istio cluster creation flow diagarm
# Deployment Process
# Create HPECP ISTIO cluster
Add kubernetes hosts by following below steps.
Login into HPECP platform by providing required username and password.
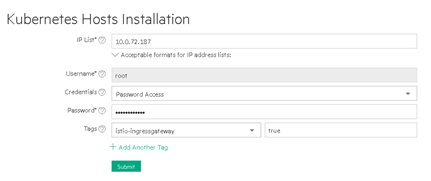
Click on Kubernetes tab in the left panel and navigate to the Kubernetes Hosts Installation page.
Add hosts by providing IP address, credentials and set istio-ingressgateway tag to true.
NOTE
Refer to Add Kubernet Hosts section to get more details on adding kubernetes hosts.
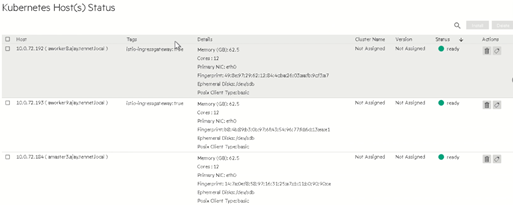
- Node status will become "Ready" once node installed successfully. Make sure that tag is set to istio-ingressgateway as shown in below snapshot.
# Create the HPECP ISTIO cluster
Follow below steps to create ISTIO cluster.
Navigate to Cluster creation page under Kubernetes menu and click on Create Kubernetes Cluster.
For host configuration, select the required master and worker nodes and click on Next.
Cross verify cluster configuration details and Click on Next.
Provide authentication details if required.
Select Istio application under Application Configuration. And click on Next.
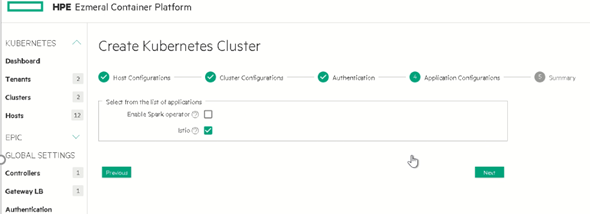
- Next page shows up the summary and click on submit create the cluster. Cluster status shows "ready" once the cluster created successfully.
NOTE
Refer to Cluster Creation section to get more information on cluster creation process.
Once the tenant is created, Necessary Istio ingress gateway and Kiali application access points will be created. Follow below steps to create tenant.
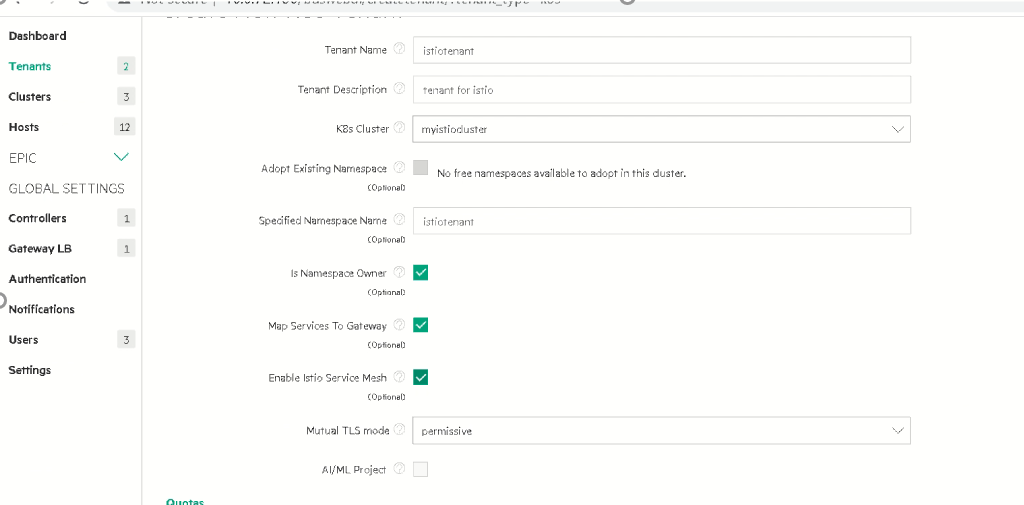
Select tenant option under Kubernetes menu and click on create tenant.
As shown in the below snapshot, select Istio cluster in "K8s Cluster" drop down menu and check the option "Enable Istio Service Mesh".
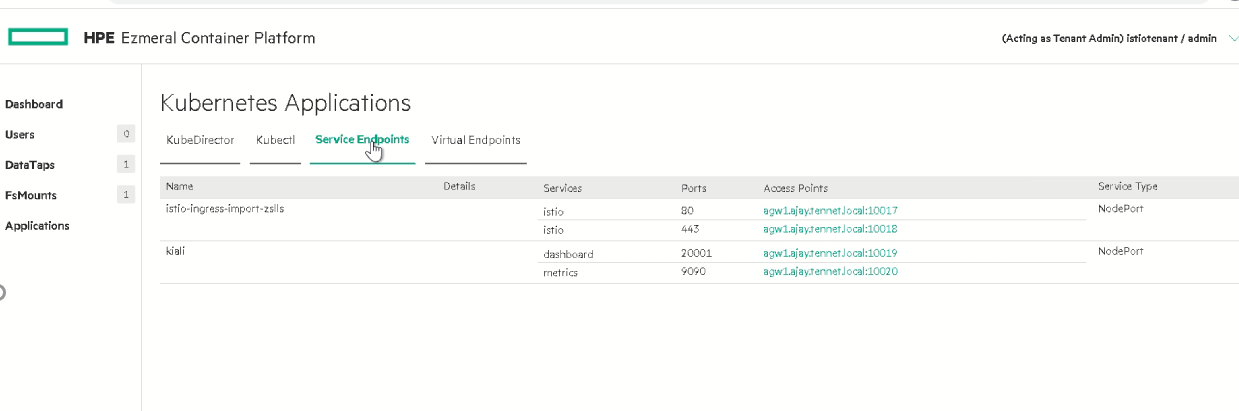
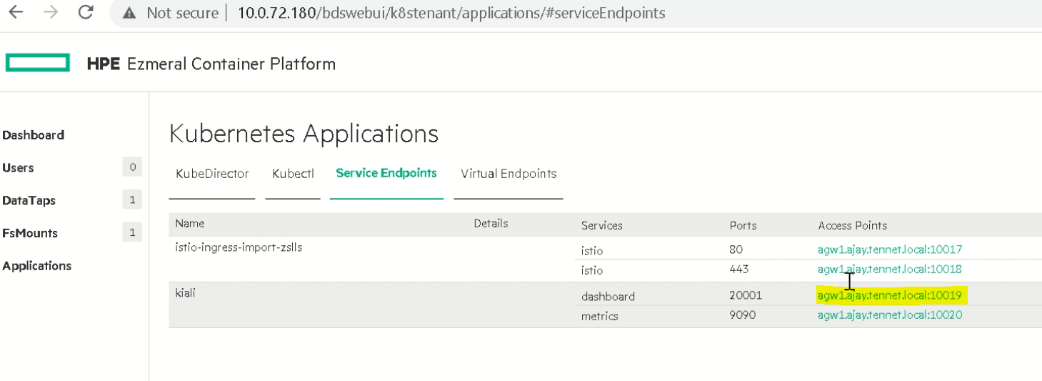
- Once the tenant is created, click on the tenant and go to the application menu. We can notice ingress gateway address and Kiali dashboard under "Service Endpoints" as shown in the blow snapshot.
# Access the Kubernetes Cluster
Navigate to Dashboard, download kubeconfig and upload to the installer machine. Export the downloaded config file to KUBECONFIG to access the cluster.
> export KUBECONFIG=<kubeconfig_file_path>Get node details by running below command.
> kubectl get nodesGet namespace details by running below command.
> kubect get ns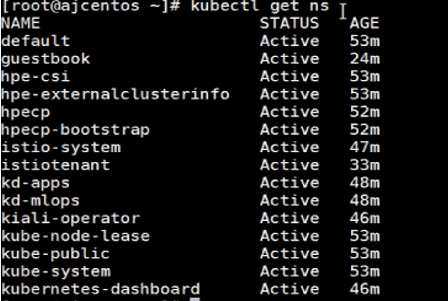
# Deploy Application
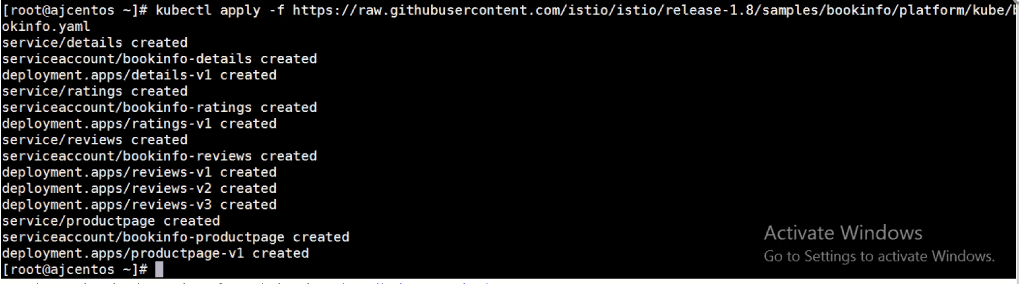
- Application will be deployed under Istio tenant namespace. Execute below command to deploy application. Here we are using sample application provided by Istio
> kubectl apply -f <https://raw.githubusercontent.com/istio/istio/release-1.8/samples/bookinfo/platform/kube/bookinfo.yaml>
Output of the above command looks like below.
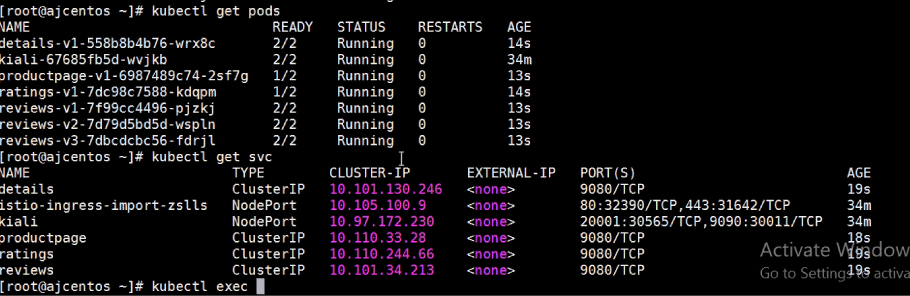
- Verify if Pods and Services are running.
- Verify the application status by running below command.
> kubectl exec "$(kubectl get pod -l app=ratings -o jsonpath='{.items[0].metadata.name}')" -c ratings -- curl productpage:9080/productpage
- Deploy ingress gateway for application.
> kubectl apply -f <https://raw.githubusercontent.com/istio/istio/release-1.8/samples/bookinfo/networking/bookinfo-gateway.yaml>
- Verify gateway status by running below command.
> kubectl get gateway

- Edit the gateway and provide a custom domain.
> kubectl edit gateway bookinfo-gateway
Modify the hosts section under spec with domain (Ex: mybook.example.com) as shown in screenshot.

Note Istio ingress hostname and port under Service Endpoints in Kubernetes Application.

Update hosts file as below so that when accessing application domain, domain points to ingress IP address
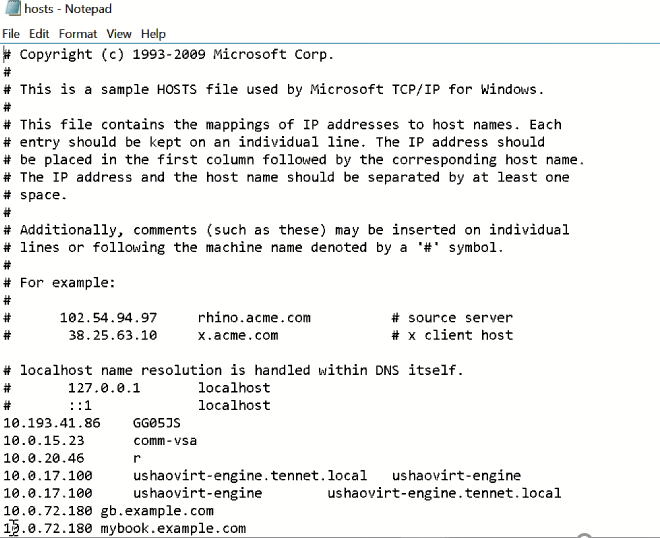
NOTE
In above example agw1.ajay.tennet.local resolves to 10.0.72.180
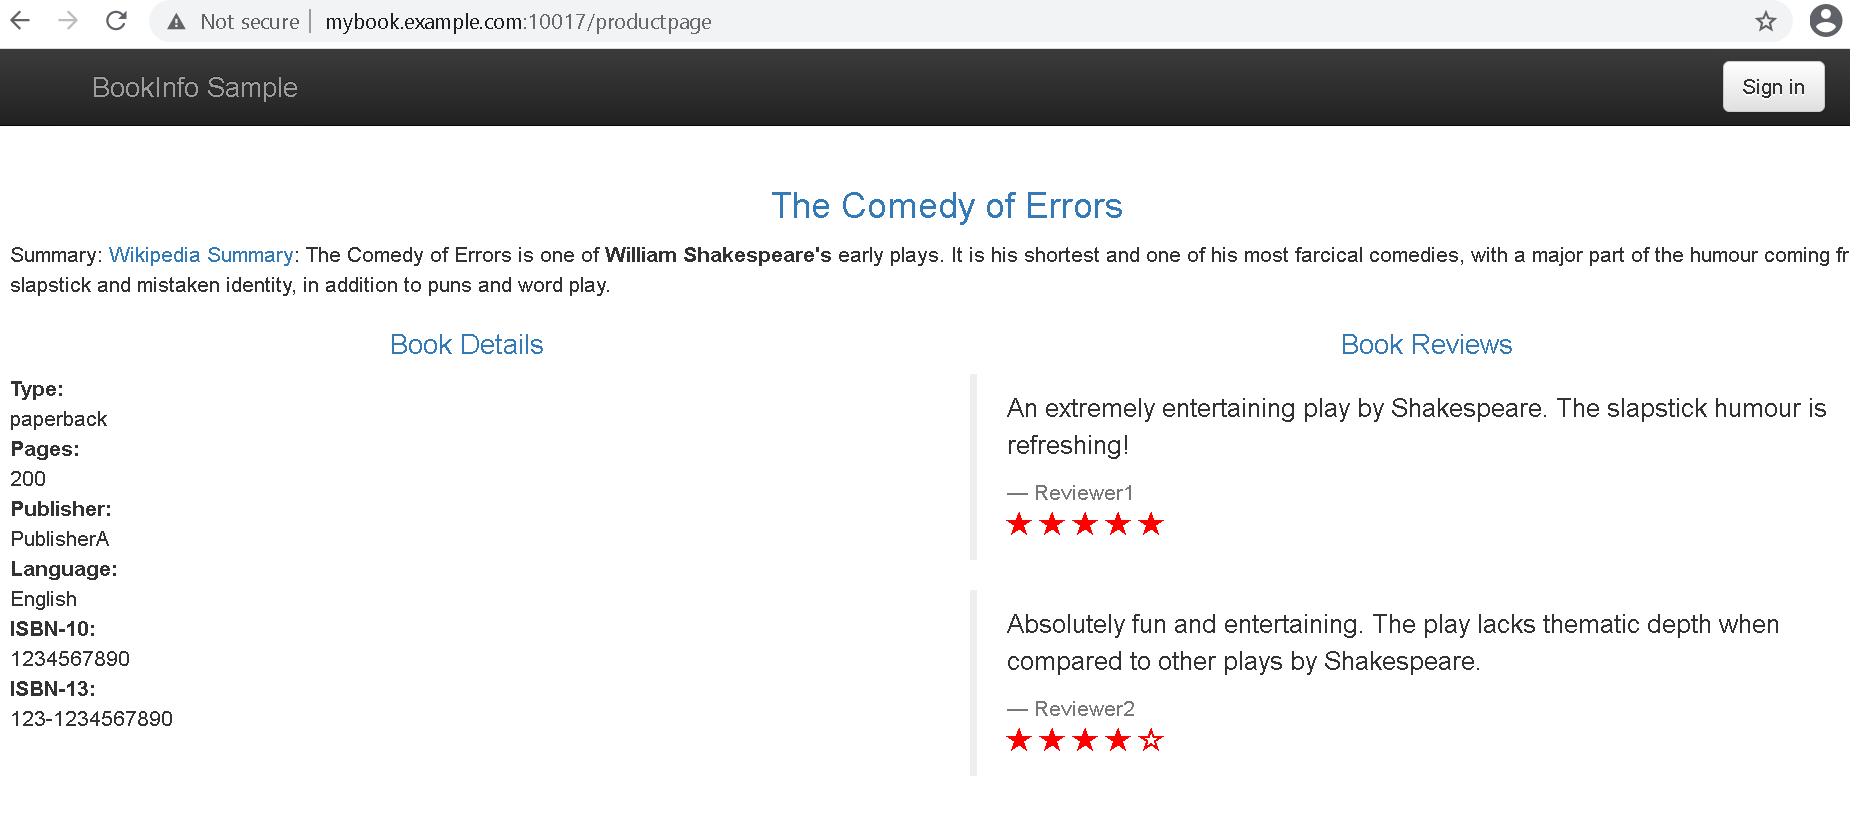
Access the application via browser using custom domain and ingress port as below. Different versions of website will be loaded each time when website is accessed.
Access Kiali
Open HPECP WEBUI and under Istio tenant access the Kiali URL under application/service Endpoints
A popup window will be appearing with token key and to proceed to Kiali. Copy the token and when asked at login, provide this token
Once Kiali dashboard is loaded, go to service section and click "review" service of the website.

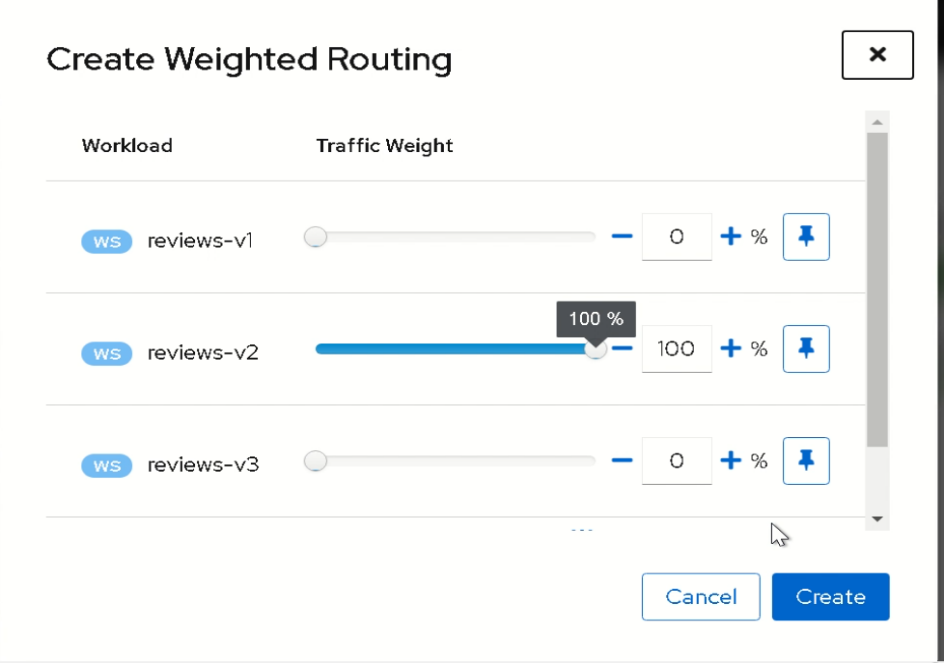
Notice that service has 3 versions of microservices as shown in below graph. We can restrict the flow of traffic by using option "Update Weighted Routing" under Actions.
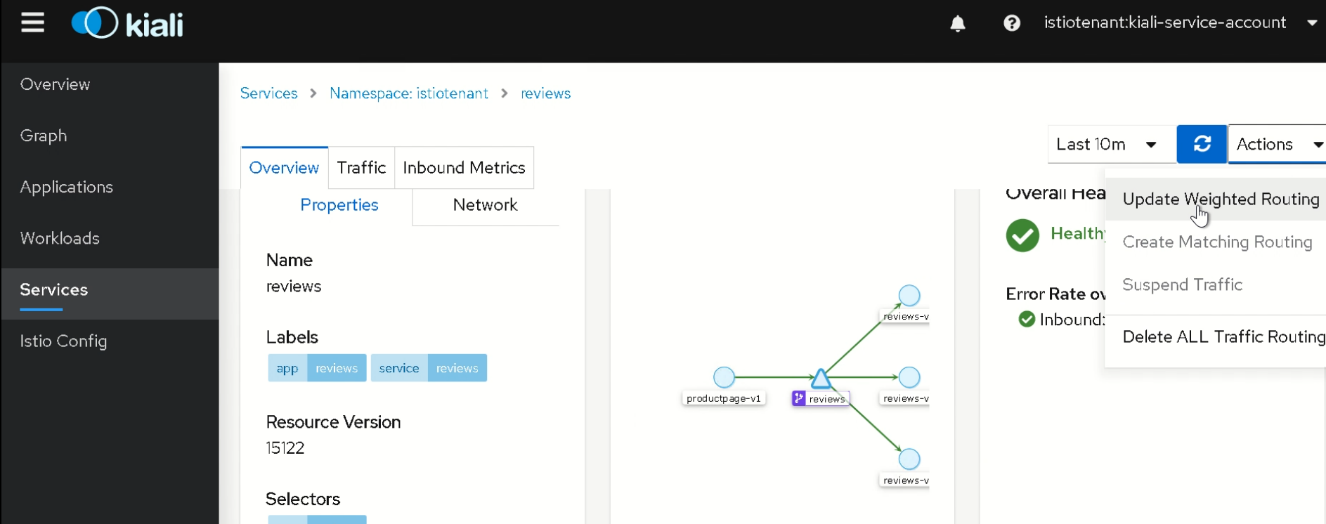
Below is snippet of traffic allowed only to version 2 of "reviews" microservice application.