# Red Hat Advanced Cluster Management for Kubernetes
# Introduction
Red Hat Advanced Cluster Management for Kubernetes provides end-to-end management visibility and control to manage your Kubernetes environment. Take control of your application modernization program with management capabilities for cluster creation, application lifecycle, and provide security and compliance for all of them across data centers and hybrid cloud environments. Clusters and applications are all visible and managed from a single console, with built-in security policies. Run your operations from anywhere that Red Hat OpenShift Container Platform runs, and manage your Kubernetes clusters.
With Red Hat Advanced Cluster Management for Kubernetes:
Work across a range of environments, including multiple data centers, private clouds and public clouds that run Kubernetes clusters.
Easily create OpenShift Container Platform Kubernetes clusters and manage cluster lifecycle in a single console.
Enforce policies at the target clusters using Kubernetes-supported custom resource definitions.
Deploy and maintain day two operations of business applications distributed across your cluster landscape.
Figure 121 shows Architecture of Advanced Cluster Management for Kubernetes
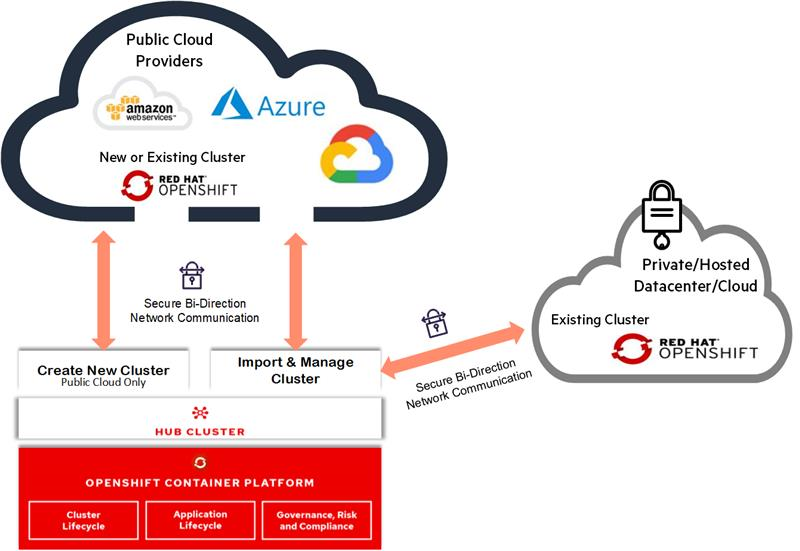
Figure 121. Advanced Cluster Manageent Architecture
# Installing Red Hat Advanced Cluster Management from the console
PREREQUISITES
Hub Cluster
- OpenShift Container Platform 4.x successfully deployed.
- Operator Hub availability.
Managed Clusters
- OpenShift 4.x on from public cloud providers (Amazon Web Services,
- Google Cloud, IBM and Microsoft Azure) or Private clouds (Openstack,
- OpenShift).
# Flow Diagram
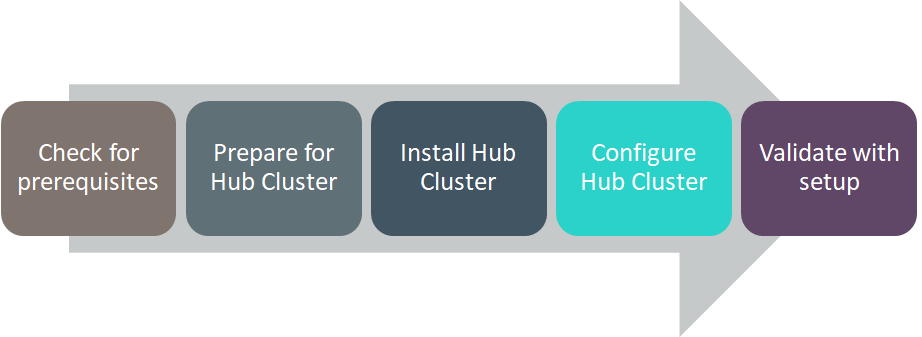
Figure 122. Red Hat Advanced Cluster Management Solution Flow Diagram
# Installation
Following steps needs to perform prior to installing Advanced Cluster Management from the OpenShift Console.
Create Namespce
Create Pull Secrets
Follow below steps to creating namespace.
Create a hub cluster namespace for the operator requirements:
In the OpenShift Container Platform console navigation, select Administration > Namespaces.
Select create Namespace.
Provide a name for your namespace. This is the namespace that you use throughout the installation process.
NOTE
The value for namespace might be referred to as Project in the OpenShift Container Platform environment.
Follow below steps to create secrets.
Switch your project namespace to the one that you created in step 1. This ensures that the steps are completed in the correct namespace. Some resources are namespace specific.
In the OpenShift Container Platform console navigation, select Administration > Namespaces.
Select the namespace that you created in step 1 from the list.
Create a pull secret that provides the entitlement to the downloads.
Copy your OpenShift Container Platform pull secret from cloud.redhat.com
In the OpenShift Container Platform console navigation, select Workloads > Secrets.
Select Create > Image Pull Secret.
Enter a name for your secret.
Select Upload Configuration File as the authentication type.
In the Configuration file field, paste the pull secret that you copied from cloud.redhat.com.
Select Create to create the pull secret.
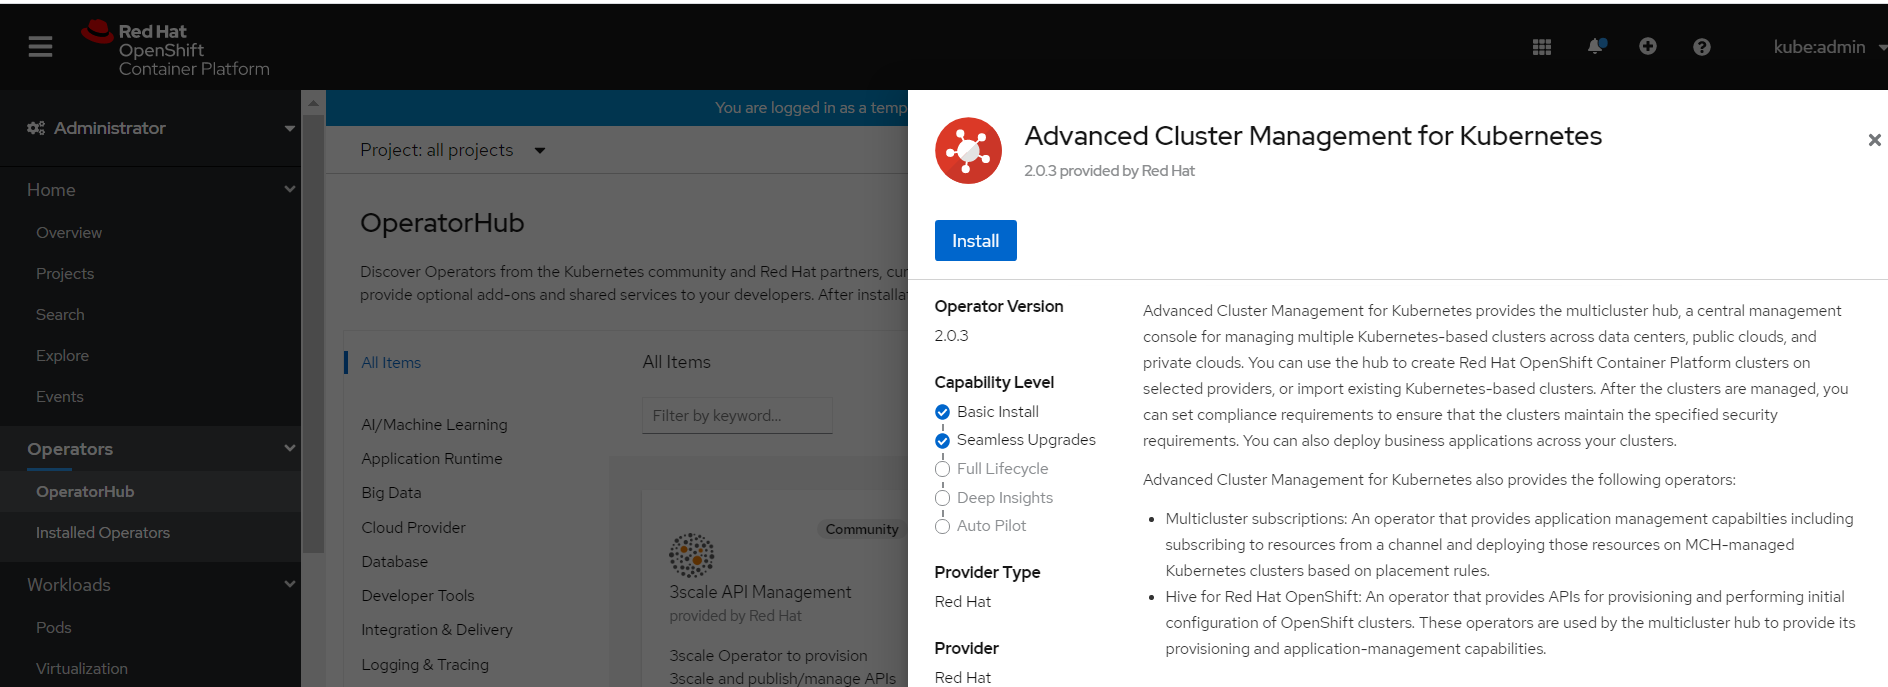
# Installing Advanced Cluster Management Operator
In the OpenShift Container Platform console navigation, select Operators > OperatorHub.
Select Red Hat Advanced Cluster Management.
Select Install.
- Update the values, if necessary.
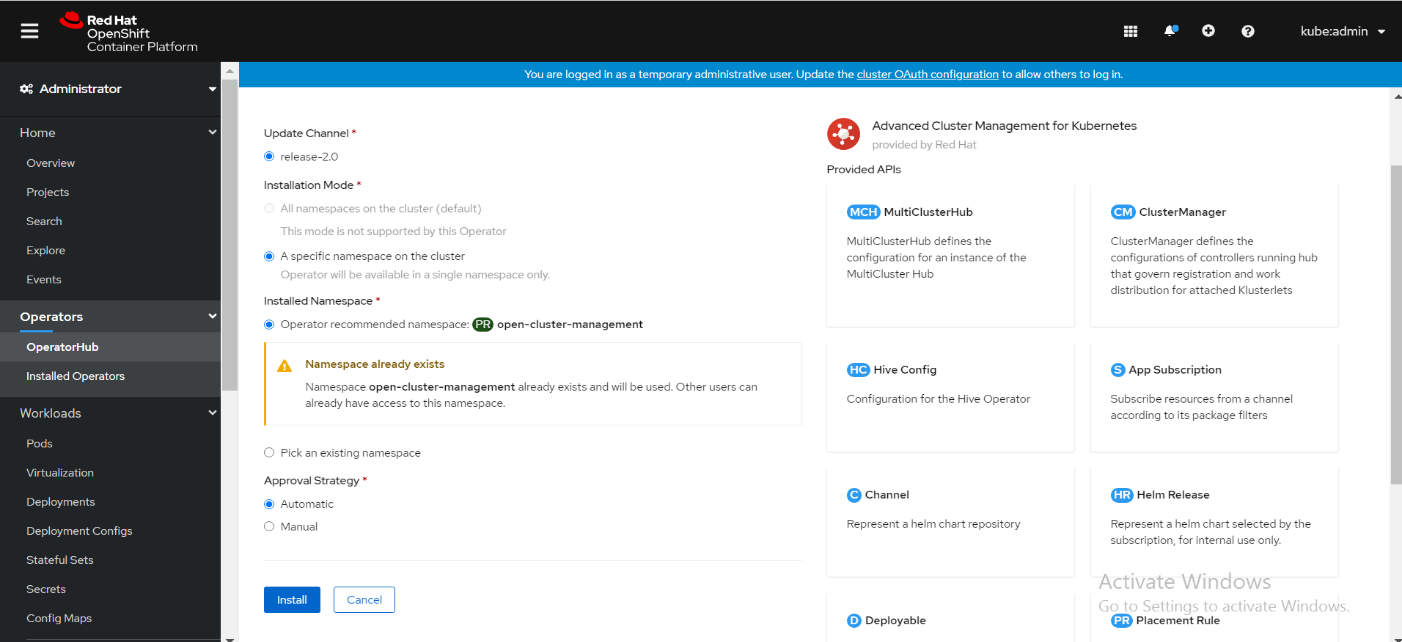
Select A specific namespace on the cluster for the Installation Mode option.
- Select openshift-storage namespace from the drop down menu.
selected by default for the Update Channel option.
Select an Approval Strategy:
Automatic specifies that you want OpenShift Container Platform to upgrade OpenShift Container Storage automatically.
Manual specifies that you want to have control to upgrade OpenShift Container Storage manually
Select Install.
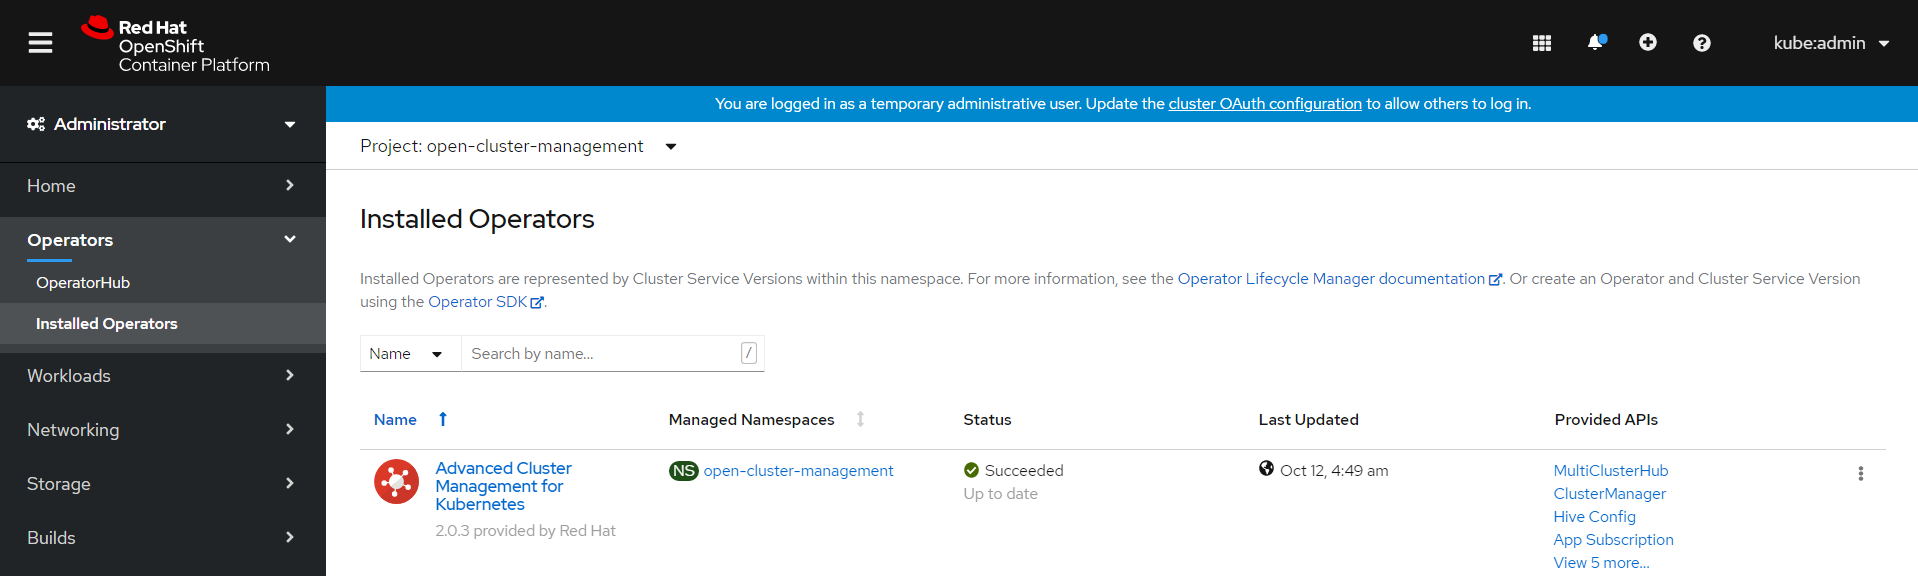
- The Installed Operators page is displayed with the status of the operator.
# Create the MultiClusterHub custom resource
In the OpenShift Container Platform console navigation, select Installed Operators > Advanced Cluster Management for Kubernetes.
Select the MultiClusterHub tab.
Select Create MultiClusterHub.
Update the values, according to your needs.
Tip: You can edit the values in the YAML file by selecting YAML View. Some of the values are only available in the YAML view. The following example shows some sample data in the YAML view:
apiVersion: operator.open-cluster-management.io/v1
kind: MultiClusterHub
metadata:
  namespace: << newly created namespace>>
  name: multiclusterhub
spec:
  imagePullSecret: <secret>
Add the pull secret that you created to the imagePullSecret field on the console. In t he YAML View, confirm that the namespace is your project namespace.
- Select Create to initialize the custom resource. It can take up to 10 minutes for the hub to build and start.
After the hub is created, the status for the operator is Running on the Installed Operators page.
# Access the Advanced Cluster Management console for the hub
- In the OpenShift Container Platform console navigation, select Networking > Routes.
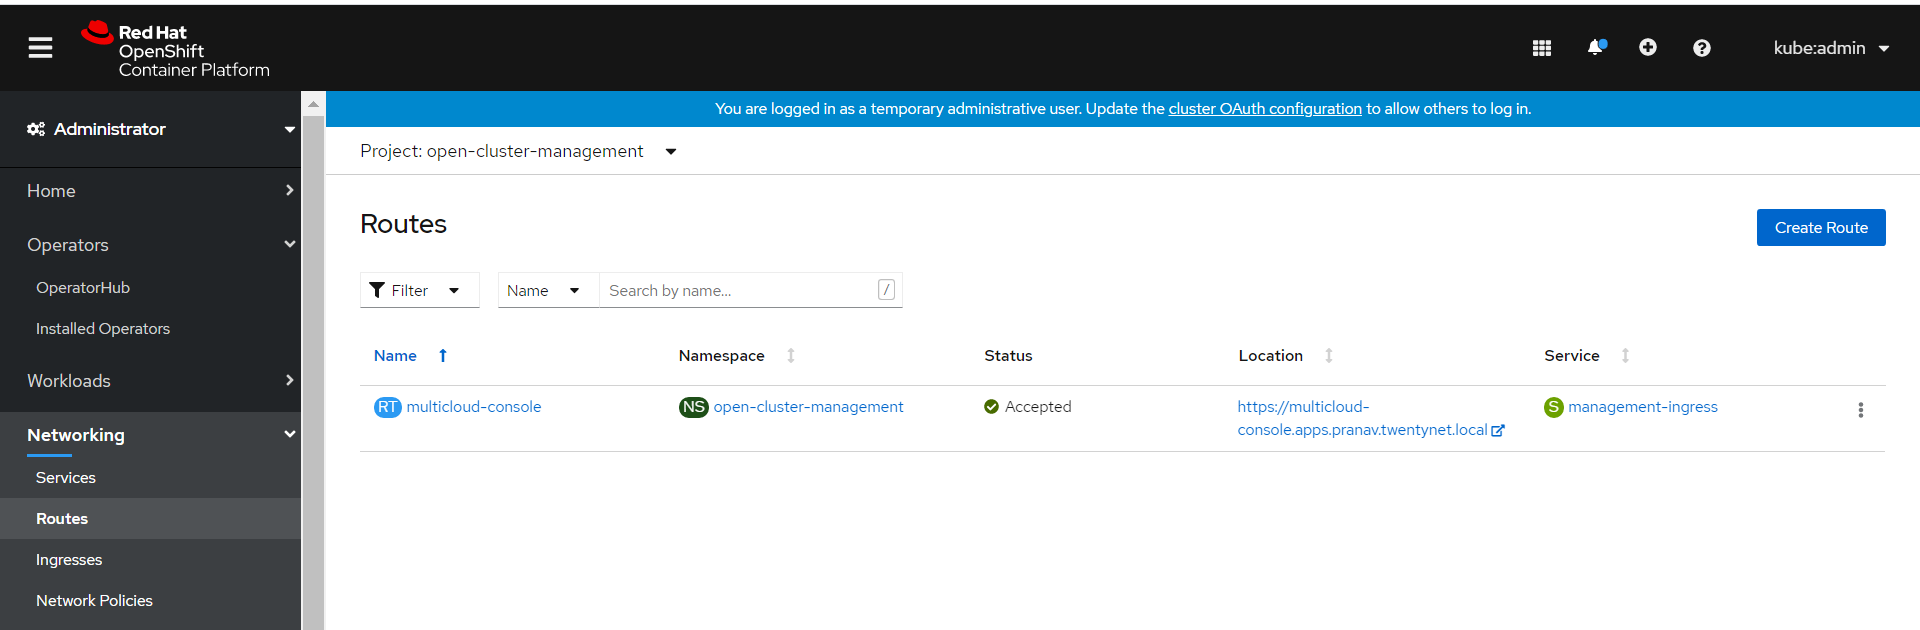
- Click the URL for Advanced Cluster Management console hub in the list and navigate it to access the console for Advanced Cluster Management console hub using your Hub openshift console username and password.
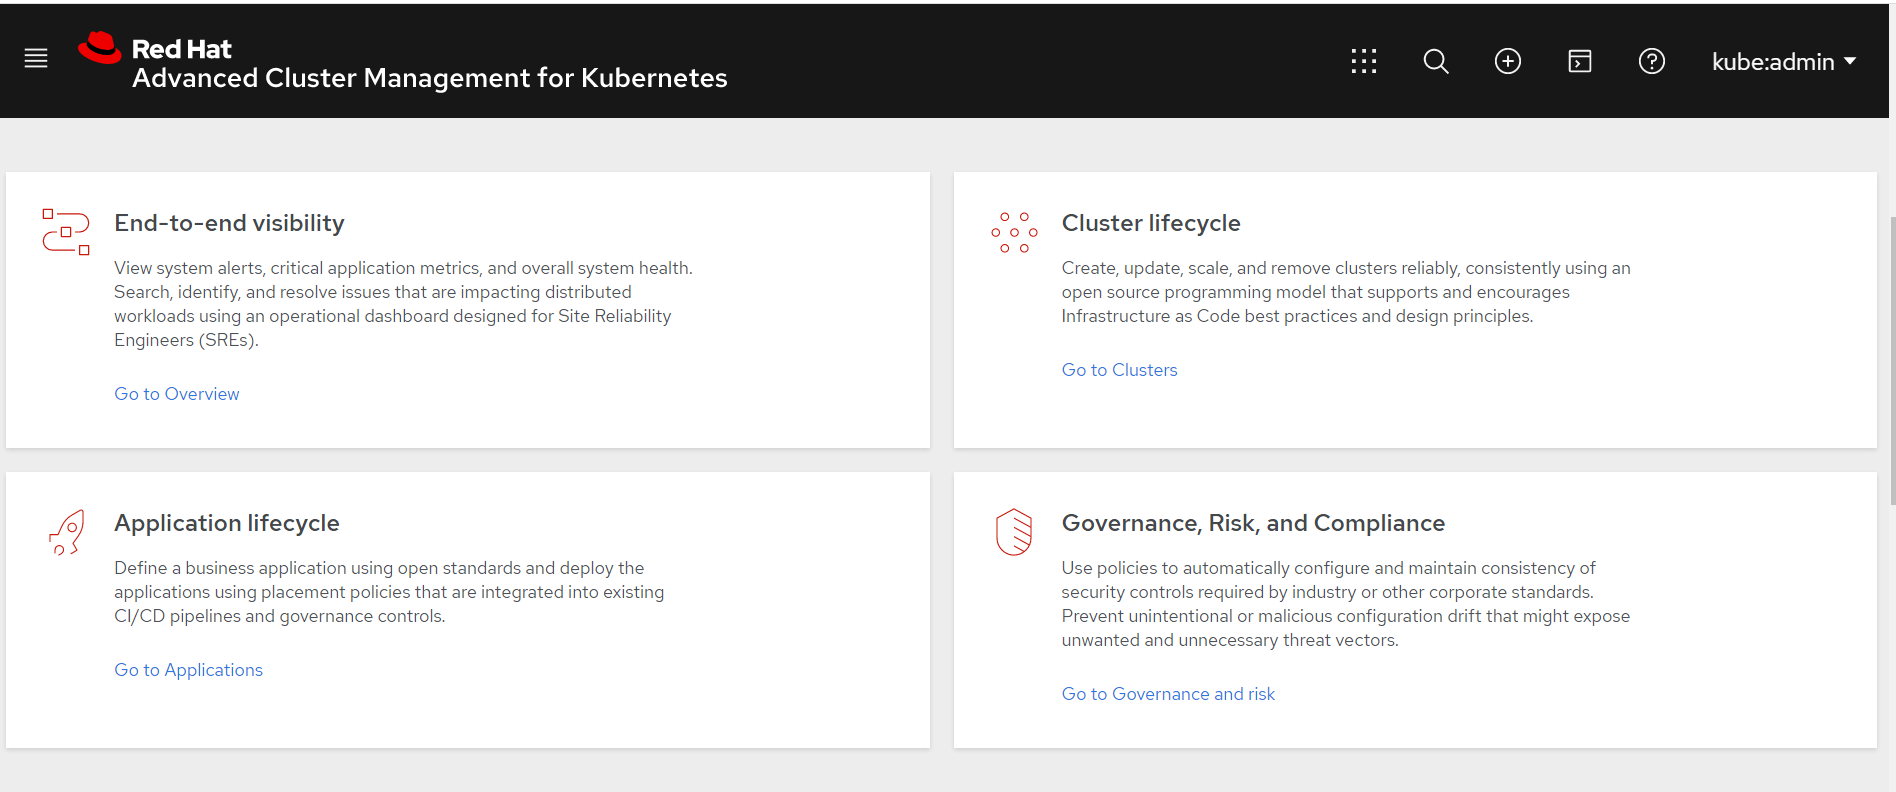
- To create/ import an existing cluster from Advanced Cluster Management console, click on Go to Cluster.
# Import an existing Cluster using Advanced Cluster Management console
Navigate to Add cluster, Click Import an existing cluster.
It displays a window as below, there you can provide Cluster name, Cloud (public or on-premise), Environment and labels are optional.
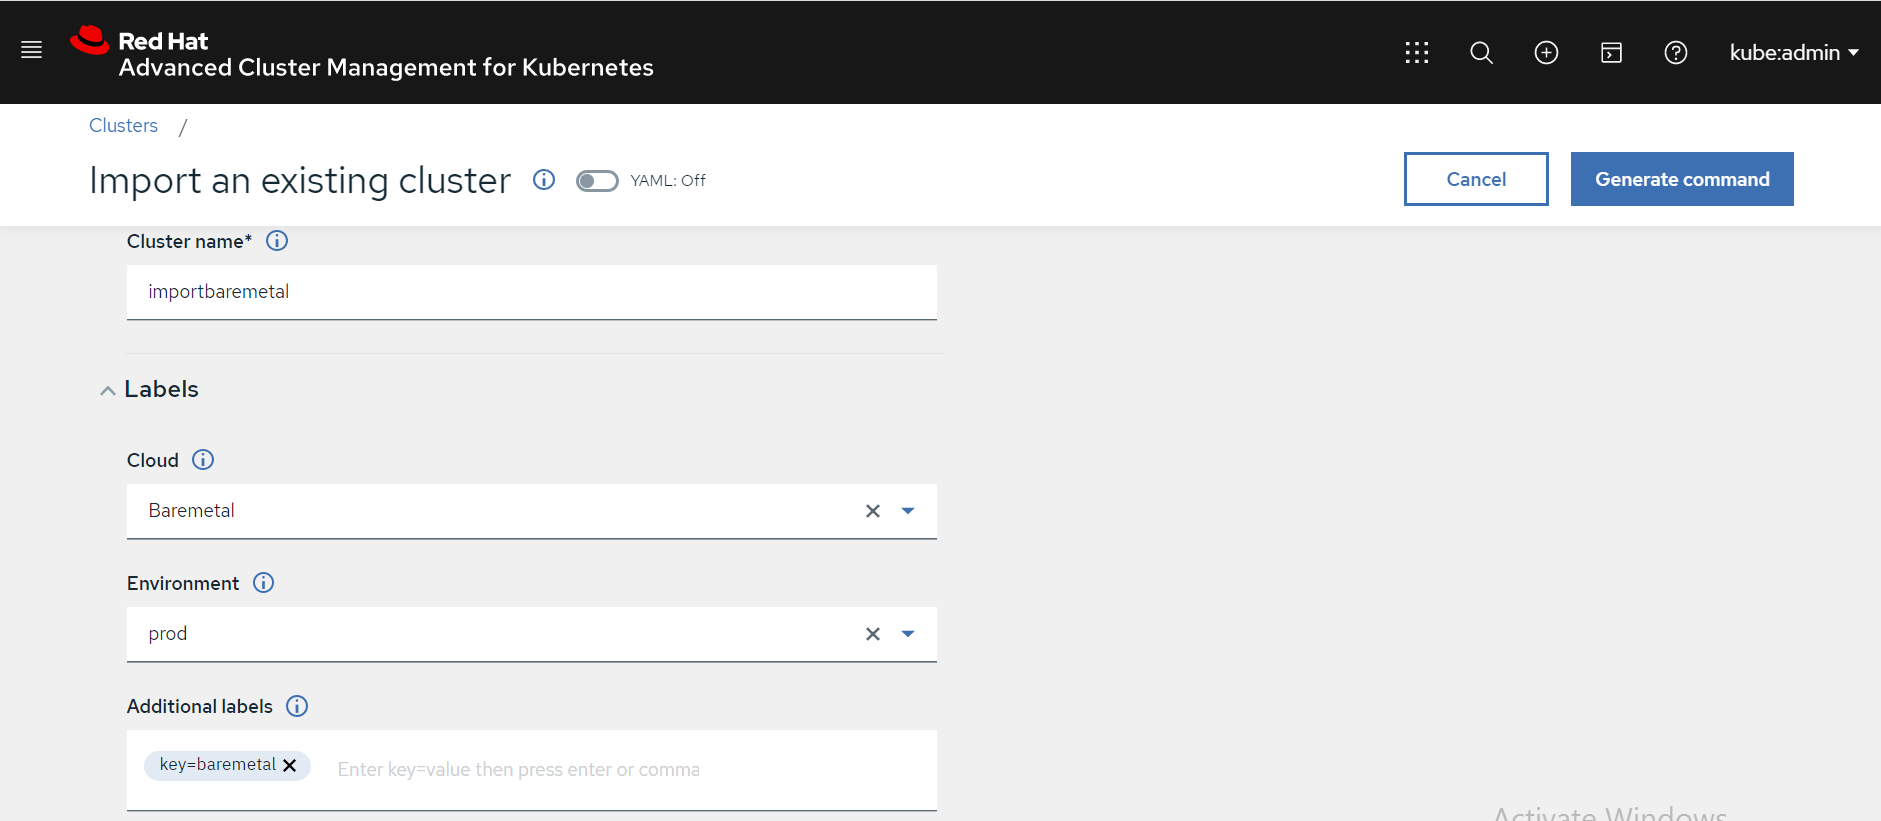
- Once you provide all the details, Click on Generate Command.
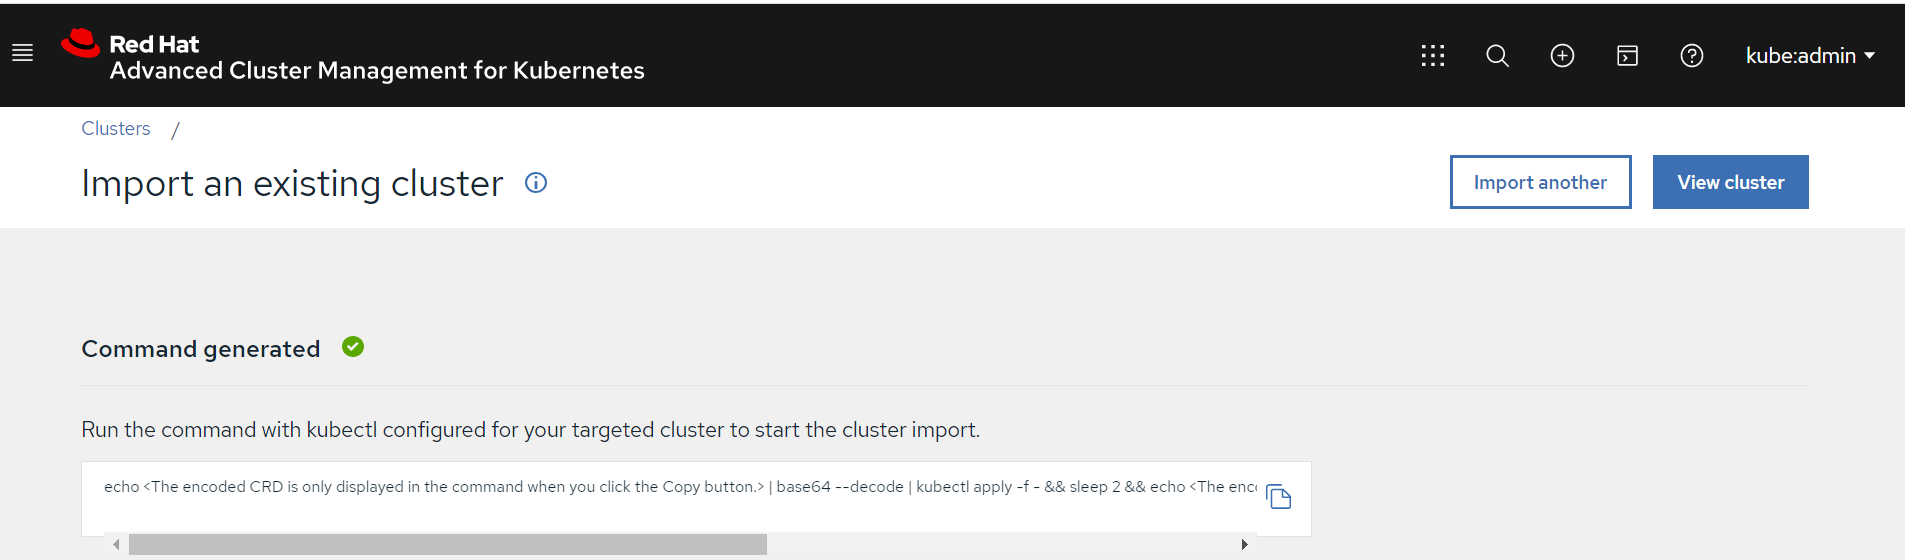
Copy the command generated, Run it on imported cluster.
After running the command, we should navigate to Advanced Cluster Management console there we can find the status of imported cluster details in cluster option as per below snap.
